


14
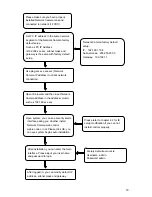
1
Line up the lens to the installation position
and turn it clockwise until it is fixed firmly.
2
Insert lens cable plug into auto lens shutter
connector. (Go to step 3 directly if you are
installing manual lens.)
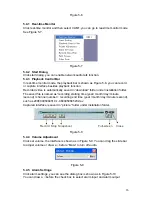
3
You can use slot screwdriver to turn screw to
adjust focus if you can not adjust properly
when it is
∞
.
Figure 3-3
3.3 Remove Lens
1
Unplug lens cable from the auto lens shutter
connector.
2
Turn lens counter clockwise and dismantle it.
Figure 3-4
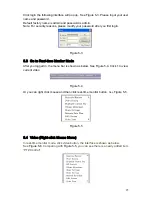
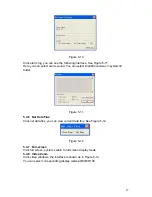
3.4
Real Panel
The network camera real panel is shown as in Figure 3-5.
1. Audio output 2.Audio input 3.SD card port
4. I/O port 5. Status indication light 6.Wireless network indication light
7. Video output 8.Wireless antenna 9.Power port
10. RESET button 11.Brightness adjust button 12.Network port
Figure 3-5


