7.
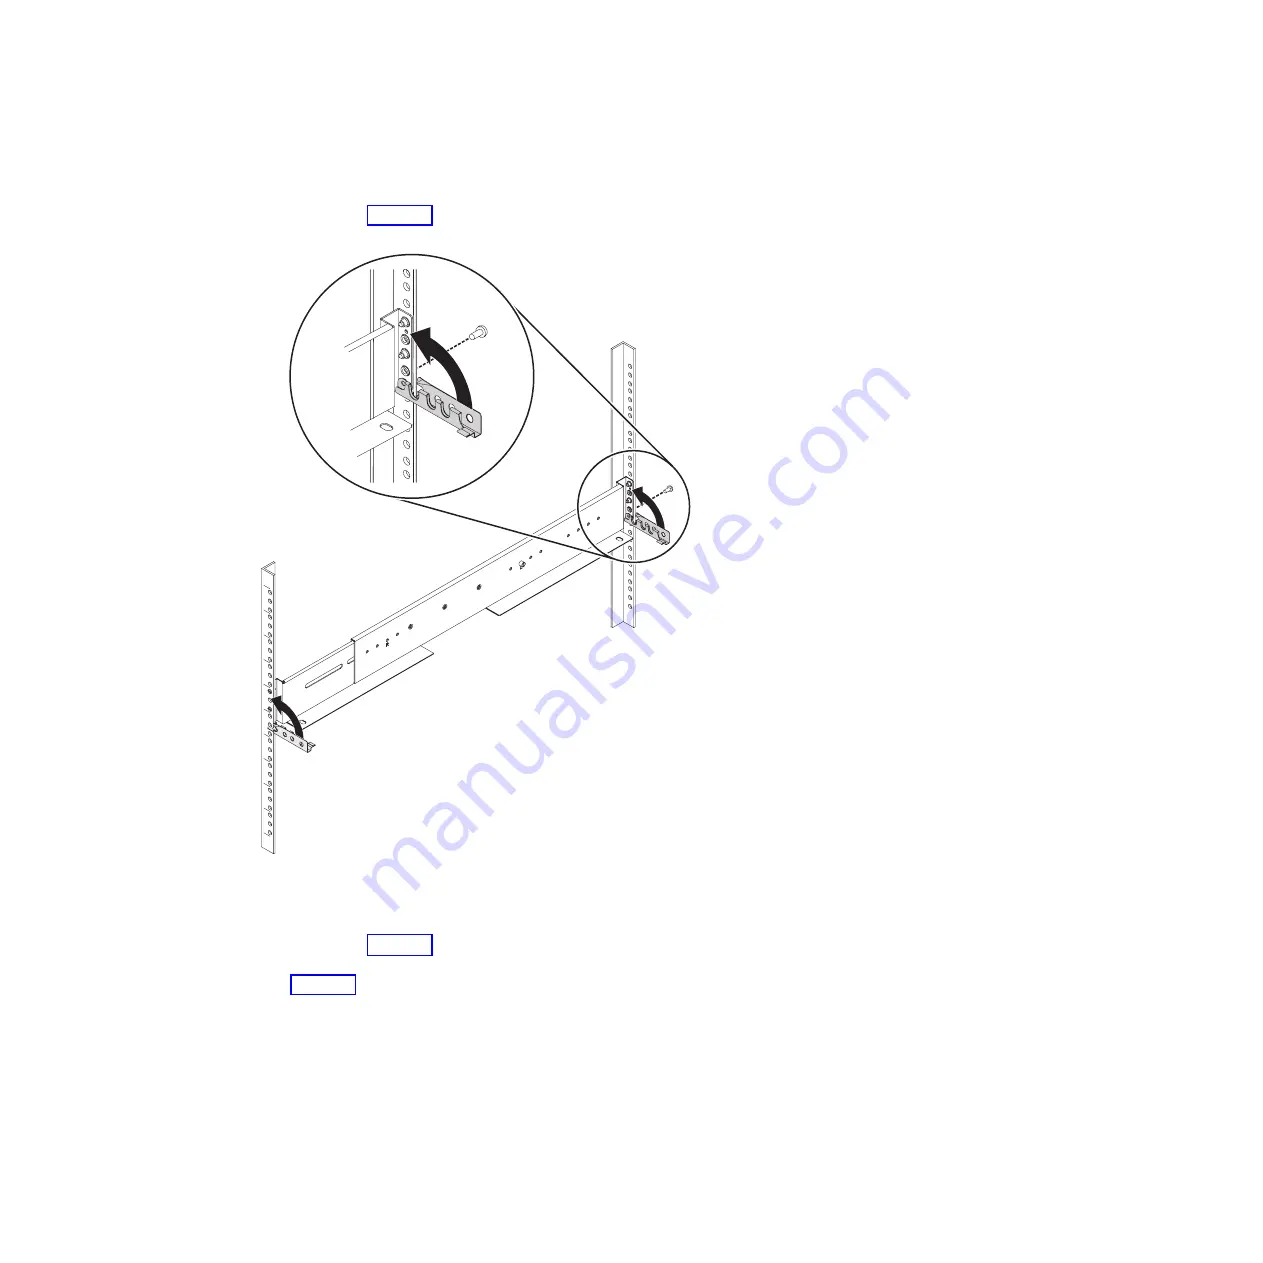
On the rear of the rail, press the two bracket pins into the holes in the rack
flanges and close the rear hinge bracket to secure the rail to the rack cabinet
flange (see Figure 10).
8.
On the front of the rail, press the two bracket pins into the holes in the rack
flanges and close the front hinge bracket to secure the rail to the rack cabinet
flange (see Figure 10).
9.
Secure the rear of the rail to the rear rack flange with an M5 screw (see
Figure 10).
10.
Repeat the steps to secure the opposite rail to the rack cabinet.
11.
Repeat the procedure to install rails for each additional enclosure.
v3500039
Figure 10. Closing hinge brackets and installing rear screw
Chapter 2. Installing the hardware
15
Summary of Contents for Storwize V3700
Page 1: ...IBM Storwize V3700 Quick Installation Guide GC27 4219 01...
Page 4: ...iv Storwize V3700 Quick Installation Guide...
Page 6: ...vi Storwize V3700 Quick Installation Guide...
Page 8: ...viii Storwize V3700 Quick Installation Guide...
Page 14: ...xiv Storwize V3700 Quick Installation Guide...
Page 30: ...10 Storwize V3700 Quick Installation Guide...
Page 64: ...44 Storwize V3700 Quick Installation Guide...
Page 78: ...f2c00790 58 Storwize V3700 Quick Installation Guide...
Page 81: ......
Page 82: ...Part Number 00AR171 Printed in USA GC27 4219 01 1P P N 00AR171...


