Chapter 5. Installing options
47
4. Remove the expansion-slot clip that holds the expansion-slot cover in place by
sliding it upward and off the frame of the server.
5. Remove the expansion-slot cover.
6. See the documentation that comes with your adapter for any cabling instructions.
Attention:
Route adapter cables before you install the adapter.
7. Set any jumpers or switches as described by the adapter manufacturer.
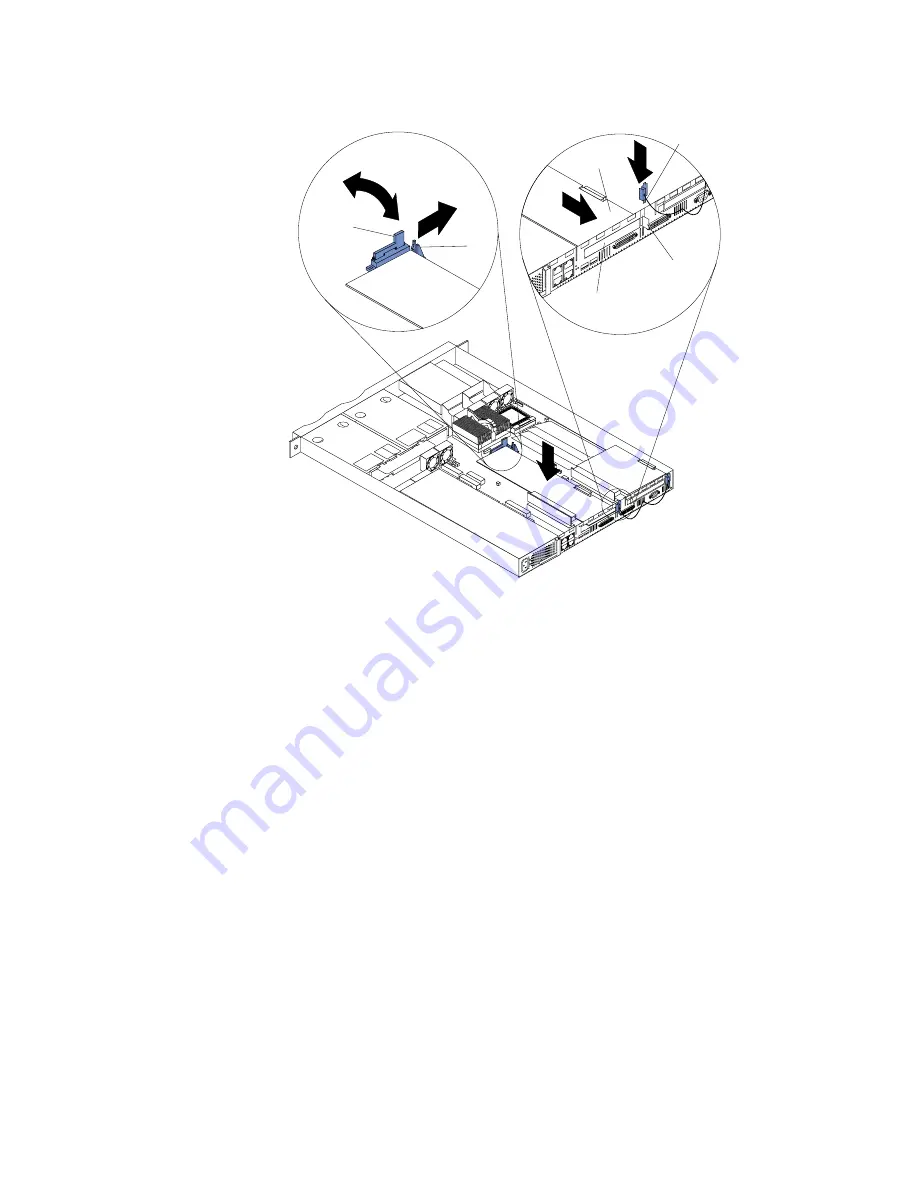
8. Install the adapter:
Note:
When installing an adapter into slot 2, skip steps a and d.
a. Open the adapter-retention latch by pushing the blue tab to release it. Then
push the latch up to the full open position.
b. Carefully grasp the adapter by its top edge or upper corners, and align it with
the connector on the PCI riser card.
c. Press the adapter firmly into the riser-card connector.
Attention:
When you install an adapter, be sure that the adapter is correctly
seated in the riser-card connector before you turn on the server. Improperly
seated adapters might cause damage to the system board, the riser card, or
the adapter.
d. Push down on the blue adapter-retention latch until it clicks into place,
securing the adapter.
e. Replace the expansion-slot clip by sliding it down until it latches into place
and holds the adapter securely.
9. Connect the internal cables to the adapter.
Attention:
Route cables so that they do not block the flow of air from the fans.
Retention
latch
Tab
Adapter
card
Expansion
slot cover
Expansion
slot clip
Expansion
slot
Summary of Contents for eServer xSeries 135
Page 1: ...User s Reference xSeries 135...
Page 2: ......
Page 3: ...IBM IBM xSeries 135 User s Reference...
Page 20: ...8 IBM xSeries 135 User s Reference...
Page 143: ......
Page 144: ...IBM Part Number 24P2803 24P28 3...


