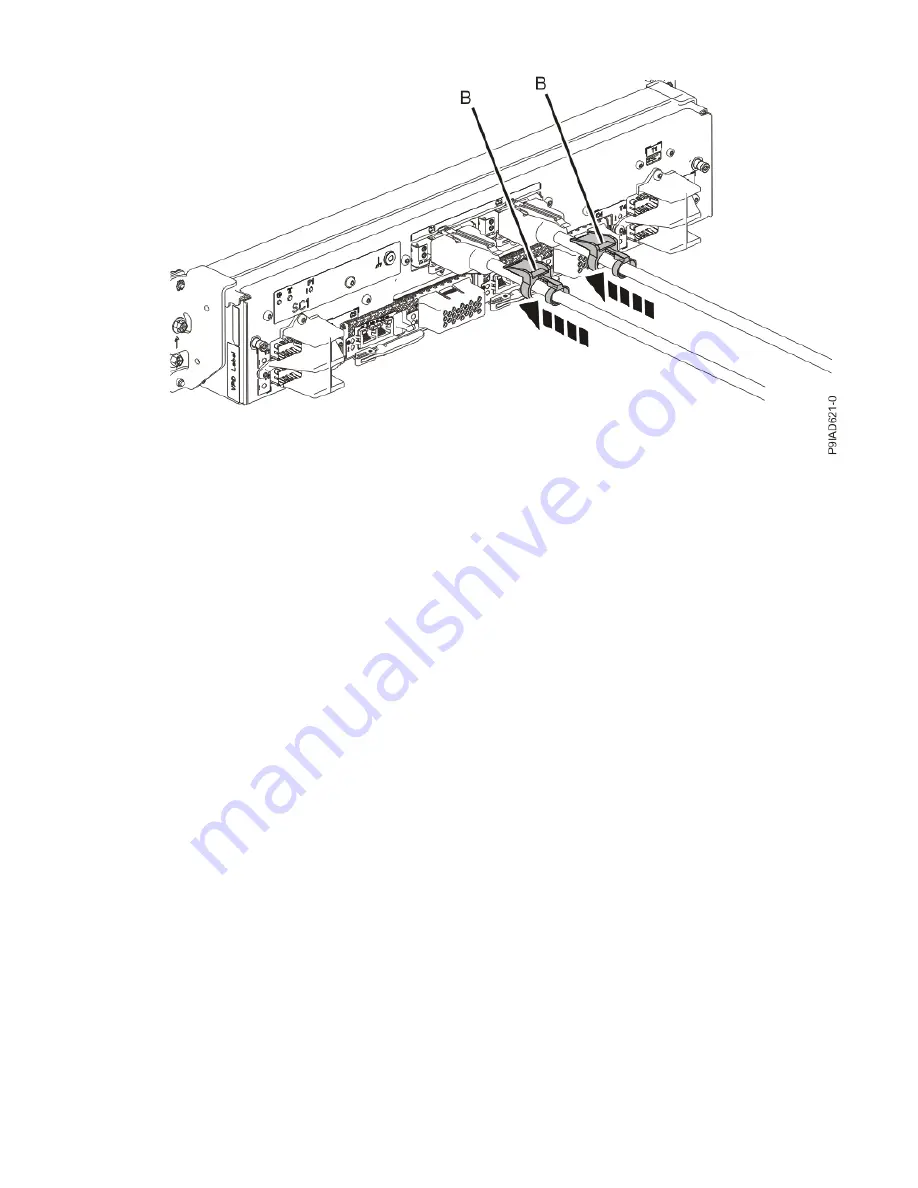
Figure 622. Replacing the UPIC cable into the system control unit
d. Lightly pull on the UPIC cable from both attachment points to ensure it is locked into place. Pull the
cable connector; do not pull on the wire. The cables should be firmly attached to the system.
4. When the service processor comes up to the Flexible Service Processor (FSP) standby state (the
power-on LED on the control panel is flashing slowly), continue to the next step.
5. Access the ASMI and run the Cable Plugging Validation utility to validate all of the cables.
a) If you are already connected to the ASMI, go to the next step. Otherwise, click All Systems then
select system being serviced. Then, click Actions > View All Actions > Launch Advanced
Systems Management (ASM).
b) In the navigation area, expand System Service Aids > Cable Plugging Validation. Then, click
Validate Cables. The system verifies that the expected cables are present.
c) If your configuration includes two or more nodes, expand System Service Aids > Cable Plugging
Validation. Then, click Verify Node Position. Otherwise, if your configuration includes only one
node, continue to the next step.
If the system is cabled correctly, the blue identify LED on each system node will light up, in
sequence, from the top node to the bottom node. If the LEDs do not light up in sequence, the FSP
cables need to be re-installed.
d) Expand System Service Aids > Cable Plugging Validation. Then, select All of the above in the
Display Cable Status section and click Continue. The system validates that the cables are installed
in the correct locations. Expand System Service Aids > Cable Plugging Validation to display a
table with the results. Ensure that the plugging status is OK for each cable in the displayed table. If
the status is OK, no further action is required. If the status is not OK, review the error logs, correct
the problems, and repeat steps b, c and d as needed until the status is OK for all cables.
e) Exit the ASMI.
710 Power Systems: Removing and replacing parts in the 9080-M9S system
Summary of Contents for 9080-M9S
Page 1: ...Power Systems Removing and replacing parts in the 9080 M9S system IBM ...
Page 19: ...Figure 11 Identify LEDs for the service processor cables on the system node Cables 13 ...
Page 25: ...Figure 17 Service processor FSP cabling Cables 19 ...
Page 51: ...Figure 37 Identify LEDs for the UPIC cables on the system node Cables 45 ...
Page 70: ...64 Power Systems Removing and replacing parts in the 9080 M9S system ...
Page 82: ...76 Power Systems Removing and replacing parts in the 9080 M9S system ...
Page 86: ...80 Power Systems Removing and replacing parts in the 9080 M9S system ...
Page 92: ...86 Power Systems Removing and replacing parts in the 9080 M9S system ...
Page 137: ...Figure 111 Cabling a Four Node Configuration Memory modules 131 ...
Page 149: ...Figure 121 Service processor FSP cabling Memory modules 143 ...
Page 157: ...Figure 130 Removing the rear power cords L003 or or Memory modules 151 ...
Page 203: ...Figure 170 Removing the rear power cords L003 or or Memory modules 197 ...
Page 250: ... L003 or or or or 244 Power Systems Removing and replacing parts in the 9080 M9S system ...
Page 275: ...Figure 231 Cabling a Four Node Configuration Memory VRMs 269 ...
Page 287: ...Figure 241 Service processor FSP cabling Memory VRMs 281 ...
Page 294: ...288 Power Systems Removing and replacing parts in the 9080 M9S system ...
Page 298: ... L003 or or or or 292 Power Systems Removing and replacing parts in the 9080 M9S system ...
Page 323: ...Figure 271 Cabling a Four Node Configuration Miscellaneous VRMs 317 ...
Page 335: ...Figure 281 Service processor FSP cabling Miscellaneous VRMs 329 ...
Page 369: ...Figure 311 Cabling a Four Node Configuration Miscellaneous VRMs 363 ...
Page 381: ...Figure 321 Service processor FSP cabling Miscellaneous VRMs 375 ...
Page 388: ...382 Power Systems Removing and replacing parts in the 9080 M9S system ...
Page 404: ...398 Power Systems Removing and replacing parts in the 9080 M9S system ...
Page 434: ...428 Power Systems Removing and replacing parts in the 9080 M9S system ...
Page 504: ...498 Power Systems Removing and replacing parts in the 9080 M9S system ...
Page 510: ...504 Power Systems Removing and replacing parts in the 9080 M9S system ...
Page 524: ...518 Power Systems Removing and replacing parts in the 9080 M9S system ...
Page 528: ... L003 or or or or 522 Power Systems Removing and replacing parts in the 9080 M9S system ...
Page 553: ...Figure 475 Cabling a Four Node Configuration Processor VRM 547 ...
Page 565: ...Figure 485 Service processor FSP cabling Processor VRM 559 ...
Page 572: ...566 Power Systems Removing and replacing parts in the 9080 M9S system ...
Page 592: ...586 Power Systems Removing and replacing parts in the 9080 M9S system ...
Page 634: ...628 Power Systems Removing and replacing parts in the 9080 M9S system ...
Page 637: ...Figure 552 Removing the rear power cords L003 or or System processor module 631 ...
Page 681: ...Figure 592 Cabling a Four Node Configuration System processor module 675 ...
Page 693: ...Figure 602 Service processor FSP cabling System processor module 687 ...
Page 729: ......
Page 730: ...IBM ...


