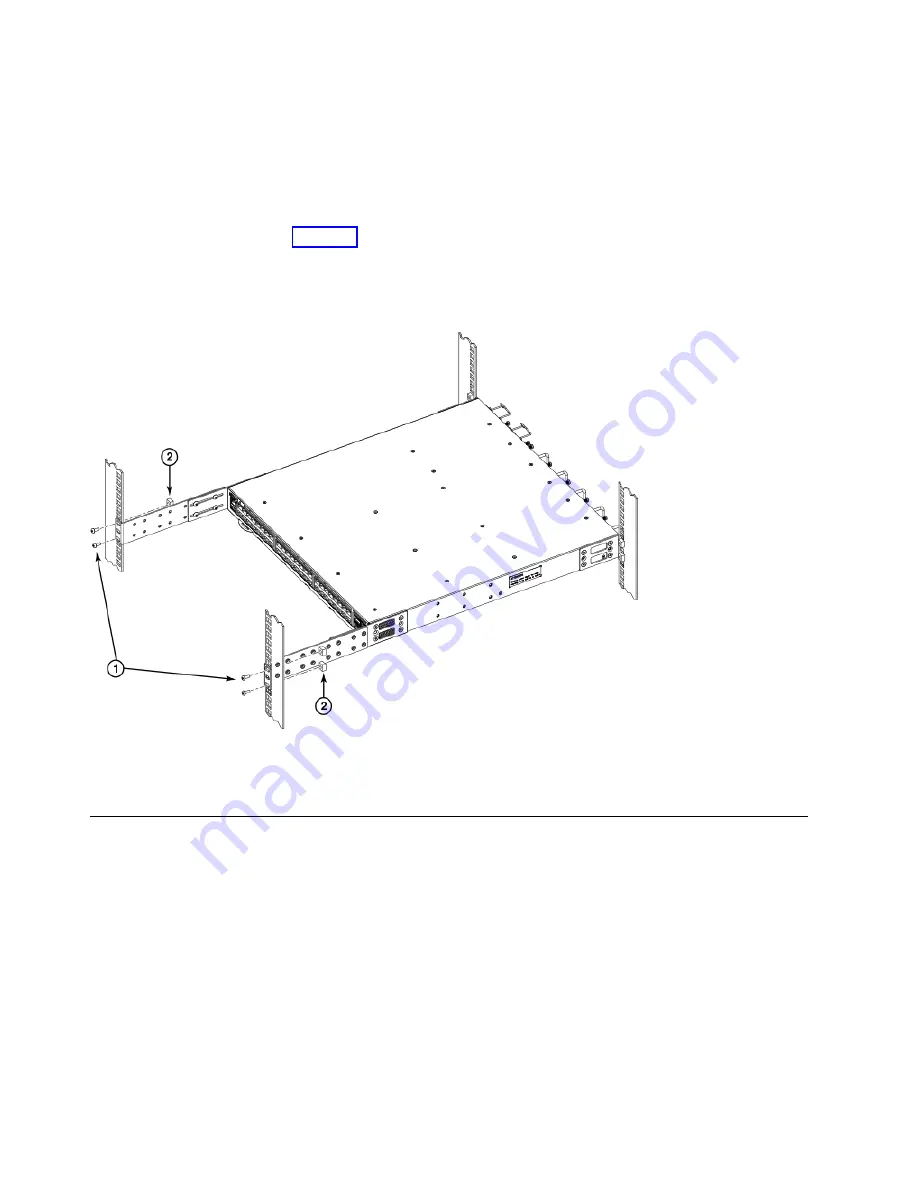
Attaching the rear brackets to the front rack posts
About this task
Complete the following steps to attach the rear brackets to the front rack posts.
Procedure
1.
Attach the right rear bracket to the right front rack post using two 10-32 x 5/8-in. screws and two
retainer nuts, as shown in Figure 14. Use the upper and lower holes in the bracket.
2.
Attach the left rear bracket to the left front rack post using two 10-32 x 5/8-in. screws and two
retainer nuts. Use the upper and lower holes in the bracket.
3.
Tighten all the 10-32 x 5/8-in. screws to a torque of 25 in-lb (29 cm-kg).
1. Screws, 10-32 x 5/8-in., panhead Phillips
2. Retainer nuts, 10-32
Installing the Universal Two-Post Rack Kit
Use the following instructions to install a Brocade 1U or 2U device in a two-post telecommunications
(Telco) rack using the Universal Two-Post Rack Kit.
There are two ways you can mount the device in a two-post rack:
v
With the port side flush with the front posts
v
With the posts mounted to the mid-section of the device
Observe the following when mounting this device:
v
Two people are required to install the device in a rack. One person should hold the device, while the
other while the other screws in the front and rear brackets.
v
Before mounting your device, review any specific installation and facility requirements in this
Hardware Installation Guide.
Figure 14. Attaching the rear brackets to the front rack posts
26
SAN128B-6 Installation, Service, and User Guide
Summary of Contents for 8960-F96
Page 6: ...vi SAN128B 6 Installation Service and User Guide...
Page 8: ...viii SAN128B 6 Installation Service and User Guide...
Page 84: ...64 SAN128B 6 Installation Service and User Guide...
Page 100: ...80 SAN128B 6 Installation Service and User Guide...
Page 114: ...94 SAN128B 6 Installation Service and User Guide...
Page 115: ......
Page 116: ...IBM Part Number 01JC270 Printed in USA SC27 9251 00 1P P N 01JC270...


