background image

INSTALLATION

9

3.1.5 Camera Installation for ceiling mount and wall mount  

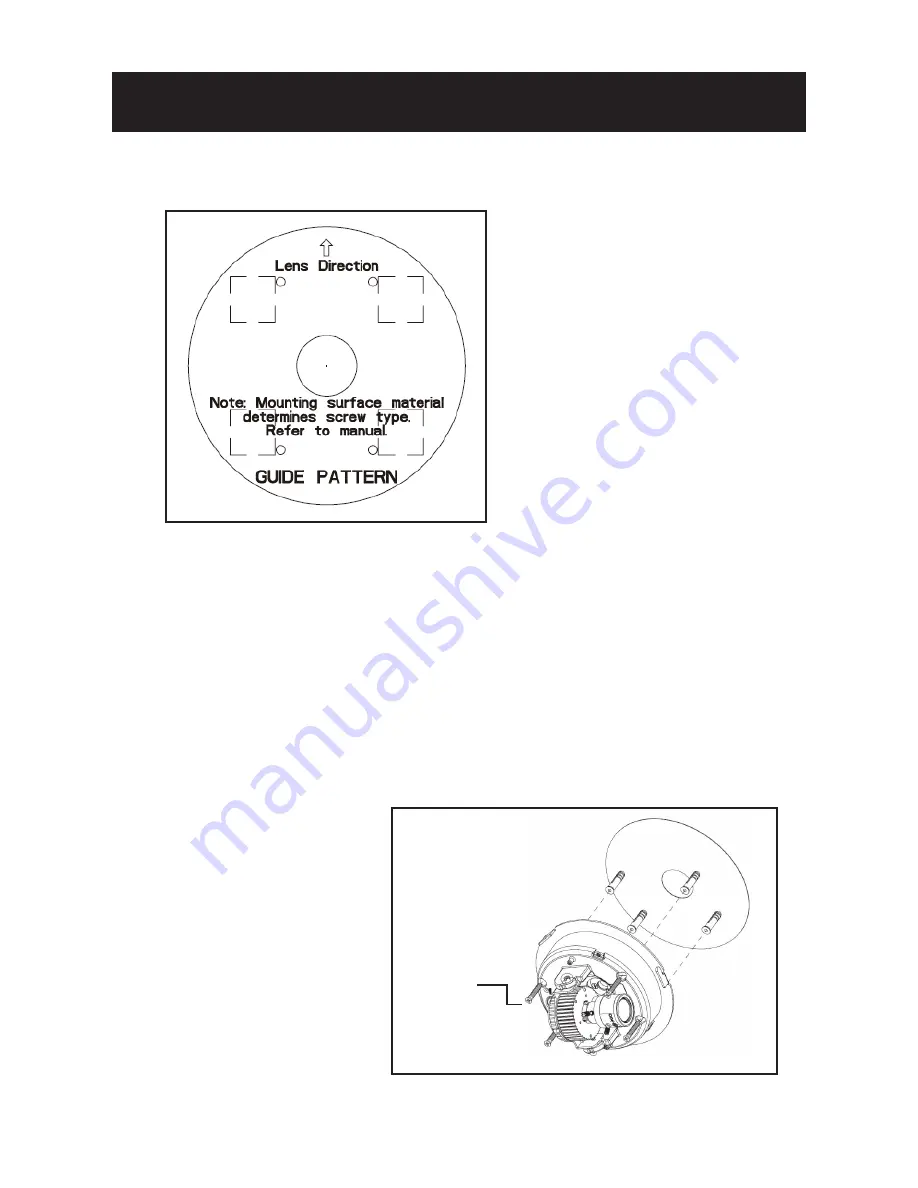
Drill the Mounting Location
1. Place the “Guide Pattern Sticker” on the desired location.
2. Drill 4 mounting holes and 1 cable entry hole.

•  Mark holes’ positions: secure the metal plate to the ceiling using the 

appropriate screws.

•  Use the machine type screws if you are attaching the camera to a pendent 

mount. Use the tapping type screws for all other surfaces.

•  For cement surfaces, insert the “Plastic Anchors” into the holes. For softer 

surfaces, do not use the “Plastic anchors”.

•  Use the Rubber Feet for surface mounting.
•  If using SD card function, insert Micro SD card or Micro SDHC card before 

locking the dome cover.

Tapping 

Type 

Screws

Plastic Anchors

Summary of Contents for Ax52 Series

Page 1: ...ion Manual Before attempting to connect or operate this product please read these instructions carefully and save this manual for future use CONTENTS SAFETY INFORMATION PRODUCT OVERVIEW SPECIFICATION...

Page 2: ...wer consumption requirements of this camera before powering the camera on Incorrect voltage may cause irreparable damage to the video camera and will effectively void the camera warranty Cleaning For...

Page 3: ...ates that ungrounded Hazardous Voltage exists within the unit The voltage level may cause personal electric shock hazards The triangle symbol with exclamation mark indicates that there are important o...

Page 4: ...individuals and objects of interest come with perfect clarity Triple Streaming The AX52 Network Camera is designed to show extreme image detail H 264 MPEG4 MJPEG triple streaming allows you to choose...

Page 5: ...rm signal output port Reserved Green Reserved Yellow 2 0 Camera Parts and Definitions GND ground electricity in electrical circuits Alarm In 1 Red alarm signal input port Alarm In 2 Brown alarm signal...

Page 6: ...0x720 Len Built in Mechanical ICR Filter varifocal lens f 3 9mm F1 2 Mega pixel lens Electric Sync system Internal AES NTSC 1 10000 s to 1 3 75s selectable PAL 1 10000 s to 1 3 125s selectable Audio T...

Page 7: ...al block Environment Operating temperature 10 C 50 C 14 F 122 F Operating humidity 10 90 RH Storage temperature 20 C 60 C 4 F 140 F Network Ethernet 10 100 base T Ethernet connection for LAN WAN Inter...

Page 8: ...d be accessed from your local network 3 1 Package Content Item Description Network Dome Camera x1 Printed Quick Start Guide x1 CD ROM User Manual Annexxus Finder x1 Guide Pattern Sticker x1 RJ45 Femal...

Page 9: ...he ceiling using the appropriate screws Use the machine type screws if you are attaching the camera to a pendent mount Use the tapping type screws for all other surfaces For cement surfaces insert the...

Page 10: ...g Camera Focus 1 Take off the screw a Counter Clockwise Screw a 2 Rotate the dome counter clockwise to unlock and pull free of the housing 3 Remove the inner liner by gently pulling it free of the two...

Page 11: ...the camera to your specification Tilt 5 Adjust the camera to your specification Pan Note When the tilt angle is less than 75 degrees there is no distortion Pan Angle about 355 degrees Tilt Angle 90 de...

Page 12: ...INSTALLATION 12 6 Focusing loosen both screws a and b and turn the lens until ideal picture 7 Reattach the inner liner and dome when you are done adjusting the focus Varifocal Lens Screw a Screw b...

Page 13: ...power supply Make sure you use the correct power supply before connecting to this network camera Use a RJ45 network connector to connect the camera to your computer or hub switch Switch A one Gigabit...

Page 14: ...y from the DHCP server You don t need to change the camera s IP address if your network uses a DHCP server 3 4 2 Connect the Camera to a Personal Computer 1 Connect the network cable to the camera and...

Page 15: ...A login window will appear Enter the default user name and to login 5 Then you should be able to see the camera image screen as follows Default Login Password Firmware Version AP_01 00 60 33_i02 Login...

Page 16: ...ons to install 3 After successfully installing Annexxus Finder double click the Annexxus Finder icon which is displayed in your desktop An Annexxus Finder window will pop out The window will display a...

Page 17: ...orage to save jpg bmp user prefer by right clicking on this link 4 3 Recording LED The recording LED becomes red when the alarm event function is triggered Live view is designed for general users to c...

Page 18: ...INSTALLATION 18 5 Setup Mode Click on setup to configure camera settings...

Page 19: ...n the following section Basic Image is used to change any picture setting on the camera Remember to click Save to keep your settings Camera Name enter a desired network camera name The name will be di...

Page 20: ...hoose a bit rate control Choices include VBR Variable Bit Rate Variable Bit Rate control is for video storage Ex NVR local storage recording Image quality is good but the CPU loading of camera is not...

Page 21: ...deo for Live View Note 2 If MJPEG is selected for both primary streaming and third streaming Live View will display the third streaming codec choices Note 3 Some video player VLC Player etc can be use...

Page 22: ...ttings Advanced settings White Balance Auto select a white balance mode according to external lighting condition for the best color temperature Sensitivity Select sensitivity values from 0 10 White Ba...

Page 23: ...lues from 0 to 100 Sharpness adjust the image sharpness level Selectable values from 0 to 100 Click Communication to view the current network settings including Network and NTP Configure all Network a...

Page 24: ...is not required if it is not used Please contact your Network Administrator for Default Gateway information 5 DNS leave 192 0 0 16 as default setting It is not required if it is not used Please contac...

Page 25: ...New Time section New Time You can set the camera time by Synchronize with Computer Timer and Synchronize with NTP Server Then select a date format type YYYY MM DD MM DD YYYY and DD MM YYYY are choices...

Page 26: ...e camera is restarted without changing any settings Typically used after updating firmware After clicking a pop up will appear asking you to confirm Click Yes Factory Default Resets the camera to fact...

Page 27: ...ewer If you want to delete a user select a user and then press the Delete User button Add Modify User You can add a new user or modify a user s information or authority To add modify a new user enter...

Page 28: ...INSTALLATION 28 5 3 6 Logs It displays all login and alarm records...

Page 29: ...unction or Enable to enable this function Sensibility set sensibility level as Lowest Low Medium High or Highest Or input a value from 0 to 99 in the customized threshold field Higher number gets high...

Page 30: ...i3 INTERNATIONAL INC 1 866 840 0004 www i3international com Canada 780 Birchmount Road Unit 16 Scarborough ON M1K 5H4 U S A 440 Lawrence Bell Drive Suite 16 Williamsville NY 14221...

Reviews: