background image

38

The distance between the throttle grip

and the front brake lever is adjustable
among six positions.

To change the position, push the brake

lever forward and turn the adjuster 

to

the desired position. When changing the
brake lever position, always be sure the
adjuster stops in the proper position ; a
projection of the brake lever holder should
fit into the depression of the adjuster.

The 

is delivered from

the factory with its adjuster set on position
6.

Position 1 provides the widest distance

and position 6 provides narrowest distance.

FRONT BRAKE LEVER

ADJUSTMENT 

~

~

Only for

』₩

Naver attempt to change the front brake
lever position while riding, or you may
lose control.

WARNING

The 

’s carburetor is

equipped with a choke system to provide
easy starting when the engine is cold.

When starting the cold engine, turn the

choke lever all the way toward you. The
choke works best when the throttle is in the
closed position. 

When the engine is warm, you do not

need to use the choke system for starting.

CARBURETOR CHOKE LEVER

~

~

For

』₩

If you keep running in condition of the
full choke lever, causes fuel excess
exhaustion, high speed not to run, it
may damage the spark plugs.

CAUTION

Summary of Contents for GT125 - PARTS CATALOGUE

Page 1: ...This owner s manual contains important safety information Please read it carefully WARNING...

Page 2: ...t of the motorcycle and should remain with the motorcycle when resold or otherwise transferred to a new owner or operator The manual contains important safety information and instructions which should...

Page 3: ...ily Install the battery to the motorcycle STANDARD CHARGING TIME 1 0 A for 10 hours 0 8 A for 10 hours BATTERY INITIAL CHARGING Do not use the battery without the battery initial charging Otherwise th...

Page 4: ...3 FUEL SYSTEM EI Electric fuel Injection System Carburetor N O T E...

Page 5: ...for choosing Hyosung motorcycle We at Hyosung have designed tested and produced this motorcycle using the most modern technology available to provide you with much happy enjoyable safe riding Motorcy...

Page 6: ...important that you avoid operating the engine in a manner which could expose the engine parts to excessive heat Please refer to the BREAK IN section for specific break in recommendations WARNING CAUT...

Page 7: ...s any sale or delivery to the ultimate purchaser or while it is in use and b The use of the vehicle after such device or element of design has been removed or rendered inoperative by any person MAINTE...

Page 8: ...ons with the rider Specific items to check are listed in the INSPECTION BEFORE RIDING section on page 58 of this owner s manual Make sure the rider wears a helmet eye protection and protective clothin...

Page 9: ...The always come on the head lamp meter lamp tail lamp and license plate lamp when the ignition switch was turned to the ON position The s lamps are come on by operating the light switch turning the ig...

Page 10: ...pparel in terms of riding your motorcycle WARNING Review thoroughly the instructions in the INSPECTION BEFORE RIDING section of this manual Do not forget to perform an entire safety inspection to ensu...

Page 11: ...all instructions in this owner s manual regarding accessories and modifications Use genuine Hyosung accessories or equivalent designed and tested for your motorcycle Consult your Hyosung dealer if yo...

Page 12: ...ected by a lifting condition or by an instability in cross winds or when being passed or passing large vehicles Improperly mounted or poorly designed accessories can result in an unsafe riding conditi...

Page 13: ...H IGNITION KEY INSTRUMENT PANEL LEFT HANDLE SWITCHES RIGHT HANDLE SWITCHES FRONT BRAKE LEVER ADJUSTMENT Only for CARBURETOR CHOKE LEVER For REAR BRAKE PEDAL GEARSHIFT LEVER FOOTRESTS SIDE STAND SEAT L...

Page 14: ...ER CAP OF CABLES EXHAUST PIPE AND MUFFLER FRONT AND REAR SUSPENSIONS REAR VIEW MIRROR REFLECTOR BATTERY AIR CLEANER SPARK PLUG IDLING SPEED ADJUSTMENT THROTTLE CABLE PLAY ADJUSTMENT CLUTCH CABLE DRIVE...

Page 15: ...ed on the left upside of the crankcase assembly Please write down the numbers in the box provided below for your future reference The frame and or engine serial numbers are used to register the motorc...

Page 16: ...ing of 91 or higher Unleaded gasoline can extend spark plug life and exhaust components life FUEL AND OIL RECOMMENDATION When refueling always shut the engine off and turn the ignition key to the OFF...

Page 17: ...16 NAMES OF EACH PARTS Clutch lever Left handle switches Instrument panel Front brake fluid reservoir Right handle switches Front brake lever Throttle grip Ignition switch Fuel tank cap...

Page 18: ...tion coil Front Ignition coil Rear Spark plug Rear Rear seat lock Fuses Brake Tail lamp Rear turn signal lamp License plate lamp 21 Passenger footrests 22 Footrests 23 Gearshift lever 24 Side stand 25...

Page 19: ...eat 30 ECU Engine Control Unit Battery Air cleaner Front brake fluid reservoir Front brake lamp switch Engine oil filter Engine oil filler cap Engine oil level lens Rear brake pedal Rear brake lamp sw...

Page 20: ...19 NAMES OF EACH PARTS Clutch lever Left handle switches Instrument panel Front brake fluid reservoir Right handle switches Front brake lever Throttle grip Ignition switch Fuel tank cap...

Page 21: ...tion coil Front Ignition coil Rear Spark plug Rear Rear seat lock Fuses Brake Tail lamp Rear turn signal lamp License plate lamp 21 Passenger footrests 22 Footrests 23 Gearshift lever 24 Side stand 25...

Page 22: ...t 30 ECU Engine Control Unit 30 Battery Air cleaner Front brake fluid reservoir Front brake lamp switch Engine oil filter Engine oil filler cap Engine oil level lens Rear brake pedal Rear brake lamp s...

Page 23: ...AMES OF EACH PARTS Clutch lever Left handle switches Carburetor choke lever Instrument panel Front brake fluid reservoir Right handle switches Front brake lever Throttle grip Ignition switch Fuel tank...

Page 24: ...ont Ignition coil Rear Spark plug Rear Rear seat lock Fuse Brake Tail lamp Rear turn signal lamp 21 License plate lamp 22 Passenger footrests 23 Footrests 24 Gearshift lever 25 Side stand 26 Engine oi...

Page 25: ...Front seat 30 Battery Fuel pump Air cleaner Front brake fluid reservoir Front brake lamp switch Engine oil filter Engine oil filler cap Engine oil level lens Rear brake pedal Rear brake lamp switch Re...

Page 26: ...AMES OF EACH PARTS Clutch lever Left handle switches Carburetor choke lever Instrument panel Front brake fluid reservoir Right handle switches Front brake lever Throttle grip Ignition switch Fuel tank...

Page 27: ...ont Throttle stop screw Ignition coil Rear Spark plug Rear Rear seat lock Fuse Brake Tail lamp 21 Rear turn signal lamp 22 License plate lamp 23 Passenger footrests 24 Footrests 25 Gearshift lever 26...

Page 28: ...ont seat 30 Battery 30 Fuel pump Air cleaner Front brake fluid reservoir Front brake lamp switch Engine oil filter Engine oil filler cap Engine oil level lens Rear brake pedal Rear brake lamp switch R...

Page 29: ...ignition key from the OFF position come up again and turn it to the LOCK position Remove the ignition key STEERING LOCK STEERING LOCK KEY Turning the ignition switch to the OFF or LOCK position while...

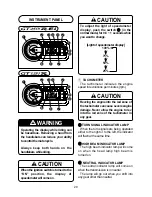
Page 30: ...gear other than neutral INSTRUMENT PANEL When the ignition switch is turned to the ON position the display of speedometer will come on CAUTION To adjust the light of speedometer display push the switc...

Page 31: ...register two kinds of distance at the same time For instance trip meter A can register the trip distance and trip meter can register the distance between fuel stops To change the display push the swit...

Page 32: ...tch in the clock reset mode for 0 6 1 seconds 4 Push the switch in the clock reset mode for 2 seconds to resume in the normal mode To reset the trip meter to zero push the switch in the normal mode fo...

Page 33: ...rip meter to zero while the display indicates trip meter or 0 6 1 seconds Odometer Trip meter Trip meter Odometer In the clock reset mode Push it for 0 6 1 seconds Adjustment Increase the hour of cloc...

Page 34: ...g the motorcycle with the LCD display panel indicating a problem with electric fuel injection system and with FI check lamp lit can damage the engine and transmission Whenever the FI check lamp is lit...

Page 35: ...ueezing the lever disengages the clutch DIMMER SWITCH Change the direction of the head lamp light The head lamp high beam comes on The high beam indicator lamp also comes on The head lamp low beam com...

Page 36: ...signal switch to the OFF position after completing the turn or lane change CAUTION 35 Use the horn switch only in case of need CAUTION RIGHT HANDLE SWITCHES 4 4 1 1 4 4 2 2 Do not operate for the eng...

Page 37: ...brake lamp will come on when the lever is squeezed 4 4 2 2 HAZARD WARNING SWITCH For All four turn signal lamps and indicator lamp will flash simultaneously when the switch is turned on with the igni...

Page 38: ...es on the engine will be started badly and the spark plugs get wetted CAUTION Take off the starter switch right after started Do not engage the starting motor for more than five seconds at a time as i...

Page 39: ...st distance and position 6 provides narrowest distance FRONT BRAKE LEVER ADJUSTMENT Only for Naver attempt to change the front brake lever position while riding or you may lose control WARNING The s c...

Page 40: ...ever to upshift and depress the lever to downshift Neutral is located between first and 2nd gear When neutral is desired depress or lift the lever halfway between first and 2nd gear It is not possible...

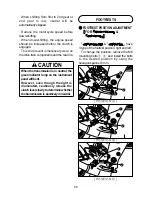
Page 41: ...ootrest position right and left To change the position remove the M8 mounting bolts and install the bolts to the desired position by using the hexagon spanner 6 mm FOOTRESTS POSITION POSITION POSITION...

Page 42: ...If they are not the footrest can come off unexpectedly WARNING are delivered from the factory on position Footrest mounting bolt 2 2 3 5 kgf m 22 35 N m GEARSHIFT LINK ROD FOR S OPTIONAL PARTS When t...

Page 43: ...that the side stand ignition interlock system is working properly before riding WARNING The rear seat lock is located the frame cover under the front side of the rear seat To remove the rear seat ins...

Page 44: ...be placed under the rear seat The tool kit is attached on the back side of the rear seat with a rubber band REAR SHOCK ABSORBER TRUNK N O T E Loading limit of trunk 1 k kg g 2 21 lbs The trunk could...

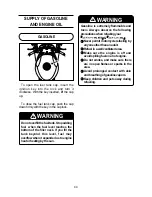
Page 45: ...overflow when it expands due to engine heat or heating by the sun WARNING SUPPLY OF GASOLINE AND ENGINE OIL Gasoline is extremely flammable and toxic Always observe the following precautions when refu...

Page 46: ...the most important maintenances to be performed ENGINE OIL Fuel and Engine oil use certainly to recommend at the front part CAUTION N O T E Engine oil expands and oil level increases when the engine...

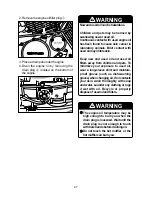
Page 47: ...ufficient Be careful not to pour the engine oil excessively CAUTION In case of the engine oil pouring excessively the engine output being made insufficient Be careful not to pour the engine oil excess...

Page 48: ...and used oil can be hazardous Children and pets may be harmed by swallowing new or used oil Continuous contact with used engine oil has been found to cause skin cancer in laboratory animals Brief con...

Page 49: ...FILTER INSTALLATION HYOSUNG 16510H05240 OUTSIDE LUSTER MATERIAL INSERTED DIRECTION Insert the oil filter so that surface of the oil filter hole turn toward the engine CAUTION When install the engine...

Page 50: ...engine oil pouring excessively the engine output being made insufficient Be careful not to pour engine oil CAUTION Failure to use the correct oil can damage your motorcycle Engine damage may occur if...

Page 51: ...top switch is in the position 5 Moving the side stand to the fully upper position 6 Squeeze the clutch lever RIDING TIPS STARTING THE ENGINE Before attempting to start the engine make sure The are equ...

Page 52: ...age 88 CAUTION If push the starter switch when FI check lamp comes on the engine will be started badly and the spark plugs get wetted If FI check lamp does not come on when the ignition switch is set...

Page 53: ...brake pedal 3 Squeeze the clutch lever and push the electric starter switch 4 Immediately after the engine starts return the choke lever halfway 5 When the engine is sufficiently warmed up move the c...

Page 54: ...ty to control the motorcycle Always keep both hands on the handlebars and both feet on the footrests of your motorcycle during operation WARNING Sudden side winds which can occur when being passed by...

Page 55: ...ually when you accelerate WARNING Do not operate for the ignition switch is in the OFF or LOCK position or the engine stop switch is in the position while driving at one s pleasure WARNING The transmi...

Page 56: ...WARNING Hard braking on wet loose rough or other slippery surfaces can cause wheel skid and loss of control Brake lightly and with care on slippery or irregular surfaces WARNING Hard braking while tur...

Page 57: ...osung The following guidelines explain proper break in procedures Less than 3 4 throttle Less than 1 2 throttle Upto1 600km 1 000miles Initial 800 km 500 miles MAXIMUM THROTTLE OPENING RECOMMENDATIONS...

Page 58: ...ll of the engine components will have worn in and all of the other parts will have seated in All adjustments will be restored all fasteners will be tightened and the dirty engine oil and engine oil fi...

Page 59: ...tire pressure as described in the INSPECTION AND MAINTENANCE section WARNING Operating these motorcycles with improper modifications can be hazardous Improper installation of accessories or modificat...

Page 60: ...e cable Smooth operation and positive return of the throttle grip to the closed position Correct lever play Smooth and progressive action Proper operation Fluid level in the reservoir to be above LOWE...

Page 61: ...endations and schedules in this owner s manual Ask your Hyosung dealer or a qualified mechanic to do the maintenance items marked with a pentagram You may perform the unmarked maintenance items by ref...

Page 62: ...otorcycle and also for safe riding It is a good practice to lubricate the motorcycle after a long rough ride or after it gets wet in the rain or after washing it Major lubrication points are indicated...

Page 63: ...lder Clutch cable Passenger footrests pivot Drive chain Footrests pivot Side stand pivot and spring hook Speedo sensor Brake lever holder Throttle cable Brake pedal pivot O Motor oil Grease G means th...

Page 64: ...il filter Idle speed Throttle cable Clutch First 1 000 km Every 4 000 km Every 8 000 km Interval Item Clean and lubricate every 1 000 km Inspect Inspect Inspect Inspect Replace every 4 years Inspect I...

Page 65: ...and muffler joint for loosening EXHAUST PIPE AND MUFFLER NO NAME Tool bag 10 12 mm open end spanner Spark plug wrench Combination screw driver Screw driver handle 1 2 3 4 5 Inspect the fuel hose for...

Page 66: ...n the legs Ensure that all components are properly tightened and check the front and rear suspension articulated joints for correct operation Inspect whether the steering stem is well assembled while...

Page 67: ...re Keep the battery away from fires When disconnecting the battery wire be sure to remove the negative battery wire first with the ignition switch OFF position then remove the positive battery wire Wh...

Page 68: ...cleaner 1 Remove the fuel tank 2 Remove the four screws 3 Pull up the air cleaner element AIR CLEANER If the air cleaner element is polluted will occur to starting go out output insuffiency combustio...

Page 69: ...the element snugly and correctly so that no incoming air will bypass it Remember rapid wear of piston rings and cylinder bore is often caused by a defective or poorly fitted element CAUTION When the...

Page 70: ...g out the following operations let the engine and the muffler cool down to ambient temperature in order to avoid burns WARNING 1 Disconnect spark plug caps 2 Remove all the dirt from the base of the s...

Page 71: ...ype Colder type CR7E CR8E CR9E The spark plug must be tightened firmly otherwise the engine may overheat and severe damage may occur Use recommended spark plugs only A spark plug of the wrong rating m...

Page 72: ...p turn the throttle stop screw in or out so that the engine may run at 1 400 1 500 RPM Improper adjustment of the idle speed can be hazardous An idle that is too high can cause the motorcycle to lurch...

Page 73: ...achieving the specified free play When finished tighten the lock nut and check free play again Refit the protection There should be 0 5 1 0 mm 0 02 0 04 in free play in the throttle cable If this is...

Page 74: ...nspecting the chain look for the following Loose pins Damaged rollers Dry or rusted links Missing O ring seals Kinked or binding links Excessive wear Improper chain adjustment If you find something wr...

Page 75: ...a 520HO for 428SO for Use of another chain may lead to premature chain failure CAUTION The drive chain should be inspected every time before riding Excessive chain slack could cause the chain to come...

Page 76: ...Keep flames and smoking materials away from kerosene Keep children and pets away from kerosene If swallowed do induce vomiting Call a physician immediately Dispose of used kerosene properly WARNING Cl...

Page 77: ...uirements LOWER BRAKES Front Brake Failure to properly inspect and maintain your motorcycle brake systems can be hazardous Improper maintenance of the brakes increases your chances of having an accide...

Page 78: ...ting If brake fluid gets into the eyes or in contact with the skin flush thoroughly with plenty of water WARNING These motorcycles use glycol based brake fluid Do not use or mix different types of bra...

Page 79: ...system Brake fluid leakage of the front and rear brake system Leak or damage of the brake hose Operating of the brake lever and pedal Wear of the front and rear brake pads N O T E The recommended brak...

Page 80: ...f you find damage such as cuts or cracks Always use the size and type of tires specified in this owner s manual WARNING FRONT BRAKE LAMP SWITCH The front brake lamp switch is located beneath the front...

Page 81: ...ility and lead to flat tire CAUTION TIRE PRESSURE COLD INFLATION FRONT REAR NORMAL RIDING SOLO RIDING DUAL RIDING 2 50kg 250 kpa 36 0 psi 2 25 kg 225 kpa 32 0 psi 2 00 kg 200 kpa 29 0 psi 2 00 kg 200...

Page 82: ...e standard tire supplied by Hyosung CAUTION REAR AXLE NUT Inspect the rear axle shaft and jointing nut for loosening 81 4 Carefully position a jack or block under engine and raise until the front whee...

Page 83: ...otorcycle on the jack or block vertically 2 Loosen the rear axle BULBS Keep fuel and other flammable substances away from electric components WARNING Before changing a bulb set the ignition switch to...

Page 84: ...the ignition switch was turned to the ON position Check if the brake lamp work well when the front brak lever or rear brake pedal was operated Check if the turn signal lamp work well when the turn sig...

Page 85: ...f a lamp other than rules may cause to excessive at the electric system or to damage the lamp LED Light Emitting Diode The use of a lamp other than rules may cause to occur the vehicle fire and to dam...

Page 86: ...out Overtightening the screw may cause the lens to crack CAUTION 6 To install the head lamp reverse the above sequence 3 Disconnect the head lamp coupler 4 Remove the dust cover and socket spring 5 A...

Page 87: ...ondition are found replace the brake tail lamp assembly LICENSE PLATE LAMP S BULB REPLACEMENT 1 Remove the lamp housing by unscrewing the screw 2 Pull out the socket from the lamp housing 3 Pull out t...

Page 88: ...or 15 A fuse Installing a fuse of incorrect rating may seriously damage the electrical system You should consult your Hyosung dealer or a qualified service mechanic immediately CAUTION The fuse box i...

Page 89: ...uel in container Do not allow any fuel to come in contact with the hot engine or exhaust system Extinguish any smoking materials before performing this check and stay away from any other fire or heat...

Page 90: ...ve procedure with the cleaned spark plug or new one 4 If there is still no spark consult your Hyosung dealer for repairs ENGINE STALLING 1 Check the fuel supply in the fuel tank 2 Check the ignition s...

Page 91: ...ge the fuel pump assembly fuel level gauge accommodated inside the tank Refit the fuel tank cap after draining all fuel WARNING TRANSPORT CLEANING PROCEDURE A thorough cleaning of your motorcycle is a...

Page 92: ...allowing water to flow over the following places Ignition switch Spark plugs Fuel tank cap Electric fuel injection system For Carburetor For Brake master cylinders Oil cooler fins Snorkel air intake f...

Page 93: ...Place the motorcycle on a firm flat surface where it will not fall over Turn the handlebars all the way to the left and lock the steering and remove the ignition key FUEL Fill the fuel tank to the top...

Page 94: ...ETURNING TO SERVICE 1 Clean the entire motorcycle 2 Drain the engine oil and replace the engine oil filter engine oil with a new one 3 Reinstall the battery 4 Adjust the pressure of tires as described...

Page 95: ...94 NOTE means the invisible parts L A B E L 4 4 1 1 4 4 2 2 4 4 3 3 4 4 4 4...

Page 96: ...95...

Page 97: ...96 4 4 1 1 4 4 2 2...

Page 98: ...4 4 3 3 4 4 4 4 97...

Page 99: ...86lbs Type Number of cylinder Bore Stroke Piston displacement Compression ratio Fuel system Starter system V 2 cylinder 57 0 mm 2 24 in 48 8 mm 1 92 in 249 15 2 in3 10 2 1 Electric fuel injection ELEC...

Page 100: ...7 54H 150 70 17 69H Double disk Disk Ignition type Ignition timing Spark plug Battery Fuse Head lamp License plate lamp Tum signal lamp Brake Tail lamp ECU CR8E 12V 10Ah MF 30A 15A 12V W5W 1 12V RY10W...

Page 101: ...5lbs Type Number of cylinder Bore Stroke Piston displacement Compression ratio Fuel system Starter system V 2 cylinder 44 0 mm 1 73 in 41 0 mm 1 61 in 124 7 7 6 in3 11 3 1 Carburetor ELECTRIC STARTER...

Page 102: ...110 70 17 54H 150 70 17 69H Disk Disk Ignition type Ignition timing Spark plug Battery Fuse Head lamp License plate lamp Tum signal lamp Brake Tail lamp CDI CR8E 12V 8Ah MF 15A 12V W5W 1 12V RY10W 4...

Page 103: ...102 MEMO...

Page 104: ...103 MEMO...

Page 105: ...Prepared by 1st Ed MAR 2009 Printed in KOREA...

Page 106: ...Part No 99011HM8110EI MAR 2009 Printed in KOREA 1st Ed...

Reviews: