Getting to Know Your WeatherTRAK ET Plus
6
Getting to Know Your WeatherTRAK ET Plus
7
2.
Upper Line Dial
Turn this dial left or right to select items on a list that appear on
the upper line of the display.
3.
Lower Line Dial
Turn this dial left or right to change the items on the list that you
have selected. These will appear in the second line of the display.
4.
Copy
Use this button to copy information that has been set for one
station to another station.
5.
Function Selector Positions
Run
Set the controller to this position for day-to-day operation. You
will see a display that shows:
•
the time and date,
•
which valves are on (manually or automatic),
•
whether the controller is in Rain Pause or if the rain sensor
is active and,
•
how many days until watering resumes.
Setup
This position lets you adjust the time, date and time zone.
Schedule
Use this position to set the days your irrigation system can
operate.
Program
This position lets you customize your landscape specific
parameters by setting various “user modes.” These user modes
include items such as:
•
Auto,
•
User Program with ET,
•
User Program No ET, and
•
Off.
Copy
This feature allows you to:
•
copy one station’s settings to another station,
•
copy one station’s settings to all other stations, or
•
restore default values.
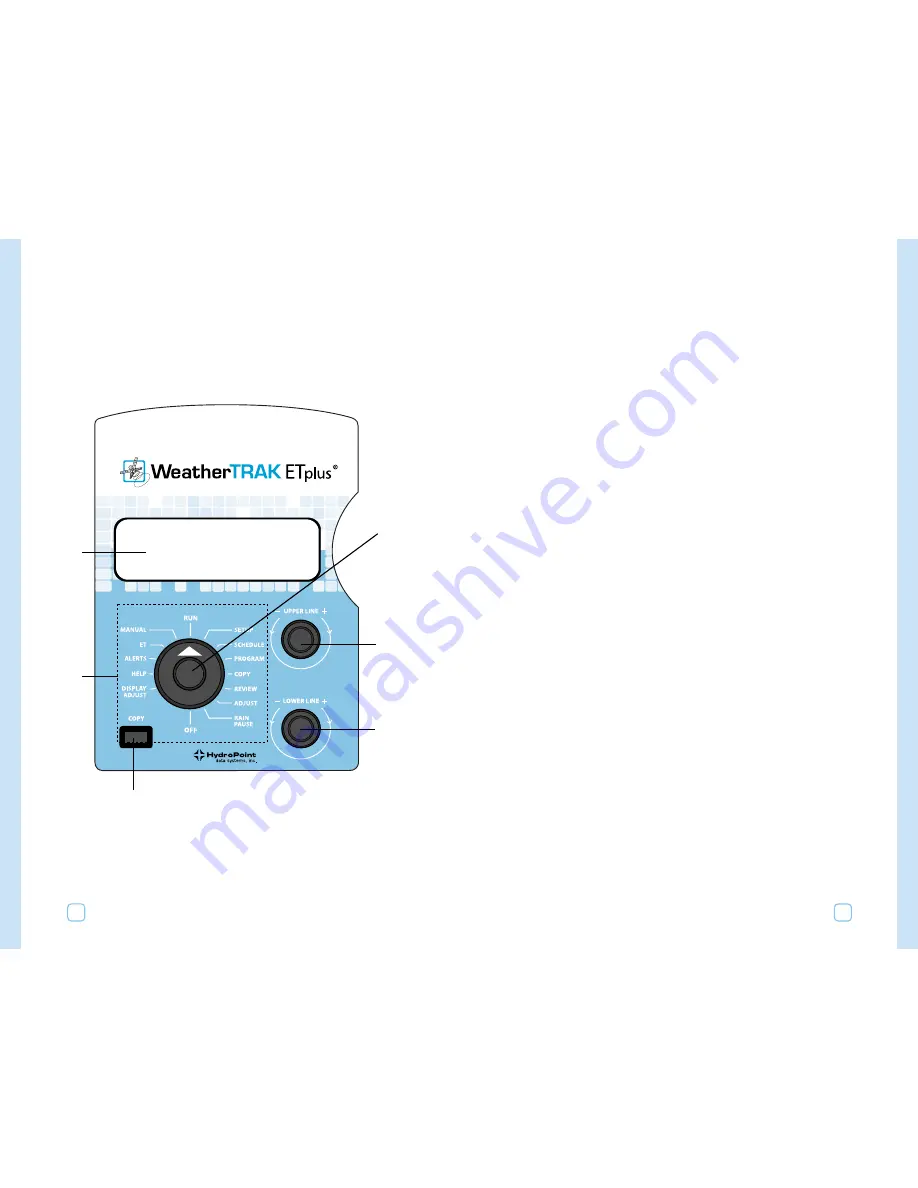
Overview of the Controller
The main controls on the WeatherTRAK ET plus are:
•
a Function Selector (1),
•
an Upper Line Dial (2), and
•
a Lower Line Dial (3).
You will also see a Copy button and an information display.
1.
Function Selector
Turn this dial left or right to select items to view. (For example,
“Run,” “Setup,” “Program,” etc.)
2
3
4
1
5
6


