16
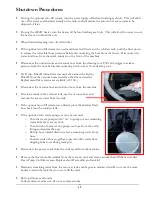
8. Connection of Optional Pump-Out Hose:
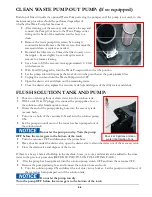
If your machine has the Optional Auto Pump-Out System you may want to connect the Pump-Out Hose.
The pump-out hose is a 50’ section of 3/4” garden hose. (Use of smaller diameter hose may reduce flow.)
•
Remove the cap from the pump-out outlet fitting on the back of the machine.
•
Connect the pump-out hose to the outlet fitting.
•
Place the other end of the hose in a commode or drain connected to the sanitary sewer system.
•
Secure hose end to prevent movement during pumping.
Use defoamer to prevent foam build-up in recovery tank during cleaning and to keep
foam/moisture from entering vacuums.
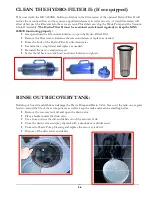
Use Hydro Filter II inline filter to trap and remove debris from the waste water before it
enters the recovery tank. Excess debris in recovery tank may clog Pump-Out filter. Clean
Filter as needed during use.
Do not turn the Waste Pump switch ON unless pump-out hose is connected and has been
routed to a proper drain.
The Waste Pump does not use a float switch and will run as soon as the Waste Pump switch
is turned ON. It is made to run continuously while cleaning, as this type diaphragm pump
can run dry without damage.
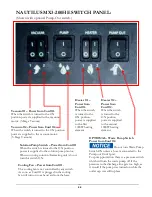
When ready to begin cleaning, turn the Waste Pump switch to the ON position.
If not using the waste pump-out, the pump-out hose does not need to be connected. When the recovery tank
fills during cleaning, the float assembly in the vacuum inlet filter will rise and will automatically shut off the
vacuum air flow to prevent the recovery tank from overfilling and waste water from getting into the vacuums.
When this occurs:
•
Immediately shut off the vacuum switches.
•
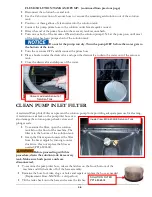
Drain the recovery tank.
o
Turn off the pump switch while draining the tank.
o
Turn pump switch back upon resumption of cleaning.
•
Close the drain valve and turn the vacuum switches back on
when ready to resume cleaning.
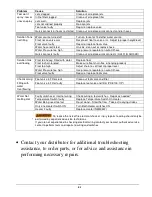
If the pump-out or vacuum shutoff is not working properly, refer to the
trouble shooting guide or contact your distributor for advice or
assistance.
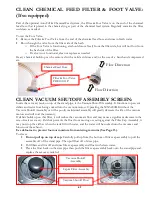
Connect the
Female Garden
Hose Fitting end
of the Pump-out
Hose to the outlet
fitting on the back
of the recovery
tank. Place the
other end of the
pump-out hose in
a sanitary drain.
Float Shutoff Assembly
Draining the Recovery Tank
Pump-out Filter
Summary of Contents for Nautilus MX3-200HE
Page 1: ...1 LMANN09 Revised 02 16 2018 Nautilus MX3 200HE Operating Manual ...
Page 37: ...37 OPTIONAL AUTO FILL FLOAT VALVE ASSEMBLY NM5740 ...
Page 38: ...38 Optional Pump Out Pump AP37 PARTS ASSEMBLY ...
Page 39: ...39 1 2 6 7 8 9 11 3 8 9 12 4 4 3 10 5 15A 8 9 8 9 39 2 ...
Page 43: ...43 48 49 49 47 47 47A 47 47 47A 47A 51 51 37 9 54 64 52 VACUUM MOUNTS CONNECTIONS 9 54 64 ...
Page 48: ...48 96 91 97 9 94 105 OPTIONAL PUMP OUT CONNECTIONS 99 95 93 103 ...
Page 49: ...49 FLOW 81 92 91 99 96 97 105 13 14A 14 95 OPTIONAL PUMP OUT PARTS 1 9 97 103 39 9 ...
Page 50: ...50 HEATER PARTS 111 113 114 112 2 115 2 116 2 42 42A 98 111 ...


