


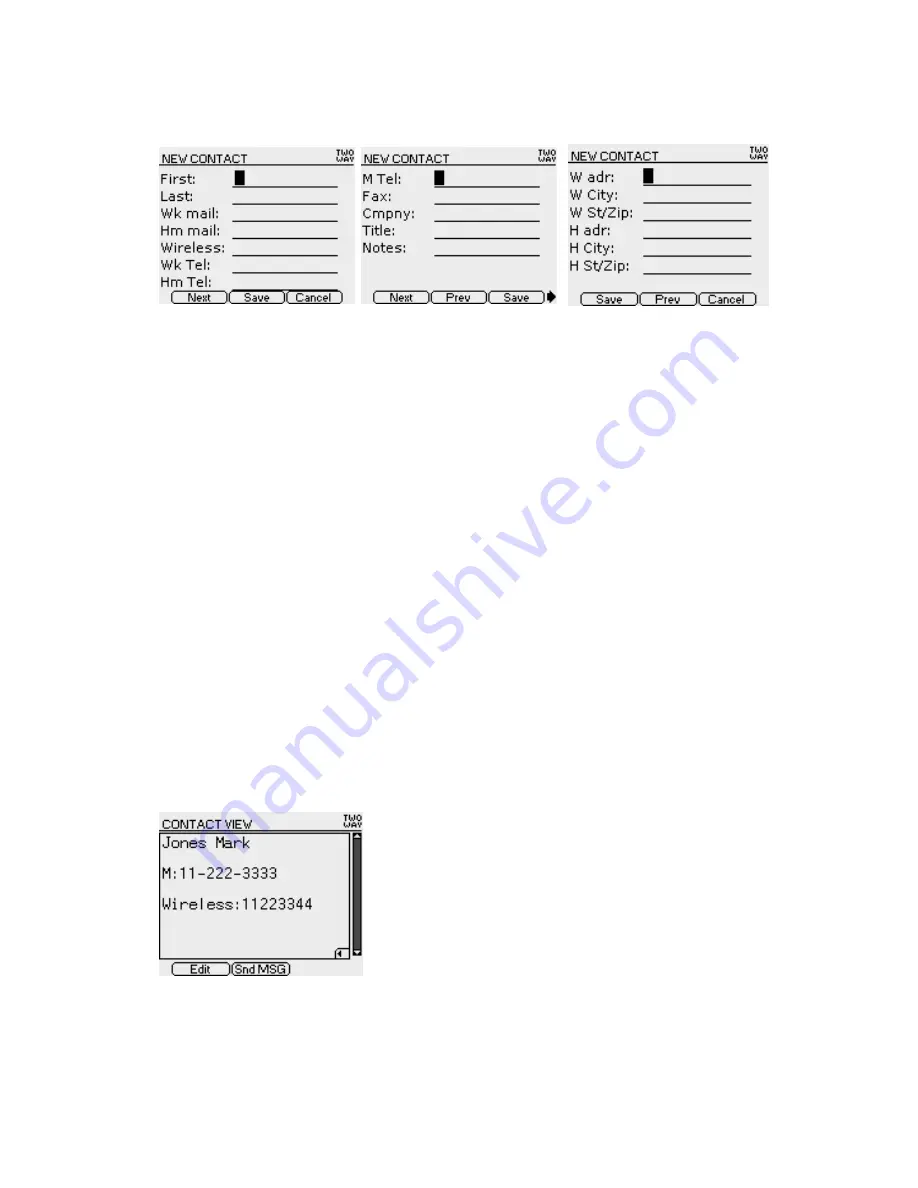
<Figure Contact-2.1> <Figure Contact-2.2> <Figure Contact-2.3>
New Contact is to input new contact contents and if you press Add new menu in the bottom menu, this
screen will displayed.
Use Up/Down arrow or Enter Key to move to the item you want and enter using the character and number
Key. In case of telephone number, you can enter number, #, (, ), x, - only.
If the cursor is placed on the last item, press Next in the bottom menu to move to the screen where you
can enter the address book (Figure Contact-2.2, Figure Contact-2.3).
Use Left/Right arrow or Tab Key to move to the menu you want and use Enter key to execute the selected
menu.
Use ESC Key to exit the lower menu.
Bottom menu description
Next: Move to the next screen where you can enter address book
Prev: Move to the previous screen where you can enter address book
Save: Save the currently entered contents in the address book
Cancel: Ignore the currently entered contents and go back to the Previous screen. (Address book list)
5.3 Contact View (Screen for Viewing Entered Address)
<Figure Contact-3>
Contact view shows full contents of each contact person. If there are lots of contents in View Box, use
Up/Down arrow to scroll the remaining contents in the box. If following list exists in the address, small
Summary of Contents for H-200
Page 1: ...H 200 H200 User s Manual August 27 2003 HuneTec Co Ltd...
Page 7: ......
Page 18: ...User s Manual Draft Version...
Page 21: ...1 Before You Start What s in the Box...
Page 22: ...Product Literature CODEX Data Cable Optional Items Travel Charger Holster H 200...
Page 24: ...Left Side Bottom Power Button Hold Button Rubber cap for serial port and Reset switch...
Page 43: ...Figure Delete 3...
Page 70: ...Figure Alarm 2...
Page 78: ...17 Mymail Figure Mymail 1 Figure Mymail 2 Figure Mymail 3...
Page 81: ...Picture 1 Picture 2 Port Setting Schedule Task Menu Display Menu...


