

Service/maintenance
OPERATION MANUAL
Chapter 7
Unichiller® eo Desktop
V2.2.0en/09.08.21//17.12
78
The inner components of the temperature control unit must be dried out Need to avoid boiling
retardation during future uses (e.g. use of a silicone oil at temperatures above about 100
°C).
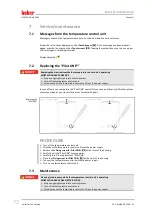
7.4.3.1
Rinsing a thermal fluid circuit with >Sight glass< [23]
PROCEDURE
Drain the temperature control unit.
→
»Draining with >Sight glass< [23]«
Residual thermal fluid can remain in the pump chamber and the internal lines after draining. Leave
the temperature control unit with open valves for a while.
Check the fill level in the collecting container. Follow the instructions for the proper disposal of
thermal fluid.
→
Page 15, section
»Proper disposal of resources and consumables«
Re-fit the knurled screw to the
>Residues drain<
[10] (if present).
Re-fit the knurled screw to the
>Drain<
[8].
Leave your externally open application connected to the temperature control unit. This rinses the
temperature control unit and your application at the same time.
Fill
the system (minimum fill level) with the thermal fluid you wish to use.
→
Page 59, section
»Filling and venting with >Sight glass< [23]«
Vent
the system.
→
»Filling and venting with >Sight glass< [23]«
Adjust the
setpoint
and the cut-out value of the
overtemperature protection
to the thermal
fluid used.
→
and
→
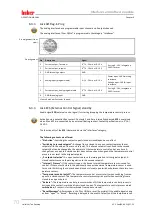
Go to the “Categories Menu”.
Tap on the category “Temperature Control”.
Tap on the category “Start/Stop”.
Tap on the dialog entry “Start temperature control”.
Touch “OK” to confirm your selection. The length of rinsing depends on the level of soiling.
Tap on the category “Start/Stop”.
Tap on the dialog entry “Stop temperature control”.
Touch “OK” to confirm your selection. The temperature control process is stopped.
Drain
the system.
→
»Draining with >Sight glass< [23]«
Repeat the steps “Filling”, “Venting”, “Start/Stop temperature control” and “Draining” until the
drained thermal fluid remains clear.
Leave the
>Drain<
[8] and
>Residues drain<
[10] (if any) open for a while to allow the thermal
fluid to evaporate in the temperature control unit.
Close the
>Drain<
[8] and
>Residues drain<
[10] (if any) once the thermal fluid has evaporated.
Remove the collecting container. Follow the instructions for the proper disposal.
→
Page 15,
section
»Proper disposal of resources and consumables«
Fill the system.
→
»Filling and venting with >Sight glass< [23]«
Vent the system.
→
Page 59, section
»Filling and venting with >Sight glass< [23]«
Restart the temperature control unit in normal mode.
7.4.3.2
Rinsing the thermal fluid circuit with >Level indicator and drain< [38]
PROCEDURE
Drain the temperature control unit.
→
»Draining with >Level indicator and
Residual thermal fluid can remain in the pump chamber and in the internal lines after draining.
Therefore leave the temperature control unit open for a while.
Check the fill level in the collecting container. Follow the instructions for the proper disposal of
thermal fluid.
→
Page 15, section
»Proper disposal of resources and consumables«
Reinsert the hose into the
>Level indicator and drain<
[38].
Leave your externally open application connected to the temperature control unit. This rinses the
temperature control unit and your application at the same time.