THT70n
EN - 41
6. Confirm saving the image with the text annotation by touching the icon “
”.
7. Insert the connector of the earphone set into the “Audio” input of the instrument (see
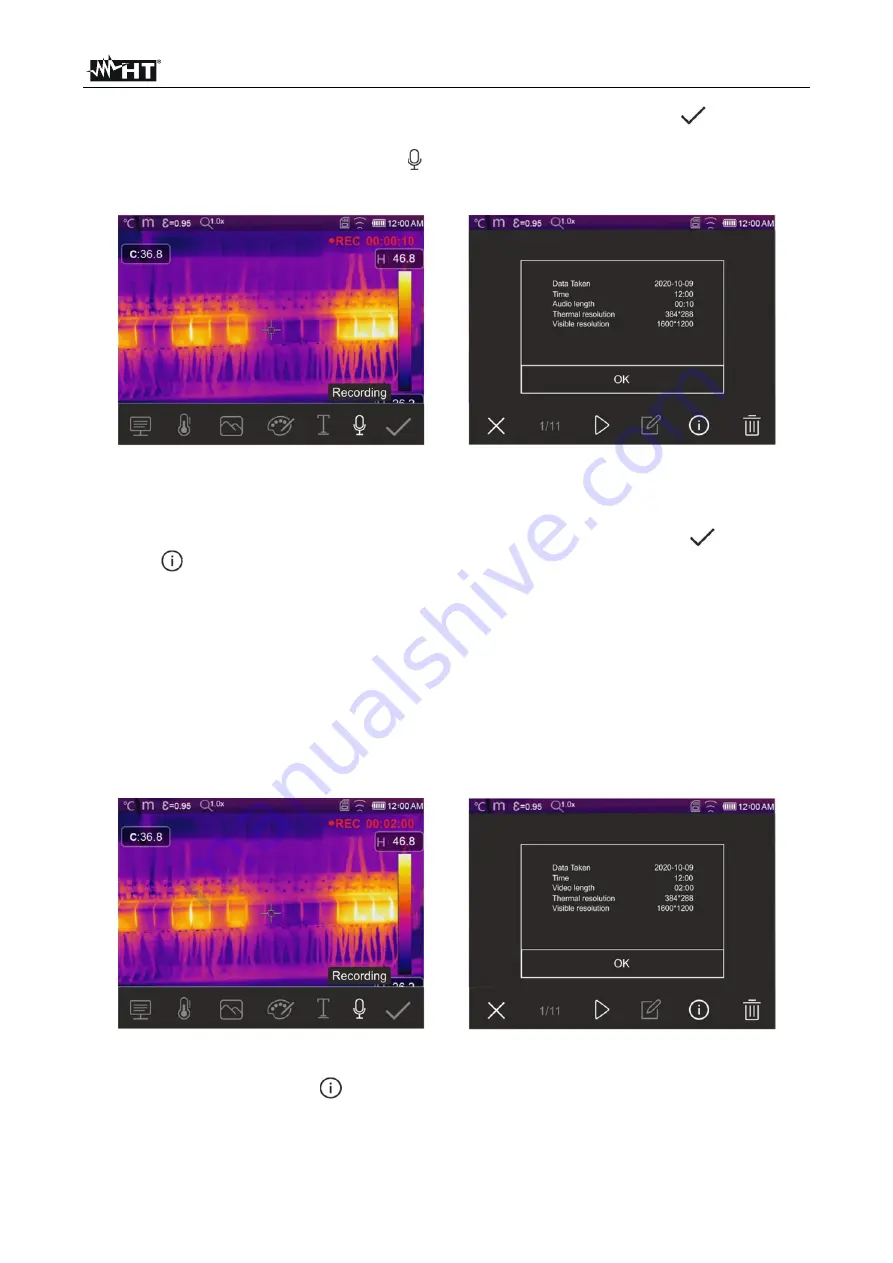
Fig. 3 – part 3) and touch the icon “ ” to add a voice annotation (
max 60s for each
image
) to the image. The following screen appears on the display:
Fig. 49: Adding a voice annotation to the image
8. The indication “REC” and the elapsed time are shown at the top of the display to
indicate that recording is in progress.
9. Confirm saving the image with the voice annotation by touching icon “
”.Touch the
icon “
” to open the section containing the information about the saved vocal
annotation
5.5.2 Recording IR videos
The instrument allows recording and saving also IR videos with or without audio in a MP4
format, as follows:
1. Insert the connector of a headphone and microphone set into the “Audio” input of the
instrument (see Fig. 3 – part 3)
2. Press and hold key T (Trigger) for at least 2s
. The indication and the elapsed time
are shown at the top of the display to indicate that recording is in progress (see Fig. 50
– left side).
Fig. 50: IR video recording
3. Press key
T
(Trigger) to stop and automatically save the recording in the instrument's
memory. Touch the icon “
” to open the section containing the information about the
saved video


