THT70n
EN - 30
4. Touch the icon “
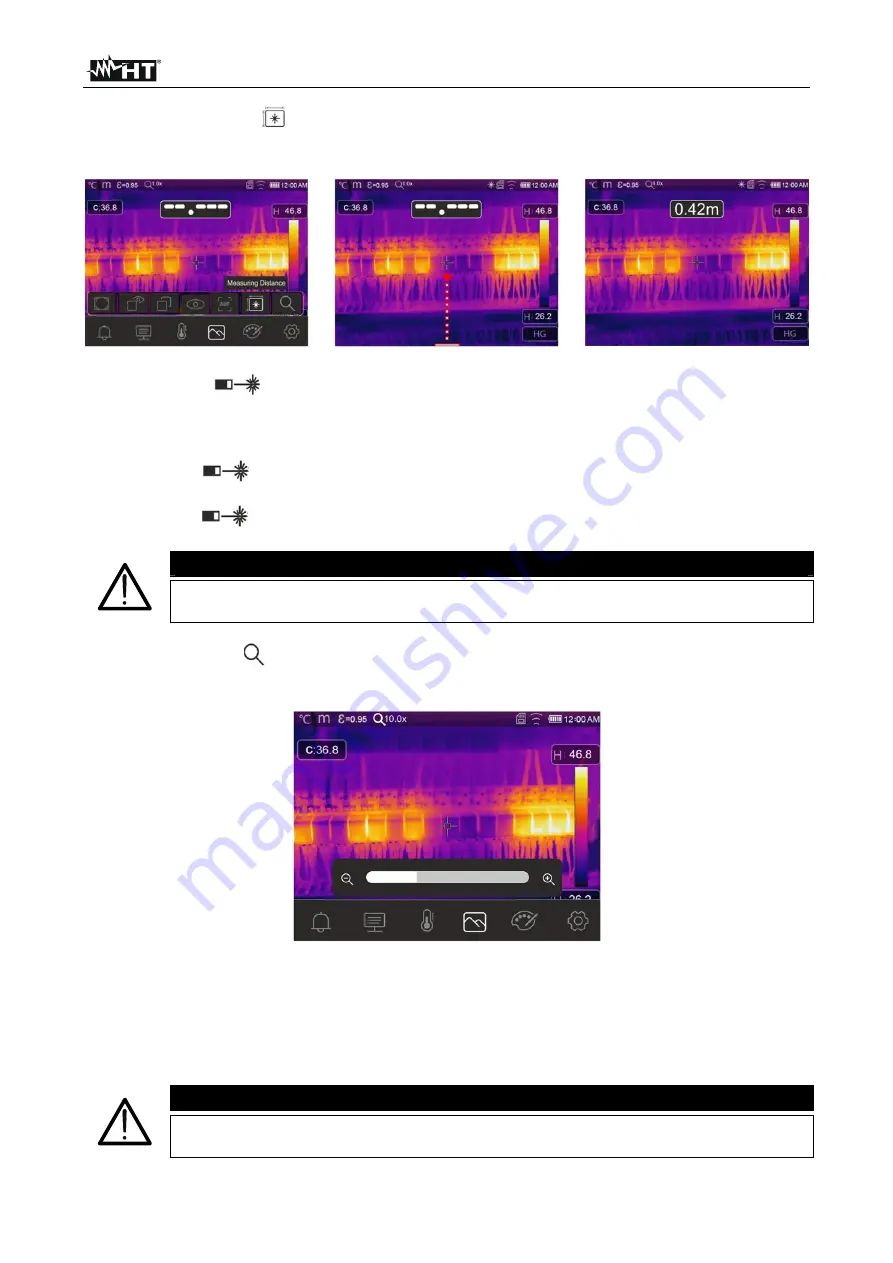
” to activate the measurement of the distance between the
instrument and the framed target. The screen in Fig. 37 – left side appears on the
display.
Fig. 37: Function for measuring distance with laser pointer
5. Press key “
”. The laser pointer is activated on the instrument, the symbol
indicating the presence of the laser (see Fig. 6 – part 6) appears at the top of the
display, and the indication that measurement has started in also shown on the display
(see Fig. 37 – middle)
6. Press key “
” again to perform measurement. The result is shown on the top of the
display in the middle (see Fig. 37 – right side).
7. Press key “
” again to activate the function again.
CAUTION
Distance measurement is NOT possible if the surface of the framed target is
made of a reflecting material (e.g.: glass, Plexiglas, aluminium, etc.).
8. Touch the icon “
” to activate the electronic Zoom of the image. The following screen
appears on the display.
Fig. 38: Activating image zoom
9. Press the arrow keys
or
or touch the scroll bar to increase/decrease the zoom
level in the range
1.0x ÷ 32.0x
by steps of
0.1x
and observe the result on the display.
The zoom value is shown at the top of the display (see Fig. 6 – part 4).
10. Set the value back to 1.0 to go back to the original size of the image.
CAUTION
The image obtained through the zoom CANNOT be saved in the instrument's
memory.


