


1.
Define the host to which the SNMP agent sends traps. Use the following StoreOnce CLI
command (note that snmp v1 and v2 use different parameters to SNMP v3).
snmp add trapsink
2.
Add SNMP users and set any authentication required. Use the following StoreOnce CLI
command:
snmp add user
3.
Send a test event to IRS and other trap recipients to test that SNMP is set up correctly and
that traps are getting to the trapsinks. Use the following StoreOnce CLI command.
snmp send testtrap
NOTE:
Once SNMP has been configured, you can also use the SNMP Test function on
the StoreOnce GUI page to test that SNMP is set up correctly and that traps can successfully
make it to the trapsinks.
NOTE:
You will need to use the StoreOnce System CLI to perform other advanced operations,
such as to add or delete trap hosts, to add or delete users, or to enable or disable SNMP. The
StoreOnce GUI provides a useful option after configuration for viewing trapsink and user details,
and for viewing events.
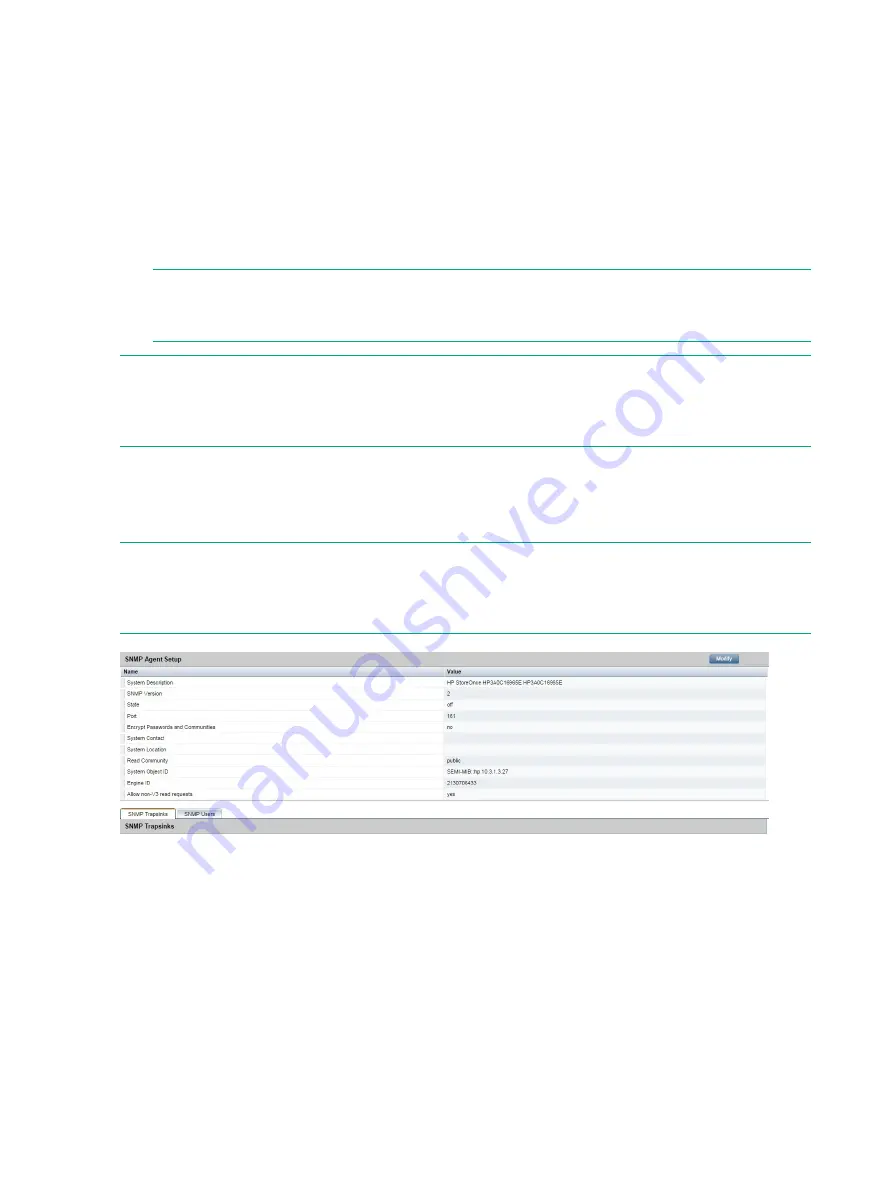
StoreOnce GUI
In the Navigator select
SNMP
from
Device Configuration
.
During initial configuration, use the top half of the page to modify SNMP Agent details.
NOTE:
The bottom half of this page contains
SNMP Trapsinks
and
SNMP Users
. These are
both configured on the StoreOnce CLI and cannot be modified from the StoreOnce GUI. For
more information about the information shown on the
SNMP Trapsinks
and
SNMP Users
tabs,
see the Online Help or the user guide for your product.
Modify the SNMP Agent Setup
1.
In the
SNMP Agent Setup
pane, click
Modify
.
34
Setting up SNMP (Simple Network Management Protocol)