


Upgrading or Replacing the DCA
155
SSL1016 Tape Autoloader Reference Guide
Installing a DCA
To install a DCA:
1. Put on ground wrist strap and connect to appropriate ground.
2. Grasp the DCA by the handle with one hand and support it underneath with
the other hand.
Caution:
Avoid touching the exposed PCBA on the bottom of the DCA.
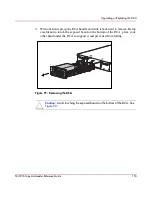
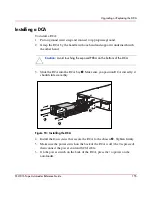
3. Slide the DCA into the DCA bay
1
. Make sure you position DCA correctly; it
should slide smoothly.
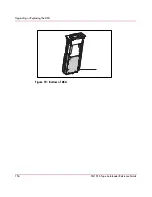
Figure 93: Installing the DCA
4. Install the four screws that secure the DCA to the chassis
2
. Tighten firmly.
5. Make sure the power switch on the back of the DCA is off (the 0 is pressed),
then connect the power cord and SCSI cable.
6. On the power switch on the back of the DCA, press the | to power on the
autoloader.
1
2
2
Summary of Contents for StorageWorks SSL1016
Page 8: ...Contents 8 SSL1016 Tape Autoloader Reference Guide ...
Page 14: ...About this Guide 14 SSL1016 Tape Autoloader Reference Guide ...
Page 22: ...Overview 22 SSL1016 Tape Autoloader Reference Guide ...
Page 60: ...Installation and Configuration 60 SSL1016 Tape Autoloader Reference Guide ...
Page 118: ...Autoloader Operation 118 SSL1016 Tape Autoloader Reference Guide ...
Page 126: ...Tape Drive Cleaning 126 SSL1016 Tape Autoloader Reference Guide ...
Page 143: ...Regulatory Compliance Notices 143 SSL1016 Tape Autoloader Reference Guide Japanese Notice ...
Page 144: ...Regulatory Compliance Notices 144 SSL1016 Tape Autoloader Reference Guide ...
Page 156: ...Upgrading or Replacing the DCA 156 SSL1016 Tape Autoloader Reference Guide ...
Page 160: ...Index 160 SSL1016 Tape Autoloader Reference Guide ...


