


Removal and replacement procedures 39
Optical disc drive
The server has an Optical Disc Drive option-kit. You can choose to install an optional ODD. The
following SATA ODD models are supported:
•
DVD drive
•
DVD-RW drive
Instruction to install the Optical Disc Drive
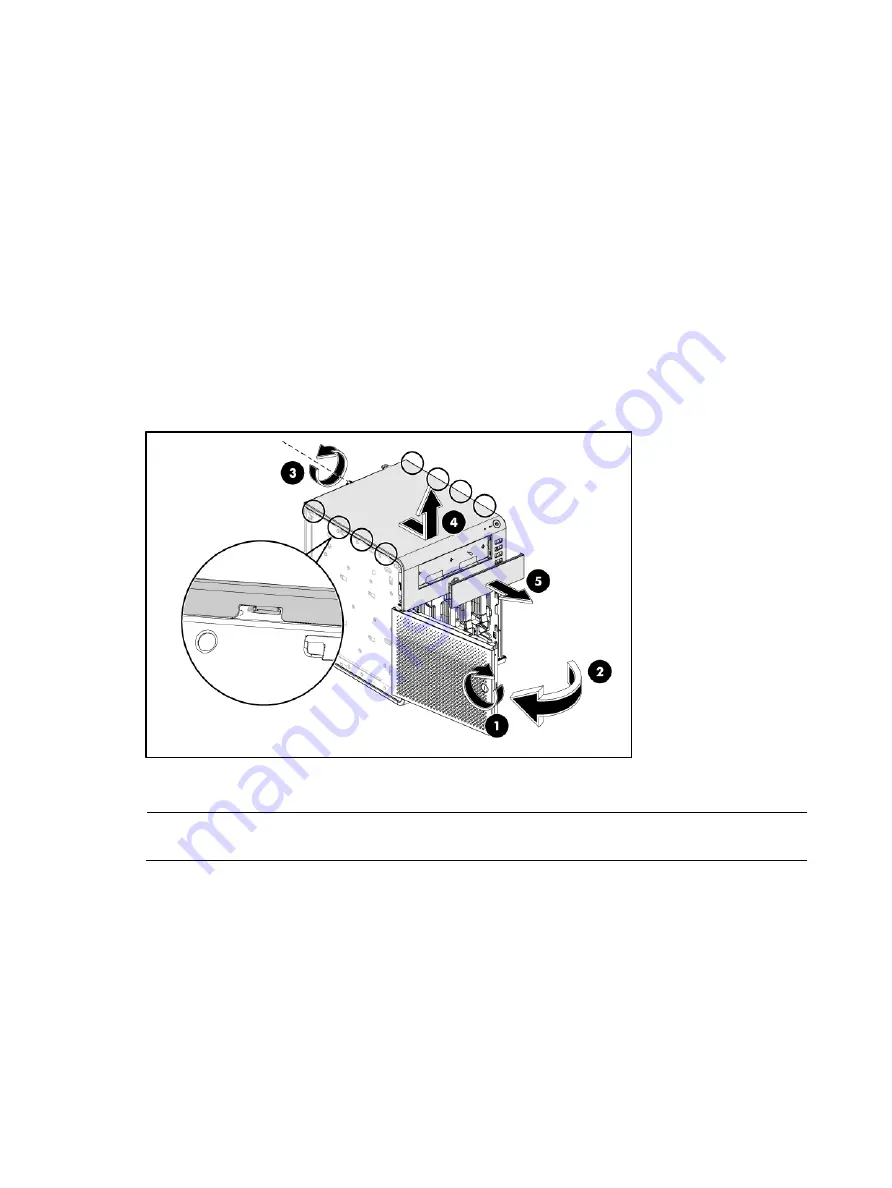
1.
Using the HP ProLiant MicroServer key to unlock the panel door.
2.
Open the panel door of the server. If necessary, remove any components or cables that prevent
access to the slot.
3.
Loosen the back thumb screw which locks the panel on the chassis.
4.
Slide the top panel forward, and then lift to remove it from the chassis.
5.
Remove the plastic faceplate from the top panel.
6.
Use the screw driver to shake the metal faceplate holes up and down to uninstall the metal
faceplate from the top panel.
NOTE:
The removal of metal faceplate is required for ODD module installation; it may not need after
removing.
Summary of Contents for ProLiant MicroServer
Page 12: ...Customer self repair 12 ...
Page 13: ...Customer self repair 13 ...
Page 14: ...Customer self repair 14 ...
Page 15: ...Customer self repair 15 ...
Page 16: ...Illustrated parts catalog 16 Illustrated parts catalog Mechanical components ...
Page 20: ...Illustrated parts catalog 20 ...
Page 21: ...Illustrated parts catalog 21 System components ...
Page 38: ...Removal and replacement procedures 38 6 Perform the post installation procedure ...
Page 50: ...Removal and replacement procedures 50 5 Perform the post installation procedure ...
Page 66: ...Diagnostic tools 66 5 Click Browse to select folder and then click Next 6 Click Next ...
Page 67: ...Diagnostic tools 67 7 Click Install 8 Click Finish ...
Page 70: ...Diagnostic tools 70 13 Click options Enable or Disable to change Write cache and NCQ status ...


