HP OmniBook 6000
Troubleshooting and Diagnostics
3-25
Desktop Management Interface (DMI)
The Desktop Management Interface (DMI) is basically a set of rules for accessing information about a
personal computer. Using DMI, an application program can determine, for example, which hardware
and software components are present in a personal computer, the operating system being used, and the
number of accessory board slots available. Using the DMI interface, a local or remote application
program can check which hardware and software components are installed on your computer, and may
be able to tell how well they are working or whether any needs replacing. All this information is
stored in a special Management Information Format (MIF) file, installed on each personal computer as
part of the DMI package.
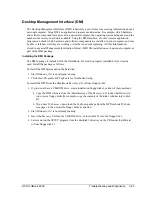
Installing the DMI Package
The DMI package is included with the OmniBook, but must be properly installed before it can be
used. Install the package as follows:.
To install the DMI preloaded on the hard disk:
1.
Start Windows, if it is not already running.
2.
Click Start, Programs, HP TopTools for Notebooks, Setup.
To install the DMI from the OmniBook Recovery CD or from floppy disks:
1.
If you do not have a CD-ROM drive, create installation floppy disks by either of these methods:
•
Copy the DMI software from the \dmi directory of the Recovery CD (under \hp\Drivers) to
two or more floppy disks (for example, copy the contents of the \disk1 subdirectory to disk
#1).
•
If you have Web access, download the TopTools package from the
HP Notebook Web site
(see page vi), then create the floppy disks as directed.
2.
Start Windows, if it is not already running.
3.
Insert the Recovery CD into the CD-ROM drive, or insert disk #1 into the floppy drive.
4.
Select and run the SETUP program from the dmi\disk1 directory on the CD (under \hp\Drivers),
or from floppy disk #1.
Summary of Contents for OmniBook 6000
Page 1: ... HP OmniBook 6000 Service Manual ...
Page 52: ......
Page 82: ......
Page 84: ...4 2 Replaceable Parts HP OmniBook 6000 Figure 4 1 Exploded View ...
Page 95: ......


