Installing a Secondary Flash Memory Module
Before beginning the installation process, review
General Hardware Installation Sequence on page 6
for procedures you should follow before and after installing or replacing hardware.
WARNING!
You must remove the right side panel to access the system board. Before removing the
side access panel, ensure that the thin client is turned off and the power cord is disconnected from
the electrical outlet.
CAUTION:
Static electricity can damage the electronic components of the computer or optional
cards. Before beginning these procedures, ensure that you are discharged of static electricity by
briefly touching a grounded metal object. When handling a memory module, be careful not to touch
any of the contacts. Doing so may damage the module.
To install the secondary flash memory module:
1.
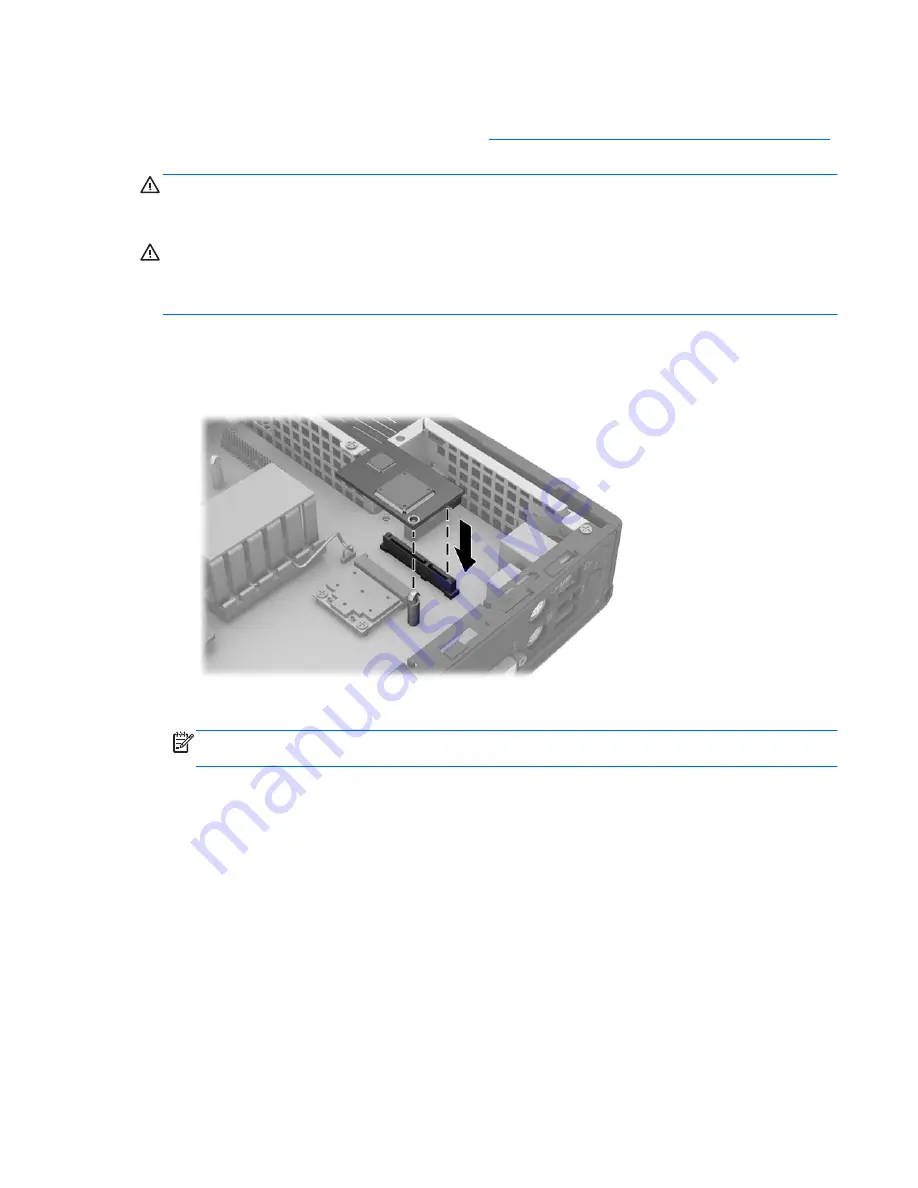
Locate the secondary flash memory module socket on the system board.
Figure 2-13
Installing the Secondary Flash Memory Module
2.
Insert the flash memory module into the socket on the system board.
NOTE:
A flash memory module can be installed in only one way. Line up the hole in the flash
memory module with the retention post on the system board.
3.
Press the module connectors firmly into the flash memory module socket, making sure that the
retention post on the system board comes up through the hole in the module.
Installing Thin Client Options
17
Summary of Contents for f10
Page 1: ...Troubleshooting Guide HP t510 Thin Client ...
Page 4: ...iv About This Book ...
Page 8: ...viii ...
Page 42: ...No Power Part 3 34 Chapter 4 Diagnostics and Troubleshooting ...
Page 43: ...No Video Part 1 Troubleshooting 35 ...
Page 67: ...Select Image to Update 59 ...


