Setup and Installation Guide
www.hp.com
4-11
Installing and Cabling the HP CCI Solution
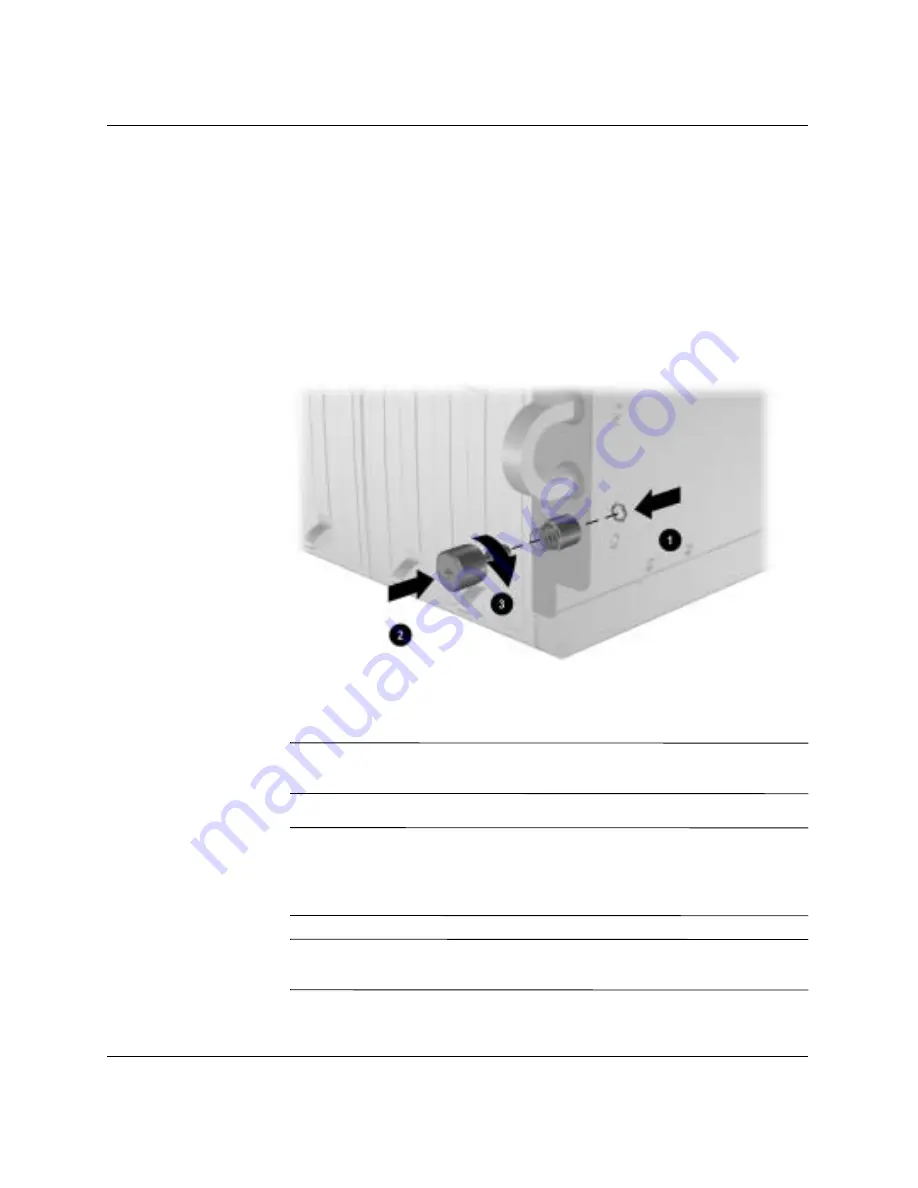
4. Place the hexagonal washer at the back of the hole in the
enclosure
1
.
5. Insert the screw through the hole in the enclosure.
6. Press the head of the screw inward so that the spring is
completely compressed
2
.
7. Screw the hexagonal washer onto the shaft of the screw until it
passes all the threads and is secure within the thumbscrew
housing
3
.
Replacing a thumbscrew, spring, and hexagonal washer
8. Repeat steps 1 through 7 for the other thumbscrew.
Å
WARNING:
Remove the two hot-plug power supplies before installing
the enclosure into the rack to reduce weight.
Å
WARNING:
At least two people must lift the enclosure into the rack
together. If the enclosure is loaded into the rack above chest level, a third
person must assist with aligning the enclosure with the rails while the
other two people support the weight of the enclosure.
Ä
CAUTION:
Do not remove the enclosure from the rack by the
thumbscrews. Use the handles located above the thumbscrews.
Summary of Contents for Blade bc1000
Page 80: ...5 22 www hp com Setup and Installation Guide Deployment and Management ...
Page 116: ...D 22 www hp com Setup and Installation Guide Troubleshooting ...
Page 128: ...E 12 www hp com Setup and Installation Guide LEDs and Switches ...
Page 134: ...F 6 www hp com Setup and Installation Guide Specifications ...
Page 138: ...G 4 www hp com Setup and Installation Guide Blade PC Battery ...
Page 146: ...Index 8 www hp com Setup and Installation Guide Index ...


