Installing the chassis 28
3.
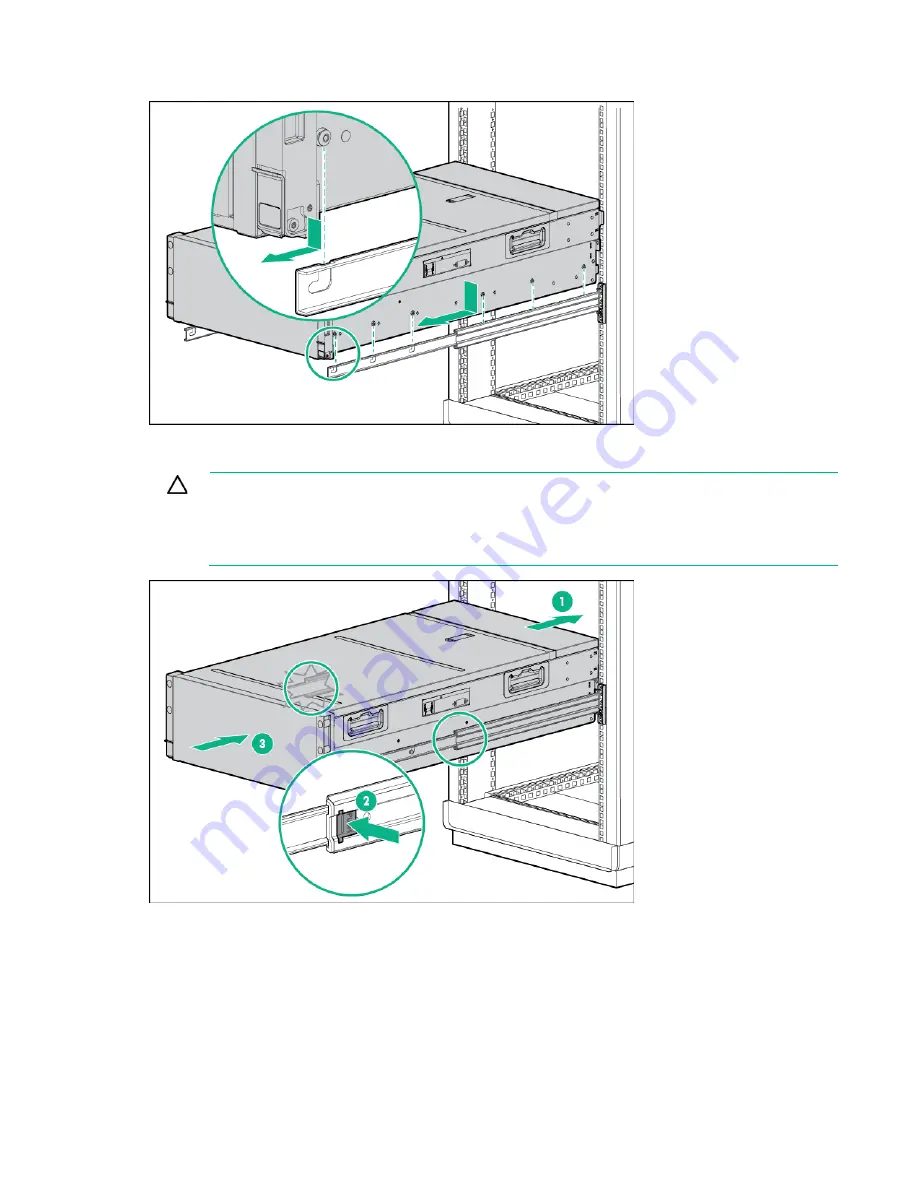
Install the chassis into the J-slot on the rails, and then pull it forward.
4.
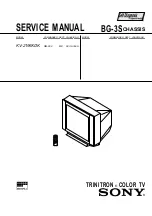
Press the Push tabs on each rail, and then slide the chassis into the rack. When the chassis stops
midway, press the push tabs on each rail to release the chassis and slide it fully into the rack.
CAUTION:
Press and hold the "Push" tab on each rail until the chassis begins to slide into
the rack. Then, release the "Push" tabs and continue to slide the chassis into the rack. Press
and hold the "Push" tab on each rail again when the rails lock at a 76.2-cm (30-inch) extension.
Then, release the "Push" tabs again and finish sliding the chassis into the rack. Failure to
release the "Push" tabs may cause damage to the rails.
Install the system components into the chassis
Once the chassis is installed in the rack, begin installing the components in the chassis.
Installing a server
Summary of Contents for apollo 4510 gen9
Page 20: ...Identifying components and LEDs 20 Optional 8 LFF drive cage bay numbering ...
Page 32: ...Installing the chassis 32 Installing a management module Install the component as indicated ...
Page 60: ...Support and other resources 60 ...
Page 61: ...Support and other resources 61 ...
Page 64: ...Acronyms and abbreviations 64 UPS uninterruptible power system USB universal serial bus ...
Page 68: ...Index 68 W warranty 46 warranty information 46 website Hewlett Packard Enterprise 54 ...


