background image

2

WARNING:

To reduce the risk of fire, electric
shock, or injury:

When using an electrical appliance, always follow

basic precaution, including the following:

READ ALL INSTRUCTIONS BEFORE USING THIS APPLIANCE

Important Safeguards!

• Use indoors only.
• Use only on surfaces moistened by the cleaning process or small

spills.  Do not immerse product.

• Connect to a properly grounded outlet only.  See “Grounding Instruc-

tions”.

• Do not clean over floor electrical outlets.
• Do not use without tanks in place.
• Use extra care when cleaning on stairs.  Do not place deep cleaner on

stairs.

• Use deep cleaner only for its intended use as described in

the instructions.  Use only attachments recommended by The Hoover
Company; others may cause hazards.

• The use of an extension cord is not recommended.  If an extension

cord is absolutely necessary, use at least a 16 gauge 3-wire cord which
has a 3-prong grounding type plug and a 3-pole receptacle that accepts
the machine plug.

• Unplug deep cleaner when not in use.  Turn off all controls

before unplugging.

• Always disconnect cord from electrical outlet before servicing the

deep cleaner.

• Do not unplug by pulling on cord.  To unplug, grasp the plug, not the

cord.  Never handle plug or appliance with wet hands.

• Do not pull or carry by cord, use cord as a handle, close door on cord or

pull cord around sharp edges or corners.  Do not run appliance over
cord.  Keep cord away from heated surfaces.

• Do not use with damaged cord or plug.  If appliance is not working as it

should, has been dropped, damaged, left outdoors, or dropped into
water, take it to a Hoover Factory Service Center or Authorized Hoover
Warranty Service Dealer.

• Close supervision is necessary when any appliance is used by or

near children.  Do not allow deep cleaner to be used as a toy or to run
unattended at any time.

• Do not point stair/upholstery tool toward people or pets.
• To assist in reducing drying time, be certain the area is well ventilated

when using detergents and other cleaners with this machine.

• Keep detergents and other cleaners out of children’s reach.
• Do not use to pick up flammable or combustible liquids such as gaso-

line or use in areas where they may be present.

• Do not pick up chlorine bleach, drain cleaner, gasoline or any other

toxic material with this appliance.

• Do not pick up anything that is burning or smoking, such as cigarettes,

matches, or hot ashes.

• Avoid picking up hard, sharp objects with the deep cleaner.  They may

damage the machine.

• Keep hair, loose clothing, fingers, feet and all parts of body away

from openings and moving parts.

• Do not put any object into openings.  Do not use with any opening

blocked; keep free of dust, lint, hair, and anything that may reduce
air flow.

• To help prevent matting and resoiling, avoid contact with carpets until

they are dry.  Keep children and pets away from carpets until they are
completely dry.

• Store in a dry place.  Do not expose machine to freezing temperatures.

Save these instructions!

Questions or Concerns?

The Hoover Company wants to quickly resolve any
concerns about your cleaner or questions regard-
ing its use.  Look on the list provided with the
product for your local

 Hoover Factory Service

Center 

or in the Yellow Pages under “Vacuum

Cleaners - Household” for the nearest

 Authorized

Hoover Warranty Service Dealer 

(Depot) or call:

1-800-944-9200 

for an automated referral

of authorized service outlet locations (U.S. only) or

1-330-499-9499 (U.S.) or 1-800-263-6376

(Canada) to speak with a Hoover representative.

PLEASE DO NOT RETURN THIS PRODUCT
TO THE STORE OR SEND IT TO NORTH
CANTON FOR SERVICE.

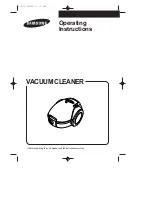
Unpack deep cleaner from the carton and
identify the parts shown.  Remove and dispose
of the  packing.

Unpacking

A

B

C

D

E

F

G

A. Deep cleaner
B. Upper handle
C. Bolts (2)
D. Nuts (3 - one extra included)
E. Carpet/Upholstery Detergent
F. Hose
G. Stair/upholstery nozzle

This Deep Cleaner cleans carpet fibers by
applying hot tap water and cleaning
solution.

Summary of Contents for Deep Cleaner

Page 1: ...c shock This appliance is equipped with a cord having an equipment grounding conductor and grounding plug A The plug must be plugged into an appropriate outlet B that is properly installed and grounded in accordance with all local codes and ordinances Grounding Instructions Thank you for selecting a HOOVER product This cleaner was inspected and packaged carefully before being shipped from the fact...

Page 2: ...e or pets To assist in reducing drying time be certain the area is well ventilated when using detergents and other cleaners with this machine Keep detergents and other cleaners out of children s reach Do not use to pick up flammable or combustible liquids such as gaso line or use in areas where they may be present Do not pick up chlorine bleach drain cleaner gasoline or any other toxic material wi...

Page 3: ... completely down 4 Place nuts in recessed areas on back of handle Hold each nut in place while tightening each bolt securely with a Phillips screw driver Fig 4 Only two nuts are needed on this model The extra nut is not required but has been provided for your convenience 5 SQUEEZE TRIGGER When handle sections are completely together squeeze trigger on upper handle to snap trigger rod in place Fig ...

Page 4: ...ion tank cap measuring cup 7 Clean solution tank holds cleaning solution 8 Recovery tank lid 9 Recovery tank holds dirty solution 10 Recovery tank front panel 11 Hood 12 Nozzle 13 Upholstery and stair cleaning connection some models only push door open to connect stair upholstery tool solution tube 14 Recovery tank latches one on each side of tank 15 ON OFF pedal 16 Handle release pedal step on pe...

Page 5: ...k before continuing use ON OFF pedal Handle release pedal Automatic shut off ON OFF PEDAL HANDLE RELEASE PEDAL FLOAT DISK How to fill TANK HANDLE Place handle in the upright locked position Carry tank to a sink Rotate tank cap counterclockwise and lift up to remove cap Continued To remove tank press down on handle and pull forward Clean solution tank upper tank General operation The deep cleaner m...

Page 6: ... leaking remove clean solution tank by pressing down on tank handle and pulling forward set tank aside do not set tank on furniture Turn deep cleaner off and disconnect from electrical outlet Rotate recovery tank latches outward one on each side of tank Lift tank off of deep cleaner and carry it to a sink or drain Step on handle release pedal and lower handle until it rests on the floor If cleanin...

Page 7: ...OOVER deep cleaner only if the upholstery fabric is marked with a W for wet clean or S W for solvent dry or wet clean Do not clean fabric marked S solvent dry clean only If your upholstery does not have a code seek professional assistance No cleaning solution removes all stains from all carpets Stain removal varies with the type of spill time elapsed before removal carpet material and carpet type ...

Page 8: ...Upholstery Detergent Dry hands and plug cord into a properly grounded outlet When finished cleaning follow After cleaning instructions on page 8 For best cleaning results and to aid in faster drying of carpet end with more dry strokes Continue using dry strokes until little water is visible passing through the recovery tank lid It is best to alternate wet and dry strokes as described above Keep no...

Page 9: ...hment downward until both ends snap into place Note Some force may be required to rotate and snap attachment into place Return deep cleaner to upright position To clean floor Read Before you begin cleaning instructions on page 7 Do not use deep cleaner on hardwood floors Fill clean solution tank according to instructions on pages 5 6 Use 5 ounces of HOOVER Bare Floor Cleaner Do not use any type of...

Page 10: ...tank Rotate lid down onto tank Make sure lid is secure on all sides before cleaning For full suction it is important that the recovery tank lid is properly secured before cleaning Reverse procedure to remove hose and solution tube Raise deep cleaner handle to upright position and replace upper clean solution tank Attach nozzle to connector end of hose by sliding it onto connec tor until the tab lo...

Page 11: ...against riser Pull nozzle slowly over carpet without pressing trigger dry stroke Position nozzle against the riser and slightly press nozzle into carpet pile Press the solution trigger and pull the nozzle slowly over the carpet second wet stroke Replace recovery tank front panel Slide panel down until it snaps firmly in place Snap clip back into position making sure solution hose is not pinched an...

Page 12: ...n place If you have a problem Problem Machine won t run If a minor problem occurs it usually can be solved quite easily when the cause is found by using the check list below Possible cause Possible solution Not firmly plugged in Plug unit in firmly No voltage in wall plug Check fuse or breaker Blown fuse tripped breaker Replace fuse reset breaker Problem Low suction Possible cause Possible solutio...

Reviews: