28
The screen will show 6 sets of dashed lines.
Once the screen with the six
dashed line is shown,
immediately click the MODE
button three times within three
seconds to enter the
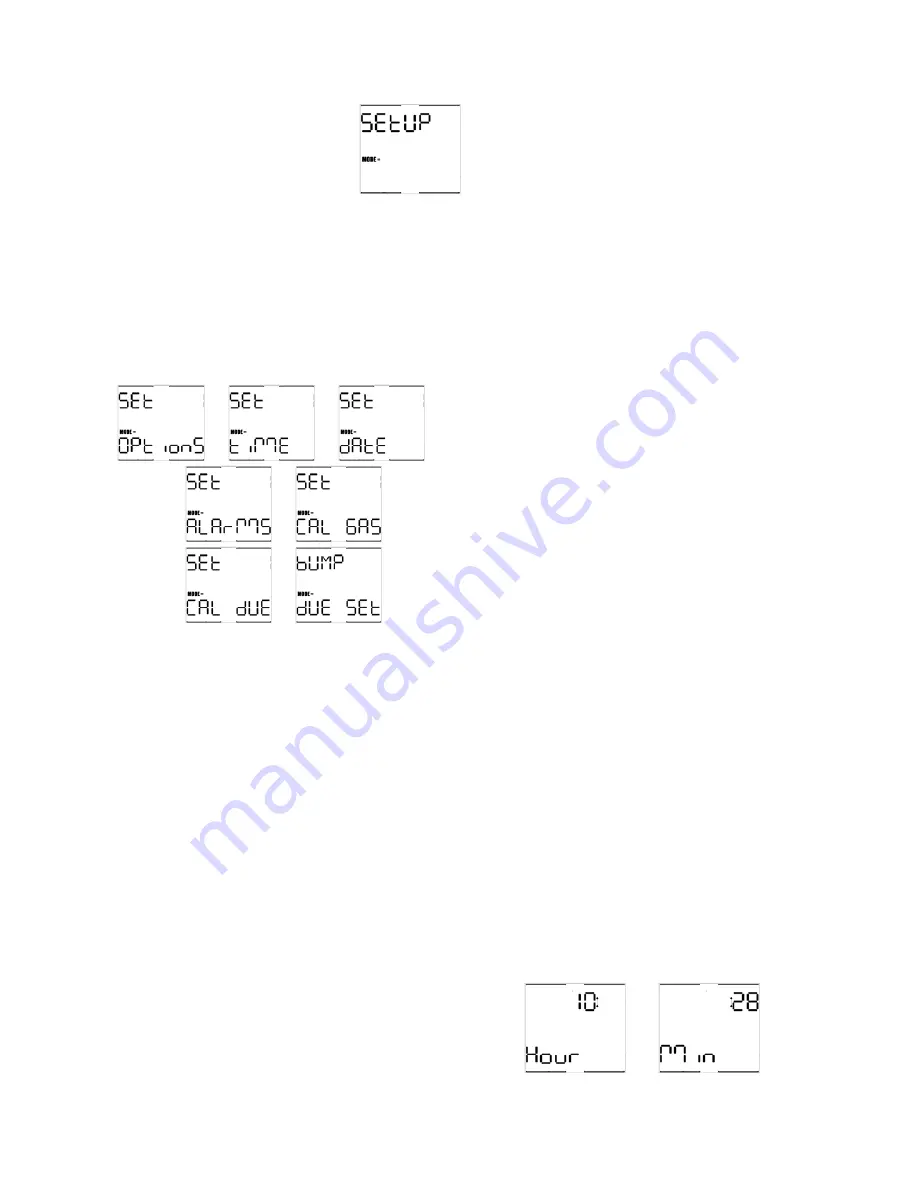
Configuration Menu. “Setup”
will be shown.
After a few seconds, the “Setup” screen will
be replaced by the “Set Options” screen and
will proceed to automatically scroll to a new
screen every 5 seconds. The “Set Time”
screen will follow the “Set Options” screen,
which will then be followed by the “Set Date”,
“Set Alarms”, “Set Cal Gas” and the “Set Cal
Due” screens before returning to the “Set
Options” screen.
→
→
→
→
→
→
The MODE button is used to make all
selections in the Advanced Menu.
1. Click the MODE button once to advance
to the next menu screen
2. Click the MODE button three times in
rapid succession to enter the submenu for
the menu item that is currently shown.
3. Hold the MODE button for three full
seconds to exit the advanced menu.
Once a submenu has been entered:
1. Click the MODE button once to advance
to the next item in the submenu you’ve
entered.
2. Hold the MODE button to modify the
setting.
3. Click the MODE button three times in
rapid succession to return to the Main
Menu.
6.2 Set
options
The set options submenu houses the controls
for the following items:
STEL (on or off)
TWA (on or off)
Security beep (on or off)
Alarm Latch (on or off)
Cal Due Use (on or off)
Upload Cal (on or off)
H
2
S Decimal Point (on or off)
Once the Set options submenu is entered, the
MultiPro will automatically scroll through the
options at 5-second intervals. To change a
setting for on to off (or vice-versa) hold the
MODE button down for 1-2 seconds.
Once the settings have been modified as
needed, click the MODE button three times in
rapid succession to return to the Main Menu.
STEL and TWA Alarms are discussed in
Appendix A.
The Security Beep is covered in section 1.4.5.
Alarm Latch settings are described in section
1.4.6.
The Cal Due Use setting determines whether
the instrument can be used when it is due for
calibration. Selecting “Cal Due Use On” will
allow the MultiPro to be used when it is due
for calibration. Selecting “Cal Due Use Off”
will cause the MultiPro to be shut down if the
calibration is due and not performed
immediately upon instrument turn on.
With the Upload Cal set to “on”, the MultiPro
will automatically enable the IrDA port and
attempt to download the results of calibration
to a PC immediately following the calibration.
This is designed mostly for users of the IQ
Datalink Program. In the default
configuration, Upload Cal is set to “off”, and
the instrument will turn off following
calibration.
Turn the H
2
S decimal point on to view
hydrogen sulfide readings in tenths of a part
per million up to 9.9 PPM. Once the decimal
point is enabled, a TWA alarm value option of
1.6 PPM will also appear under the alarm
settings options.
6.3 Set
time
When the set time option is accessed, the
screen will alternate between the hours and
minutes screens. The hours screen is given
in 24-hour format. The two screens will
alternate every 5 seconds.
↔
Summary of Contents for MultiPro
Page 1: ......


