background image

USING THE FLEXIBLE EXTENSION (Optional Accessory for Paint Sprayer 100)

The flexible extension can be bent at any angle to make spraying floors, ceilings, overhangs, or hard
to reach areas easier. Using the flexible extension will prevent tilting of the sprayer.
Note: Tilting of the sprayer is not recommended as it may cause leakage.
1. Release spray tip by turning it counterclockwise. Remove the atomizer head from sprayer and check

for wear. The atomizer valve assembly should remain in cartridge.

2. Attach flexible extension end onto the sprayer.
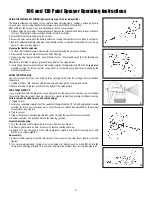
3. Screw the spray nozzle onto the flexible extension, leaving the atomizer valve in place. See Figure I.
4. Bend the adjustable flexible extension to the position which is required for painting, this can be up,

down, or sideways. See Figure J.

Cleaning the flexible extension
1. To clean the flexible extension, spray water or solvent through the sprayer until clean.
2. Disassemble nozzle and atomizer valve to finish cleaning.
3. If you are using the suction tube, you will need to cover the materials to avoid a film forming and

drying out. 

Note: Before returning to project, practice first and adjust the spray pattern.
4. If using the paint container, empty any remaining material. Fill approximately 1/2 full with appropriate

cleaning solution; for latex use warm soapy water; for oil based use solvent recommended by the
material manufacturer.

SHORT TERM CLEAN UP
Use these instructions if you are not going to be spraying for 30 minutes or longer but will continue
the project.
1. Unplug electrical cord. Remove cylinder housing and clean piston, cylinder and nozzle.
2. Before returning to project, practice first and adjust the spray pattern.

LONG TERM CLEAN UP
If you are finished with the project or are not going to use the sprayer the next day you must follow
these instructions for proper clean up. Never store sprayer longer than overnight without cleaning.
Failure to properly clean sprayer will cause damage.
1. Unplug sprayer.
2. Empty any remaining material from the container. Fill approximately 1/2 full with appropriate cleaning

solution; for latex use warm soapy water; for oil based use solvent recommended by the material
manufacturer. See Figure K.

3. Plug in sprayer.
4. Trigger the sprayer until cleaning solution comes through the sprayer for several seconds.
5. Remove container and properly discard the cleaning solution.
Cleaning pump housing:
1. Turn thumb knob counterclockwise to unscrew. Remove. See Figure L.
2. Pull down and forward on front of sprayer to remove cartridge housing.
3. Remove all parts, thoroughly clean with appropriate solution. Lubricate all moving parts with 

WD-40 or any lightweight oil.

Re-assembly:
1. Reinsert cylinder pump assembly into sprayer. Place cover on housing. Insert thumb screw and

tighten.

2. Turn sprayer upside down, then put in a small amount of light oil such as brand WD-40 into the

suction hole and trigger briefly. This prevents the piston and cylinder from rusting. See Figure M.

100 and 120 Paint Sprayer Operating Instructions

L

M

5

K

I

J

Summary of Contents for 100

Page 1: ...UCCIONES LEA Y ENTIENDA ESTE MANUAL DEL PROPIETARIO ANTES DE OPERAR SU ROCIADORA SIN AIRE Para el uso de la casa solamente MANTENGA A LOS NIÑOS ALEJADOS DEL ÁREA DE TRABAJO Pulvérisateur à peinture modèles 100 et 120 Livret d instructions CONSERVEZ CES DIRECTIVES L UTILISATEUR DOIT LIRE ET COMPRENDRE LE GUIDE DU PROPRIÉTAIRE AVANT DE FAIRE FONCTIONNER LE PULVÉRISATEUR À HAUTE PRESSION Pour l usage...

Page 2: ...ctive eyewear The airless sprayer must be grounded In the event of an electrical short circuit grounding reduces the risk of electrical shock by providing an escape wire for the electric current This product is equipped with a cord having a grounding wire with an appropriate grounding plug The plug must be plugged into an outlet that is properly installed and grounded in accordance with all local ...

Page 3: ...l recommended by the paint manufacturer For latex paints use a lubricant additive or water to prevent excess piston wear and possible seizure of the piston Floetrol brand name is a lubricant additive that should be added before thinning paint with water then if further thinning is needed add water Following is a general thinning guide using the viscosity cup provided Figure D Because materials dif...

Page 4: ...e sure cord is not in a traffic area to avoid tripping of persons Do not use if cord is damaged IMPORTANT Should a low humming sound and or irregular spray pattern occur while spraying immediately remove plug from electrical source and thoroughly clean This will prevent the motor from overheating and causing damage to the sprayer See cleaning instructions Note If you stop spraying for 30 minutes o...

Page 5: ...nstructions if you are not going to be spraying for 30 minutes or longer but will continue the project 1 Unplug electrical cord Remove cylinder housing and clean piston cylinder and nozzle 2 Before returning to project practice first and adjust the spray pattern LONG TERM CLEAN UP If you are finished with the project or are not going to use the sprayer the next day you must follow these instructio...

Page 6: ...a reduce el riesgo de descargas eléctricas proporcionando un alambre de escape para la corriente eléctrica Este producto está equipado con un cordón eléctrico que cuenta con un alambre de conexión a tierra y con un enchufe de conexión a tierra apropiados El enchufe se debe conectar en un tomacorriente adecuadamente instalado y conectado a tierra de acuerdo con todos los códigos y reglamentos local...

Page 7: ...esgaste excesivo del pistón y para evitar que éste se atasque Floetrol una marca es un aditivo lubricante que debe agregarse antes de diluir la pintura con agua y si es necesario diluirla aún más se puede agregar más agua A continuación se encuentra una guía general para diluir pintura utilizando el recipiente de viscosidad que viene incorporado figura D Debido a que los materiales difieren según ...

Page 8: ...tos filosos Asegúrese de que el cordón eléctrico no se encuentre en un área transitada para evitar que las personas se tropiecen con él No use el cordón si está dañado IMPORTANTE Si se escucha un zumbido bajo y o se obtiene un patrón de rociado irregular durante la rociada desconecte de inmediato el enchufe del tomacorriente eléctrico y limpie minuciosamente la unidad Esto evitará que el motor se ...

Page 9: ...o va a continuar con el proyecto 1 Desenchufe el cordón eléctrico Quite la cubierta del cilindro Limpie el pistón el cilindro y el inyector 2 Antes de reanudar el proyecto practique primero y ajuste el patrón de rociado LIMPIEZA A LARGO PLAZO Si terminó con el proyecto o no va a usar la rociadora al siguiente día debe seguir estas instrucciones para limpiarla correctamente Nunca almacene la rociad...

Page 10: ...ements graves Utilisez un masque ou un respirateur lors de la pulvérisation lorsqu il y a un risque d inhalation des vapeurs nocives Utilisez des lunettes de protection Cet appareil à haute pression doit être mis à la terre Dans l éventualité d un court circuit la mise à la terre réduit les risques de choc électrique en évacuant le courant dans un fil Cet appareil est muni d un cordon électrique c...

Page 11: ...cant de peinture Pour les peintures au latex utilisez un additif lubrifiant ou de l eau pour éviter l usure excessive du piston et son grippage éventuel Le Floetrol marque de commerce est un additif lubrifiant qui doit être ajouté avant de diluer la peinture avec de l eau s il est nécessaire de diluer davantage ajoutez alors de l eau Voici un guide de dilution général à utiliser conjointement avec...

Page 12: ...ces de chaleur et des objets pointus Assurez vous que le cordon ne se trouve pas dans un endroit passant de manière à ne pas faire trébucher quelqu un N utilisez jamais un cordon endommagé IMPORTANT Si un bourdonnement sourd se fait entendre ou si la répartition de la pulvérisation n est pas uniforme débranchez immédiatement le cordon électrique et nettoyez complètement l appareil Cette précaution...

Page 13: ...iliser le pulvérisateur pendant 30 minutes ou plus mais que vous comptez poursuivre vos travaux après cet arrêt temporaire 1 Débranchez le cordon électrique Enlevez le logement de cylindre Nettoyez le piston le cylindre et le bec 2 Avant de continuer à utiliser le pulvérisateur effectuez quelques essais et ajustez la répartition de la pulvérisation NETTOYAGE LORS D ARRÊT PROLONGÉ Si vous avez term...

Page 14: ...ba de viscosidad 1 18 Tornillo de bloqueo de la carcaza 1 19 C816545 Cepillo de limpieza 1 20 Extensión flexible 1 21 C816558 Tubo de succión con abrazadera 1 22 C816556 Boquilla de rociado densamente 1 C805894 Pista de la potencia 1 Si usted no puede obtener partes y accesorios de su distribuidor local por favor llámenos o escribanos a HomeRight 1661 94th Lane NE MINNEAPOLIS MN 55449 4324 Tel 763...

Page 15: ...e a una distancia más corta El material está muy espeso Adelgace el material La presión es demasiado alta Ajuste la perilla de control Punta de rociado desgastada Reemplace la punta de rociado Patrón de rociado irregular Uno o más orificios de la válvula atomizadora están tapados Limpie la válvula atomizadora Bloqueo parcial de la boquilla de rociado Limpie la boquilla El material se está filtrand...

Page 16: ... garantías implícitas ni la exclusión de daños incidentales o resultantes de manera que la limitación y la exclusión anteriores pueden no aplicar a usted Esta garantía le otorga derechos legales específicos y usted también puede tener otros derechos que varían entre estados Si desea solicitar servicio cubierto por esta garantía envíe su producto con porte pagado junto con una descripción del probl...

Reviews: