


*Note* If you do not see ANY unit in the device status, and there is a device
connected to your computer, try to unplug all devices, and plug them back in.
Also make sure that the cable connecting your computer to the HomePlug
device is the right type and working correctly. If all of this seems to be correct,
and you still receive nothing in the
Device
window, try rebooting your
computer. If the problem still persists, please contact technical support from
your supplier.
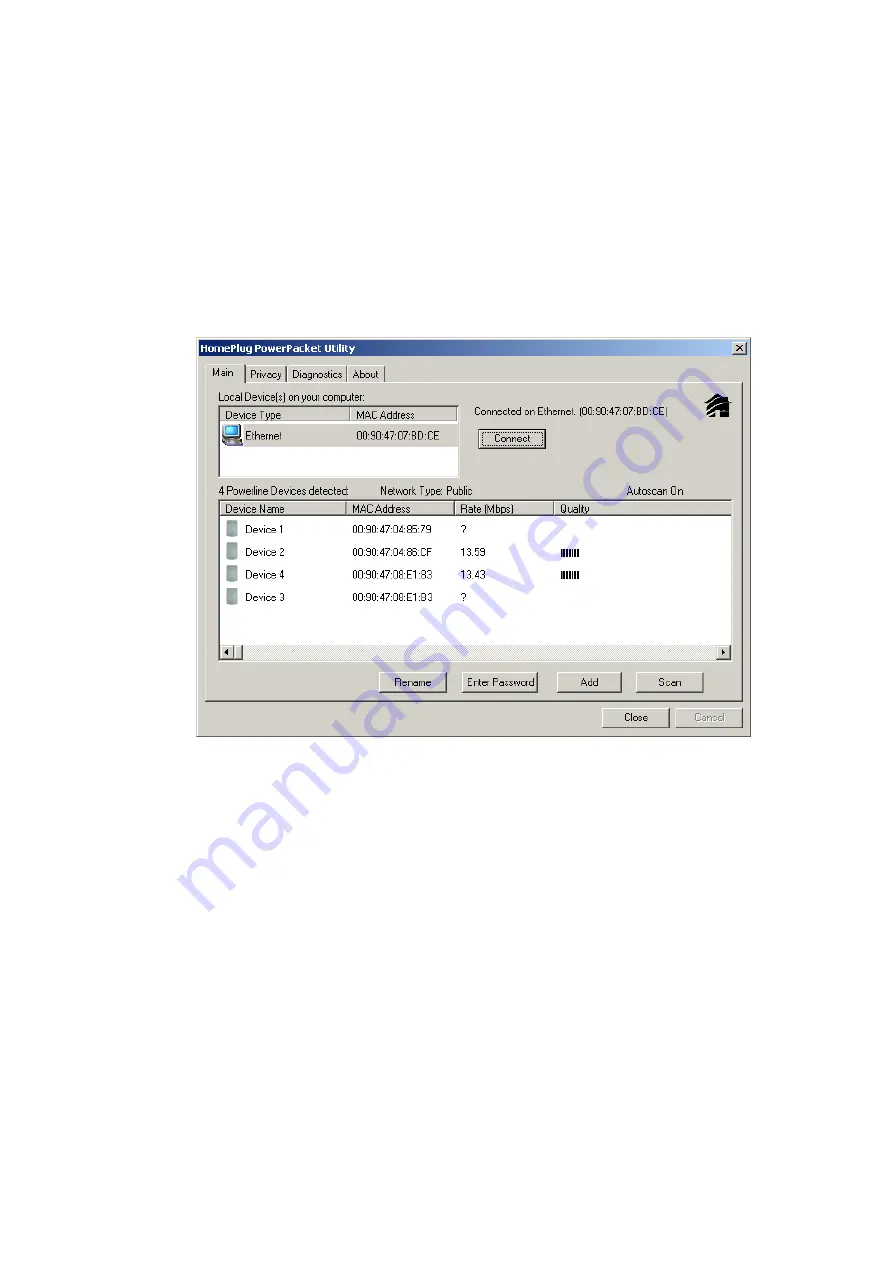
Part 2: Diagnose a Network HomePlug device
The Main tab shows all the other HomePlug Units on your powerline network.
It will represent them by MAC Address, and will also show the available
bandwidth to each unit (Units farther away from the current computer might
have a lower Data Rate, since the distance is farther). If you add or subtract
units from your home network, you might want to re-Scan, by clicking the
“
Scan
” button. This will rescan the network, and refresh with any changes.
**
Note**
Only units with the same
Network Password
will be shown, please
check that first, to make sure they all have the same network password (Case
sensitive).
**Note**
If a Unit shows MAC Address of all 0’s, this unit might not have a
solid connection, or might not connect at all. If this is the case please contact
technical support.
**
Note**
If there are Units in your home, that you do not see in this Network
scan, try to unplug all devices, and plug them back in (Only do this with the
Units that you do not view in the network screen, you don’t have to do this with
all units. If the problem persists, try to move the unit closer to this current unit
11
Summary of Contents for VeseNET Powerline PLA-14-E
Page 6: ...6 ...
Page 18: ...1 Click Start and click Run 2 Type Command in the run prompt Click OK 18 ...
Page 24: ...3 Click Properties 4 Click Highlight Internet Protocol TCP IP and click Properties 24 ...
Page 27: ...2 Type winipcfg and click OK 3 Select the Network adapter you want to release IP s for 27 ...
Page 28: ...4 Click Release 5 Your IP Address should turn to 0 0 0 0 28 ...
Page 32: ...32 ...
Page 56: ...56 ...