ASSEMBLY
HOLZMANN MASCHINEN GmbH www.holzmann-maschinen.at
Seite 36
MULTI-DÜBELBOHRMASCHINE / SINGLE-RAW MULTI-BORING MACHINE DBM 21N
Rest a 0,01mm feeler gauge on top of gauge
block, and lower the spindles by turning the crank
handle until the rod contacts the feeler gauge, as
shown in Fig.
14
. The feeler gauge should just
rub against both the gauge block nad the rod.
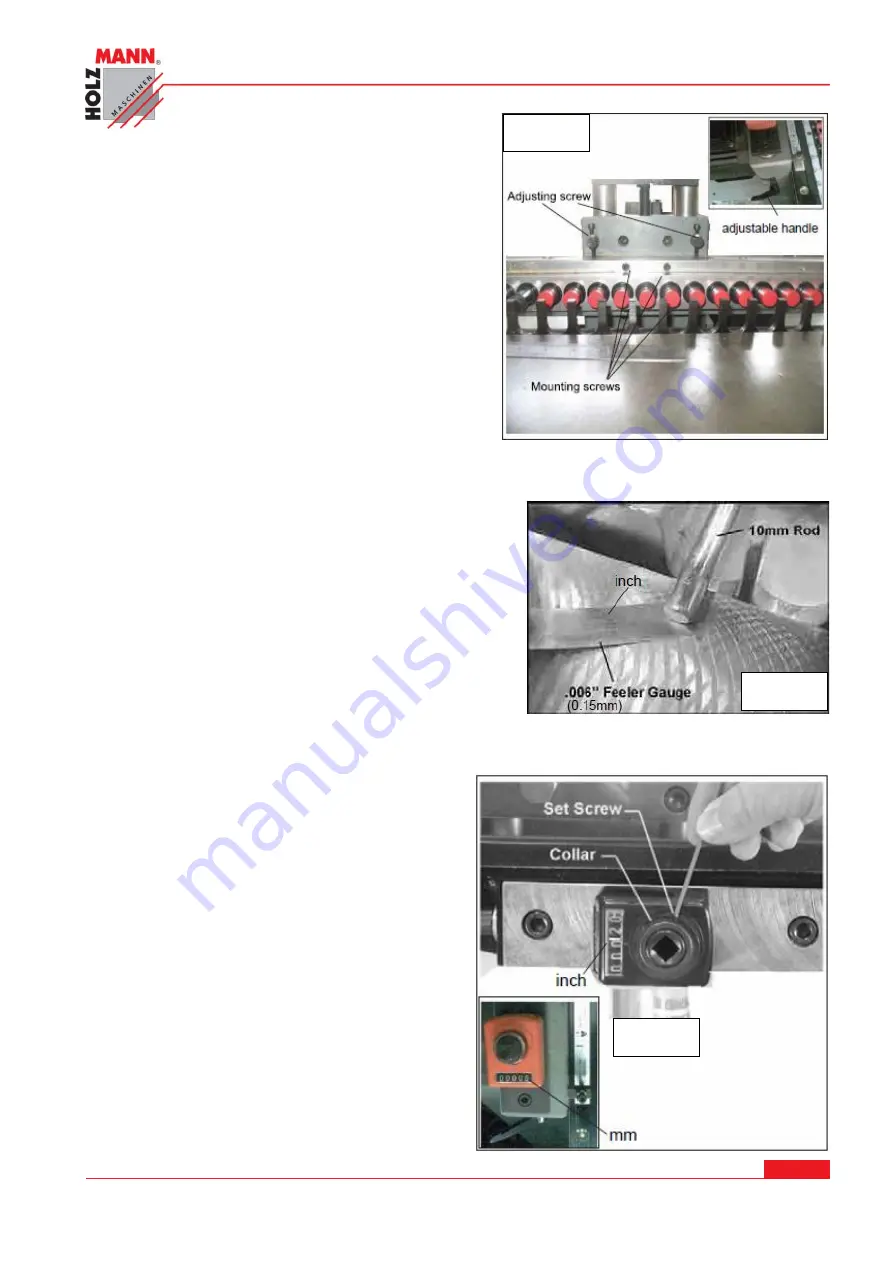
Lock the boring head in this position, by
tightening the adjustable handle next to crank
handle (see Fig.
15
)
Remove the chuck, with its rod, from the center
spindle and install it on the far right spindle.
Use the gauge block and feeler gauge to check
the height of the end spindles, in the same
manner as you did the center spindle. Both end spindles should match the height of the center
spindle. If they do not, loosen the four mounting screws as shown in Fig.
15
. Turn two
adjustment screws (Fig.
15
) slightly until the spindle heights match.
When the spindle heigths match, re-tighten the four
mounting screws.
Leave the 10mm rods on the spindles for further
adjustment procedures.
13.5.11
“Zero” the Digital Readout
This Procedure will set the digital readout so that
it reads zero when the centerline of the spindles is
aligned with the table surface.
NOTE: It is important to use 10mm rods in the
chucks and a 0,15mm feeler gauge when doing
this adjustment, as these measurements are
critical for accurate set up.
With the boring head still in horizontal position,
and the 10mm rods still in place on the spindles,
lower the spindles with the crank handle until a
0,15mm gauge just rubs between the rod and the
table surface, as shown in Fig.
17
At this point 5mm is the distance from the center
of the spindle (or rod) to the table surface.
Therefore, the mechanical digital readout should
read 5mm.
Fig. 15
Fig. 17
Fig. 16
Summary of Contents for DBM 21N
Page 57: ......


