❏ ❏
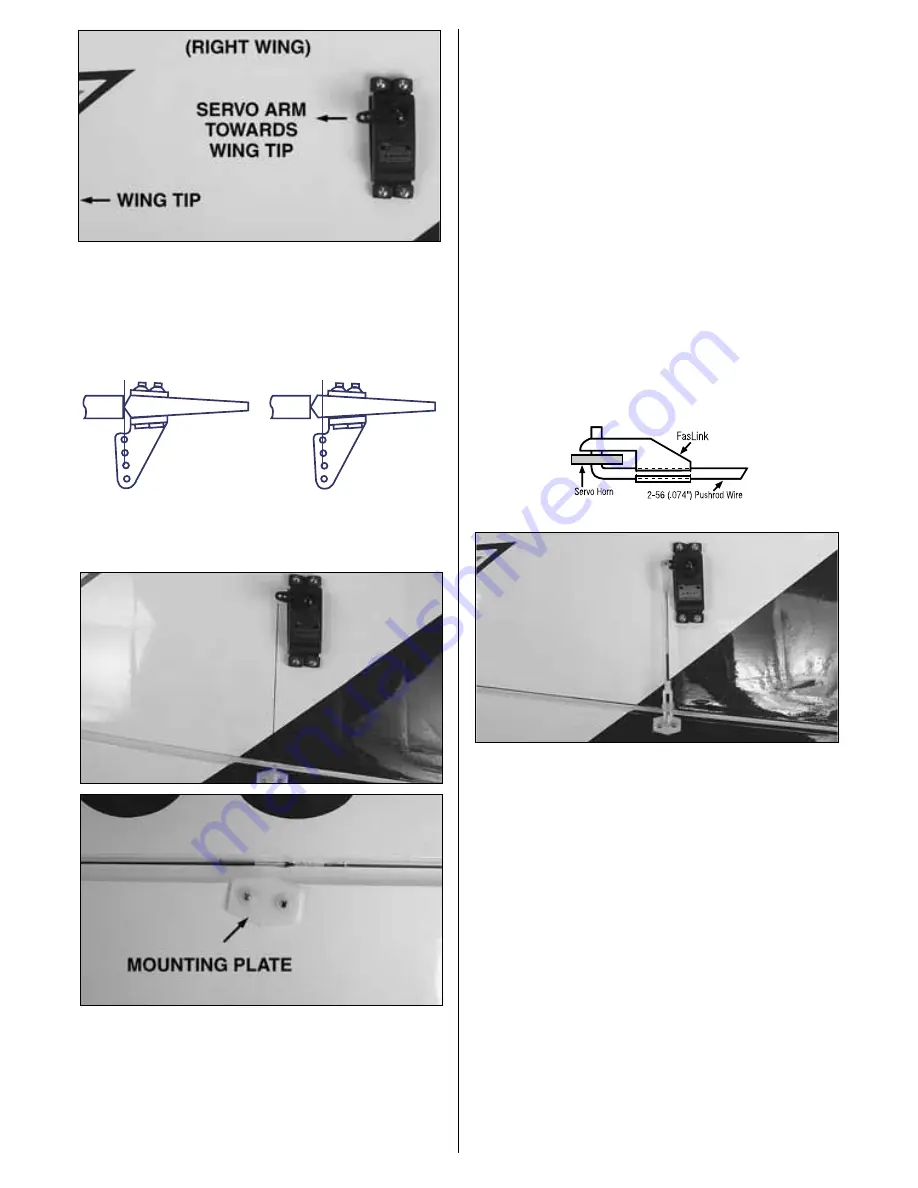
3. Install the servo into the wing. Center the
servo and install a servo arm as shown.
❏ ❏
4. Position a nylon control horn on the aileron as
shown in the sketch, aligning it with the servo. Mark the
location for the screw holes. Drill through the marks you
made with a 1/16” [1.6mm] drill bit, drilling through the
aileron. Secure the control horn to the aileron with two
2 x 20mm [3/4”] machine screws and the nylon
mounting plate.
❏ ❏
5. Locate a 2 x 102mm [4”] pushrod wire
threaded on one end. Screw a nylon clevis onto the
threaded end of the wire 20 full turns. Install a
silicone clevis keeper onto the clevis and then install
the clevis in the second hole from the end of the
aileron control horn.
❏ ❏
6. Be sure the aileron servo is centered.
Enlarge the second outermost hole in the servo arm
with a Hobbico Servo Horn Drill (or a #48 or 5/64”
[2mm] drill bit). Center the aileron and align the wire
pushrod with the hole in the end of the servo arm.
Using a marker, mark the location where the wire
aligns with the hole in the servo arm. On that mark
make a 90 degree bend. From the bend measure an
additional 3/16” [4.8mm], then cut off the excess
pushrod wire.
❏ ❏
7. Install the wire into the hole in the servo
arm using a nylon FasLink as shown in the sketch.
❏
8. Repeat steps I - 7 for the left wing panel.
Correct
Incorrect
8


