


9
ENGLISH
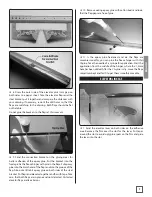
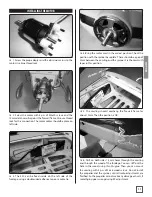
RUDDER LINKAGE
❏
1. Thread the steering wires into the fuselage, using a
plastic bowden cable. The wires should be crossed inside the
fuselage.
❏
2. Thread the wire first trough the clamp sleeve and then
trough the rudder lever, than back to the sleeve. Crimp the
sleeve with plieres and bend the outstanding end backwards.
❏
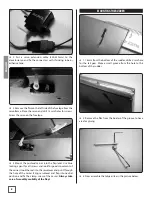
3. Fit the rudder servo with rubber bushings and metal
sleeves. Put the rudder servo to its place and drill 1.5mm holes
for the screws. Fix the servos with the provided screws.
❏
4. Screw the linkage
carriers to the servo lever.
Use blue thread lock and
take care, that the carriers
keep mobile. Adjust the
rudder servo to neutral
position and mount the
servo lever.
❏
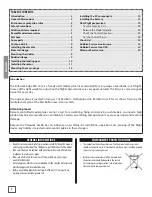
4. Roughen the steel wire on the adhesive surface and glue
it with epoxy glue into the rudder. The wheel axis should be
rectangular to the rudder flap. The pivot point of the rudder
should match with the pivot point of the tail gear.
❏
5. Now you can glue the fiber glass lever symmetric into
the slot of the rudder.
❏
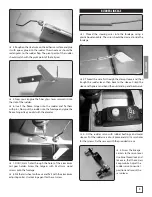
6. Insert the fleece hinges into the rudder and fix them
with pins. Now put the rudder into the fuselage and glue the
fleece hinges like you did with the elevator.
❏
7. Drill 1,5mm holes through the holes of the aluminium
tail gear holder. Screw the tailgear with 2.3x11mm wood
screws onto the fuselage.
❏
8. Put the tail wheel on the axis and fix it with the aluminium
adjusting collar. Use locking agent for the set screw.
Summary of Contents for Edge 540 RB FLWA4140
Page 15: ...15 ENGLISH NOTES...


