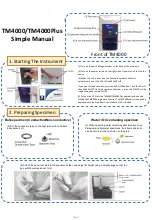

(18) Click the “Save” button to capture the image
5. Saving Captured Images
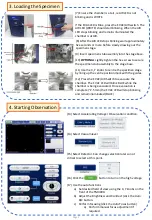
(20) Click the button to turn off the high voltage.
6. Stopping Observation
(21) To remove the sample press the EVAC/AIR switch to
introduce air into the specimen chamber. Wait until the AIR
LED (WHITE) stops blinking and remains illuminated.
(22) Slowly draw out the specimen stage, undo the hex
mounting screw and remove the specimen stub assembly
from the stage.
(23) Close the specimen stage door.
(24) If you are not looking at any other specimens, press the
EVAC/AIR switch to evacuate the chamber. The EVAC LED
(BLUE) will blink while the chamber is evacuated and will stop
blinking and remain illuminated once the chamber is under
vacuum (~2.5 min)
(19) After the image capturing process is completed
the Save Image dialog will be displayed. Input a file
name and save the image.
NOTE: Quick Save will save the image on the screen, ie
lower resolution than if you use the Save button.
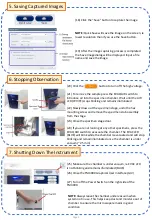
(25) Make sure the chamber is under vacuum, ie EVAC LED
is not blinking and remains illuminated (BLUE)
7. Shutting Down The Instrument
(26) Close the TM4000 Graphical User Interface (GUI)
(27) Turn off the Power Switch on the right side of the
TM4000.
NOTE: Always leave the chamber under vacuum when
system not in use. This helps keep dust and moisture out of
chamber to ensure the microscope remains in good
condition.
Page 3


