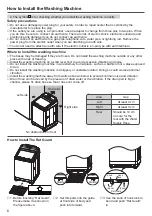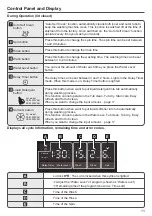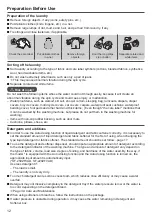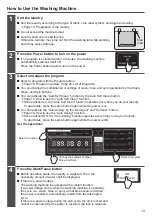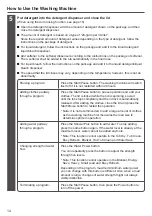
7
How to Install the Washing Machine
Installing the drain hose
●
The symbol is for checking whether you install the washing machine correctly.
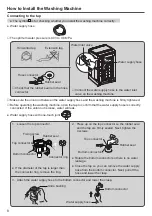
1. Push the drain hose into the connection port and hold it tightly with the hose clip (enclosed in the
package.)
Base
Base
Hose clip
Internal hose
Connection port
Drain hose
Drain Hose
Connection
port
Hose clip (set it correctly in the direction indicated in the
fi
gure)
2. Insert the end of the drain hose into the drain outlet.
Do not allow the drain hose to be bent, twisted, pulled out and damaged, stepped on, or crimped.
Spread a cloth on the ground before laying the washing machine down on its back to prevent damaging it.
Use a knife to cut the end of the drain hose at a 45 degree angle because if the drain channel is shallow
and the end of the drain hose is blocked, it could cause a malfunction.
Is it
fi
rmly installed to the drain outlet, elbow
pipe connector and drain trap?
Is the end of the drain hose blocked?
Is the hose piece installed to the end of the
drain hose?
Is the drain hose bent?
Drain Hose
Blocked
Drain Outlet
Bent
Hose Piece
Keep the top of the drain hose no more than 10 cm above the
fl
oor if it crosses a door sill or something
else. If it is higher than this, the water has di
ffi
culty draining and a “C2” error (water does not drain) may
occur.
Do not extend the drain hose more than 2 meters from the washing machine.
Please use the Extension Hose that is sold separately. For good draining e
ff
ect, please follow below.
In case of using the general extension hose, if inner diameter of hose is small, it cannot drain water
e
ffi
ciently and the unit may not work normally.
Is the end of the drain hose coming o
ff
due to
the force or vibration of the drainage water?
Is the height of the drain hose exceeding more
than 10 cm and the total length of the drain
hose exceeding more than 2 m?
2 m or less
10 cm or less


