background image


4

 / 

12


1.4   LED color and Biometric Reader status 

 
The indicator LED shows the status of the Biometric Reader.  Depending on its color and 
blinking state, please take an appropriate action. Note that Hitachi Finger Vein Biometric PKI 
Middleware (C-N1719-11) (hereafter called the Middleware) needs to be installed in the PC. 


Note: In some PCs the LED doesn’t become OFF when the PC enter SLEEP or POWER OFF.  


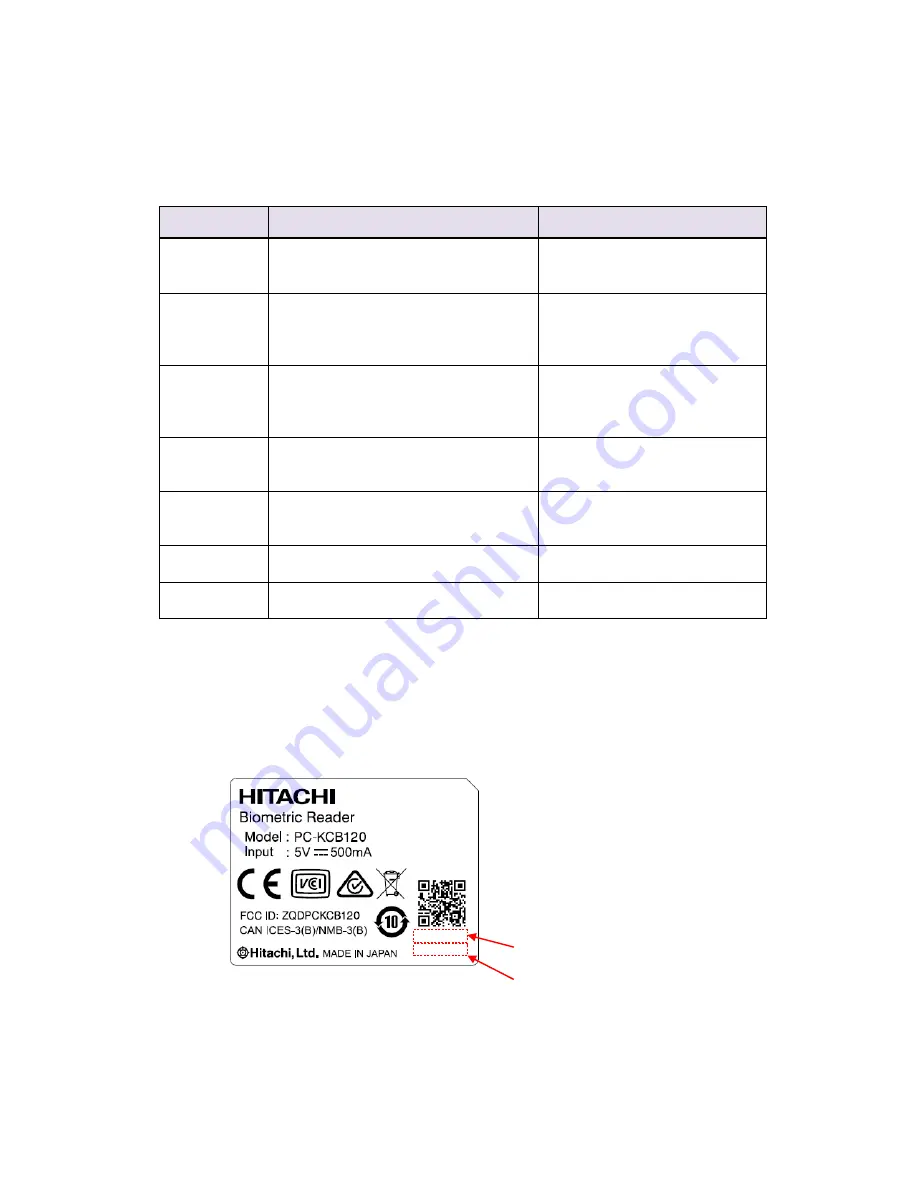
1.5  Rating Label 


2. Installation of the Biometric Reader


LED status 

Biometric Reader status 

Action 

Off 

Biometric Reader is not connected to the 
PC or Biometric Reader is not 
recognized by the Middleware. 

Connect the Biometric Reader to 
the PC. Install the Middleware. 

Orange 

Biometric Reader is connected to the PC 
and is recognized by the Middleware. 
(Smart Card is not inserted or 
recognized.) 

Insert a supported Smart Card to 
the Biometric Reader. 

Orange blink 

Biometric Reader is connected to the PC 
and Smart Card being is accessed. 

Wait until the LED status 
becomes Green.  
Do not disconnect the Biometric 
Reader or remove the Smart Card. 

Green 

Biometric Reader is connected to the PC 
and Smart Card is recognized. 
Biometric Reader is to ready for use. 

Green blink 

Biometric Reader is connected to the PC 
and is requesting the capturing of finger 
vein. 

Place your finger on the scanning 
area of the Biometric Reader. 

Red 

Biometric Reader is connected to the PC 
and finger vein authentication failed. 

Retry finger vein authentication. 

Red blink 

Biometric Reader is connected to the PC 
and a device error occurred. 

Disconnect the Biometric Reader 
from PC and connect again. 

Lot Number (7 digit) 

Manufacturing Number (7 digit) 

JC26AAJ 

0000001 

Summary of Contents for PC-KCB120

Page 1: ...example the control of chemical plants medical devices urgent communications etc Hitachi Ltd assumes no liability for any such uses and for any derived circumstances that may lead to accidents if used inappropriately Hitachi Ltd does not guarantee the correct functioning of this product if it is used simultaneously with other identification devices Regulations and Measures ICES 003 Statements This...

Page 2: ...n addition to U S regulations for export control and make all necessary arrangements accordingly The above applies to attachments and software surrounding the device as well Contact your distributor should you have any concerns Disposal When discarding this product follow all regional and local laws Also consult regulations regarding the material of each component Hazardous substance table for Chi...

Page 3: ...nd use the Biometric Reader 1 1 Product characteristics The Biometric Reader is a biometric authentication device that performs individual authentication by capturing finger vein patterns 1 2 What s in the box Your Biometric Reader package includes Biometric Reader 1 unit USB Cable 1 8m 5 9ft 1 piece 1 3 Biometric Reader components Overhead view Back view USB connector Micro B Type Scanning area T...

Page 4: ...d is recognized by the Middleware Smart Card is not inserted or recognized Insert a supported Smart Card to the Biometric Reader Orange blink Biometric Reader is connected to the PC and Smart Card being is accessed Wait until the LED status becomes Green Do not disconnect the Biometric Reader or remove the Smart Card Green Biometric Reader is connected to the PC and Smart Card is recognized Biomet...

Page 5: ...to the USB Micro B connector of the Biometric Reader Connect the plug A of the USB cable to the USB port of your PC Attention Connect the USB plug and the USB connector securely Hold the plug end when connecting or disconnecting the USB cable to prevent the connectors from breaking down Important When connecting the USB cable via a USB hub check the supply current The Biometric Reader may malfunct...

Page 6: ... displayed in the Device Manager as a Smart Card Reader 2 4 Removing the Biometric Reader Use following procedure to safely remove the Biometric Reader 1 Click the Safely Remove Hardware and Eject Media icon in the notification area at the far right of the taskbar Note To display the Safely Remove Hardware and Eject Media icon click Show hidden icons icon the arrow at the left side of the notifica...

Page 7: ...g direction Check the direction of the card before you insert it to the slot 2 Do not insert or pull out the Smart Card except by fingers 3 Don t bend the Smart Card when insert or pull out the card Insertion Insert the Smart Card to the slot with the contact part in front Pinching the Smart Card with fingers from both sides of the card and insert it into the slot Removal Pinching Smart Card with ...

Page 8: ...oning of the finger may lead to an authentication failure See the Enrollment and Authentication Guide for details of the proper finger placement Finger vein authentication and enrollment may fail in the following cases narrow fingers finger width under 10 mm 0 4 inch wide fingers finger width over 25 mm 1 inch short fingers finger cannot reach the back finger rest Do not place any non finger objec...

Page 9: ...ader is recommended About once a month or whenever required according the condition of the Biometric Reader clean the external parts by rubbing it with a soft piece of cloth If a dirt remains use a mild detergent and wipe it off with a damp cloth 4 2 Cleaning scanning area Maintenance of the scanning area is recommended about once a month or whenever it is dirty with fingerprints and others 1 Push...

Page 10: ...ic Reader is recognized as a USB 1 1 device 6 Troubleshooting Name Biometric Reader Model PC KCB120 Applicable finger width 1 Wider than 10 mm 0 4 inch and narrower than 25 mm 1 inch Interface USB 1 1 2 3 4 Dimensions Approx 69mm 2 7inch W x 97mm 3 8inch D x 79mm 3 1inch H USB cable not included Weight Approx 133g 4 7oz USB cable not included Maximum Current Consumption DC 5V 500 mA Bus powered En...

Page 11: ...pture process is completed Your finger is not properly placed Place your finger properly into the scanning area as shown in the Authentication and Registration Guide Your finger is wounded excessively dry or dirty Wash or clean your finger then perform authentication again When your finger is wounded excessively dry or dirty a quality finger vein image may not be obtained and it may result in auth...

Page 12: ...ansfer of the registration information contained in the Unit memory 2 Translation of this user s guide to any computer languages or any other language The use of any electronic mechanical magnetic optic or similar procedures for performing the above actions laid down in points 1 and 2 is also prohibited All other logos product names brand names and company names mentioned herein are either tradema...

Reviews: