background image

* ALTERNATIVE PARTS

--- 3 ---

ITEM

NO.

CODE NO.

DESCRIPTION

REMARKS

NO.

USED

PARTS

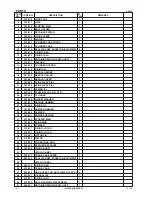
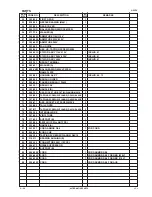
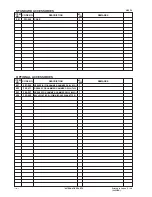
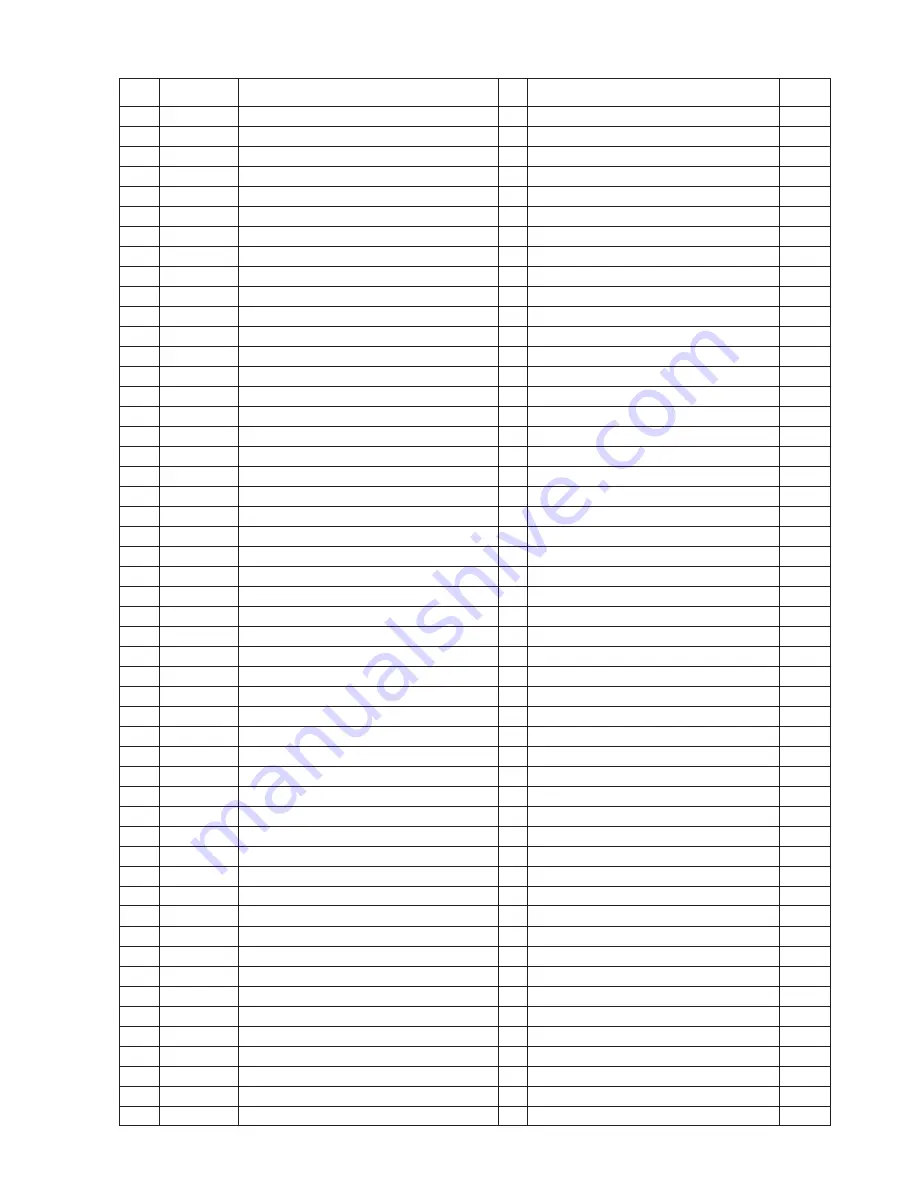
5 -- 04

H 25PV

52

323-055

FIRST GEAR

1

53

939-299

NEEDLE BEARING (M661)

1

54

323-084

GEAR COVER

1

55

600-1DD

BALL BEARING 6001DDCMPS2L

1

56

971-736

WASHER (B)

1

*

57

360-660C

ARMATURE 110V-115V

1

*

57

360-660E

ARMATURE 220V-230V

1

*

57

360-660F

ARMATURE 240V

1

58

323-083

FAN GUIDE

1

59

980-864

HEX. HD. TAPPING SCREW D5X40

2

*

60

340-593C

STATOR ASS’Y 110V-115V

1

INCLUD. 61

*

60

340-593E

STATOR ASS’Y 220V-230V

1

INCLUD. 61

*

60

340-593F

STATOR ASS’Y 240V

1

INCLUD. 61

61

930-703

BRUSH TERMINAL

2

62

982-631

WASHER (A)

1

63

608-VVM

BALL BEARING 608VVC2PS2L

1

64

NAME PLATE

1

65

323-082

HOUSING ASS’Y

1

INCLUD. 66, 73

66

958-900

BRUSH HOLDER

2

67

999-056

CARBON BRUSH (1 PAIR)

2

68

945-161

BRUSH CAP

2

69

323-092

HANDLE (B)

1

70

994-192

HEX. SOCKET HD. BOLT (W/FLANGE) M5X16

2

71

302-089

TAPPING SCREW (W/FLANGE) D5X20 (BLACK)

2

72

307-028

TAPPING SCREW (W/FLANGE) D4X25 (BLACK)

3

73

938-477

HEX. SOCKET SET SCREW M5X8

2

74

323-085

TAIL COVER

1

75

307-811

TAPPING SCREW (W/FLANGE) D4X16 (BLACK)

2

76

994-190

INTERNAL WIRE

1

77

321-322

VINYL TUBE

1

78

317-492

SUPPORT (B)

1

79

323-086

SWITCH (1P PILLAR TYPE)

1

80

323-091

HANDLE (A)

1

81

953-327

CORD ARMOR D8.8

1

FOR CORD

82

960-266

CORD CLIP

1

83

984-750

TAPPING SCREW (W/FLANGE) D4X16

2

84

310-111

BEARING BUSHING (B)

1

85

959-140

CONNECTOR 50091 (10 PCS.)

1

86

994-273

NOISE SUPPRESSOR

1

87

317-492

SUPPORT (B)

1

*

88

500-390Z

CORD

1

CORD ARMOR D8.8

*

88

500-446Z

CORD

1

CORD ARMOR D8.8 FOR GBR (230V)

*

88

500-454Z

CORD

1

CORD ARMOR D8.8 FOR GBR (110V)

*

88

500-439Z

CORD

1

CORD ARMOR D8.8 FOR AUS

Summary of Contents for H 25PV

Page 1: ...TECHNICAL DATA AND SERVICE MANUAL DEMOLITION HAMMER H 25PV SPECIFICATIONS AND PARTS ARE SUBJECT TO CHANGE FOR IMPROVEMENT LIST No E477 May 2004 H MODEL H 25PV Hitachi Power Tools ...

Page 2: ...is TECHNICAL DATA AND SERVICE MANUAL a symbol is used in the place of company name and model name of our competitor The symbol utilized here is as follows Symbol Utilized Competitor Company Name Model Name MAKITA HK1810 C ...

Page 3: ...ECAUTIONS IN SALES PROMOTION 7 7 1 Handling Instructions 7 7 2 Caution Plate 7 7 3 Grease Replacement 7 7 4 O Ring Replacement 7 8 REFERENCE INFORMATION 8 8 1 Striking Operation 8 8 2 Idling proof Mechanism 9 8 3 Sealed and Dustproof Construction 9 8 4 Tool Retainer 10 8 5 Adjusting Mechanism for Tool Swivel Angle 10 9 REPAIR GUIDE 11 9 1 Precautions and Suggestions for Disassembly and Reassembly ...

Page 4: ...ver for easier handling 4 Simply turning method variable lock mechanism for easy working angle adjustment of chisels etc 5 Trigger variable switch with dial speed control 6 A very original design 3 APPLICATIONS Stripping mortar and tiles Demolishing and chiseling of concrete Grooving and cutting bricks 4 SELLING POINTS High chipping and demolishing performance with low vibration and low noise leve...

Page 5: ...y the movement of sleeve A provided around the cylinder that interlocks with the tool and the second hammer to prevent idle hammering This mechanism securely prevents idle hammering even in wall hammering works or even if a tool that can cause great rebound on the striker such as a cutter is used Thanks to the highly reliable mechanism for prevention of idle hammering the service life of the Model...

Page 6: ...230 V 2 2 A 240 V 500 W No load 4 100 min 1 Full load 3 200 min 1 Product 3 2 kg 7 1 lbs excluding cord Packed 6 0 kg 13 2 lbs Corrugated cardboard box with plastic tool case Plastic case 1 Single phase AC 50 60 Hz 110 V 230 V 240 V AC single phase series commutator motor Double insulation Power source Voltage Motor type Insulation structure Enclosure 5 SPECIFICATIONS Switch Type of handles Full l...

Page 7: ...ging work 2 Bull point round type Overall length 250 mm 10 250 mm 10 Bull point square type Bull point round type Code No 303046 316656 1 Cold chisel 2 Cutter Overall length 250 mm 10 250 mm 10 Grooving chisel Code No 316657 316658 Width 20 mm 1 9 16 40 mm 25 32 5 1 3 Grooving work Overall length 250 mm 10 Code No 316659 ...

Page 8: ...e for impact drill Note Code numbers listed above are subject to change Please refer to periodic Technical News Bulletins 500 g 1 1 lbs Can 70 g 2 5 oz Tube Code No 308471 Code No 980927 30 g 1 oz Tube Code No 981840 ...

Page 9: ... HITACHI 500 0 to 4 0 720 0 to 5 2 kg dB A Insulation structure No load noise level Weight without cord and side handle Double insulation Double insulation C 0 to 3 200 0 to 3 800 320 12 5 8 195 7 23 32 102 4 395 15 9 16 226 8 7 8 102 4 Length Width Height 3 2 7 1 lbs 4 2 9 2 lbs Dimensions mm mm mm Full load vibration level dB VL dB A Full load noise level H 30PV 122 123 87 7 93 0 80 8 82 7 6 2 D...

Page 10: ...ustomer fully understands and follows these precautions before using tool For Australia 7 3 Grease Replacement The striking portion and the speed reduction portion of the Model H 25PV respectively use different types of grease Grease replacement is required if the unit is disassembled for maintenance or O rings become damaged and worn as described in 7 4 The striking portion uses special grease If...

Page 11: ...e striker to continuously strike against the end of the second hammer At the same time the air cushion effect within the air chamber absorbs the impact of the striker Should the air escape from the air chamber the air cushion effect would cease and the impact energy would not be absorbed Accordingly the O rings mounted on the striker and the piston play an extremely important role in sealing the a...

Page 12: ...orcibly moved to the position illustrated in Fig 4 by spring A and the striker moves out of striking position When this occurs the air holes located at the position unaffected by the rebound of the striker at no load are opened and the pressure within the air chamber remains unchanged even though the piston continues to reciprocate thereby preventing striking operation Fig 5 Slide sleeve A Second ...

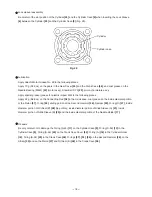
Page 13: ...Lock the tool by returning grip back to the original position Make sure it is locked completely by pulling tool in direction Fig 7 Fig 6 Tool shank Grip Front cap Fig 7 Lock sleeve Grip Fig 8 8 5 Adjusting Mechanism for Tool Swivel Angle Sliding the lock sleeve in the direction turn the grip in the direction as shown in Fig 8 Then the tip angle of the tool can be adjusted in eight levels After adj...

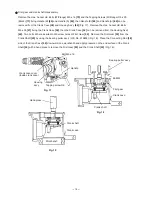
Page 14: ... engaged firmly with the Cylinder 24 pull it strongly to remove This allows Grip 2 to be separated from the Cylinder 24 Front cap Grip Fig 9 Remove the Stopper Ring 3 by means of a snap ring remover then the Ball Holder 4 two Steel Balls D7 0 23 Retainer Spring 5 and Lock Sleeve 6 can be removed from the Cylinder 24 Remove Ring A 7 by means of a snap ring remover then the Cylinder Case Cover 8 can...

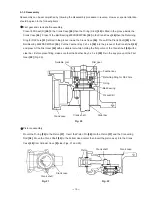
Page 15: ...d from the Cylinder Case 9 by pushing the Cylinder 24 Remove the Retaining Ring for D28 Shaft 13 from the Cylinder 24 by means of a snap ring remover then the Cylinder Holder 15 can be removed from the Cylinder 24 Remove the four Needle Rollers 18 then remove the Needle Holder 17 Needle Cover 19 Slide Sleeve B 20 and Slide Sleeve A 21 Fig 12 Fig 11 Slide sleeve B Needle cover Thrust washer Cylinde...

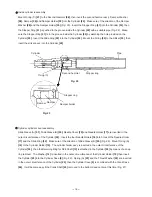
Page 16: ...g 14 Damper holder Spring hook Crank case Connecting rod Crank case cover Piston Crank shaft Fig 15 Crank case Connecting rod Crank shaft Fig 16 Inside cylinder disassembly Remove the Striker 33 and the Slide Ring 32 from inside Cylinder 24 Fig 13 Remove the Stopper Ring 31 from the groove inside Cylinder 24 by striking the Stopper Ring 31 through the hole provided on Cylinder 24 Next take out the...

Page 17: ...Ass y 65 Two bolts M5 are inserted in M5 screw holes of First Gear 52 Remove the First Gear 52 from the Crank Shaft 40 by using the bearing puller ass y J30 No 970804 Fig 18 Place the Connecting Rod 38 side of the Crank Case 46 downward on a workbench and apply pressure on the end surface of the Crank Shaft 40 with a hand press to remove the First Gear 52 and the Crank Shaft 40 Fig 19 Fig 17 Bolt ...

Page 18: ... 3 x 3 x 8 39 into the groove of the Crank Shaft 40 and press fit the First Gear 52 with a suitable tool while holding the flat portion of the Crank Shaft 40 with a steel bar Before press fitting make sure that the Feather Key 3 x 3 x 8 39 fits in the key groove of the First Gear 52 Fig 20 Fig 20 Ball bearing Oil seal B Retaining Ring for D32 hole O ring Feather key Suitable tool First gear Steel ...

Page 19: ...cumference of the Cylinder 24 then the Cylinder Case 9 is combined with the Crank Case 46 It will become easy if the Crank Shaft 40 is moved to the bottom dead center at this time Fig 27 Fig 24 Inside cylinder reassembly Mount O ring C 27 to the Second Hammer 26 then insert the second hammer ass y Damper Washer 28 Damper 29 and Damper Holder 30 into the Cylinder 24 Make sure of the direction of th...

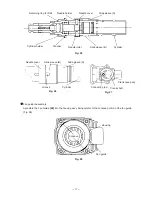
Page 20: ...on of the fan guide Fig 28 Concave Fan guide Housing Fig 28 Fig 25 Slide sleeve B Cylinder Slide sleeve A Retaining ring for D28 Needle holder Needle roller Cylinder holder Washer Needle cover Needle cover Cylinder Groove Slide sleeve A Slide sleeve B Fig 26 Fig 27 Connecting rod Crank shaft Crank case ass y ...

Page 21: ... 53 motor ass y Steel Ball D7 0 23 pinion of armature ass y Apply special grease grease for electric impact drill to the following places Apply 22 g 0 88 oz on the Connecting Rod 38 in the crank case coat grease on the inside diameter portion of the Piston 37 O ring 35 sliding portion of the Second Hammer 26 Damper 29 O ring C 27 inside diameter portion of Oil Seal B 48 lip portion inside diameter...

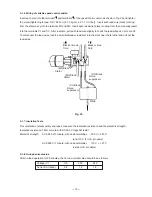
Page 22: ...river into the slots near the terminal and pull out the lead wires 9 1 7 Insulation Tests On completion of disassembly and repair measure the insulation resistance and the dielectric strength Insulation resistance 7 MΩ or more with DC 500 V megohm tester Dielectric strength AC 4 000 V 1 minute with no abnormalities 220 V 240 V and 110 V for U K products AC 2 500 V 1 minute with no abnormalities 11...

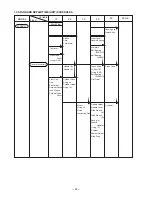
Page 23: ...r General Assembly Front Cap Grip Ball Holder Retainer Spring Lock Sleeve Cylinder Case Cover Needle Holder Needle Cover Slide Sleeve B Slide Sleeve A Spring A Second Hammer O ring C Damper Damper Holder Slide Ring Housing Ass y Stator Ass y Handle B Handle A Crank Shaft Oil Seal B O ring S 32 Ball Bearing 6002DD First Gear Crank Case Striker O ring x 2 Piston Connecting Rod Crank Case Cover O rin...

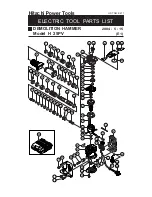
Page 24: ...E1 Hitachi Power Tools 1 10 11 12 13 14 15 16 17 26 27 28 29 30 31 32 33 34 35 36 37 38 44 45 40 48 49 50 51 52 53 54 55 56 57 58 59 60 61 62 63 64 65 66 67 68 69 501 70 71 72 73 77 76 80 82 81 85 86 87 88 83 74 75 47 39 43 42 41 18 19 20 21 22 23 24 25 2 3 4 5 6 7 8 9 46 84 78 79 ...

Page 25: ... SLEEVE A 1 22 323 067 SPRING A 1 23 959 156 STEEL BALL D7 0 10 PCS 2 24 323 056 CYLINDER 1 25 323 068 THRUST WASHER 1 26 323 057 SECOND HAMMER 1 27 323 058 O RING C 1 28 323 059 DAMPER WASHER 1 29 323 060 DAMPER 1 30 323 061 DAMPER HOLDER 1 31 323 062 STOPPER RING 1 32 323 063 SLIDE RING 1 33 323 066 STRIKER 1 34 319 577 O RING I D 19 2 1 35 319 577 O RING I D 19 2 1 36 319 581 PISTON PIN 1 37 31...

Page 26: ...BRUSH HOLDER 2 67 999 056 CARBON BRUSH 1 PAIR 2 68 945 161 BRUSH CAP 2 69 323 092 HANDLE B 1 70 994 192 HEX SOCKET HD BOLT W FLANGE M5X16 2 71 302 089 TAPPING SCREW W FLANGE D5X20 BLACK 2 72 307 028 TAPPING SCREW W FLANGE D4X25 BLACK 3 73 938 477 HEX SOCKET SET SCREW M5X8 2 74 323 085 TAIL COVER 1 75 307 811 TAPPING SCREW W FLANGE D4X16 BLACK 2 76 994 190 INTERNAL WIRE 1 77 321 322 VINYL TUBE 1 78...

Page 27: ...ESSORIES ITEM NO CODE NO DESCRIPTION REMARKS NO USED H 25PV 501 323 090 CASE 1 601 981 840 GREASE A FOR HAMMER HAMMER DRILL 30G 1 602 308 471 GREASE FOR HAMMER HAMMER DRILL 70G 1 603 980 927 GREASE FOR HAMMER HAMMER DRILL 500G 1 604 303 046 BULL POINT SDS 250MM ROUND SHANK TYPE 1 Printed in Japan 040515N ...

Page 28: ......

Reviews: