


Q
u
ick O
p
e
ratio
n (E
ngl
ish
)
5
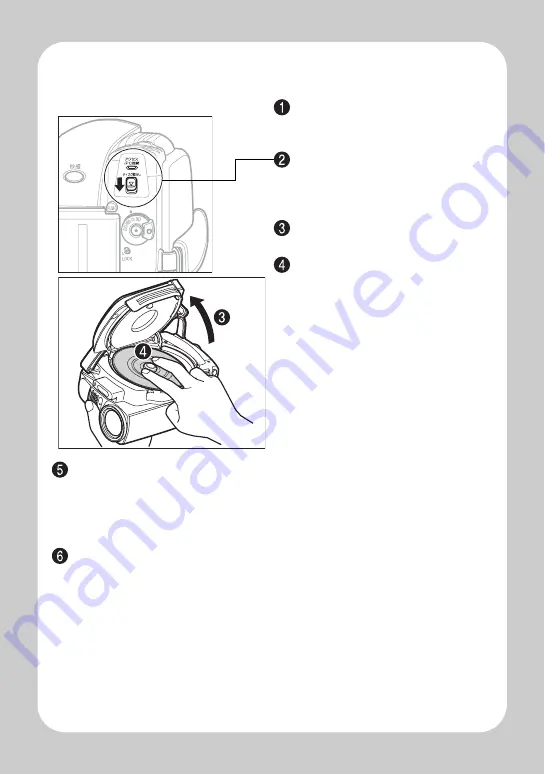
Inserting a DVD
Close the lid.
After the lid is closed all the way, the camcorder will attempt to recognize the
DVD. During this recognition process, the access/PC indicator flashes. While
this is happening, do not remove the power source, shake the camcorder, or
subject it to impact.
When you insert a new DVD-RW/+RW and the message which prompts you
to format the disc appears, format the disc (p.6).
You can record on a DVD-RAM/DVD-R without formating.
Attach the charged battery pack to
the camcorder, or connect the
camcorder to a power outlet.
Turn the power switch to "
切
",
then press down the disc eject
switch until the access/PC indicator
lights, then release.
After several seconds, the lid pops
open. Open it fully with your hand.
Place the recording surface of the
DVD face down, then push down
on the center of the DVD until it
clicks into place.
• For single-sided discs, the side
opposite the label is the recording
surface.
• To record on the other side for
double-sided discs, remove the
disc (p.6), flip it over, and then
reload it.


