Configuration
7–21
Hitachi AMS 2100/2300 Storage System Hardware Guide
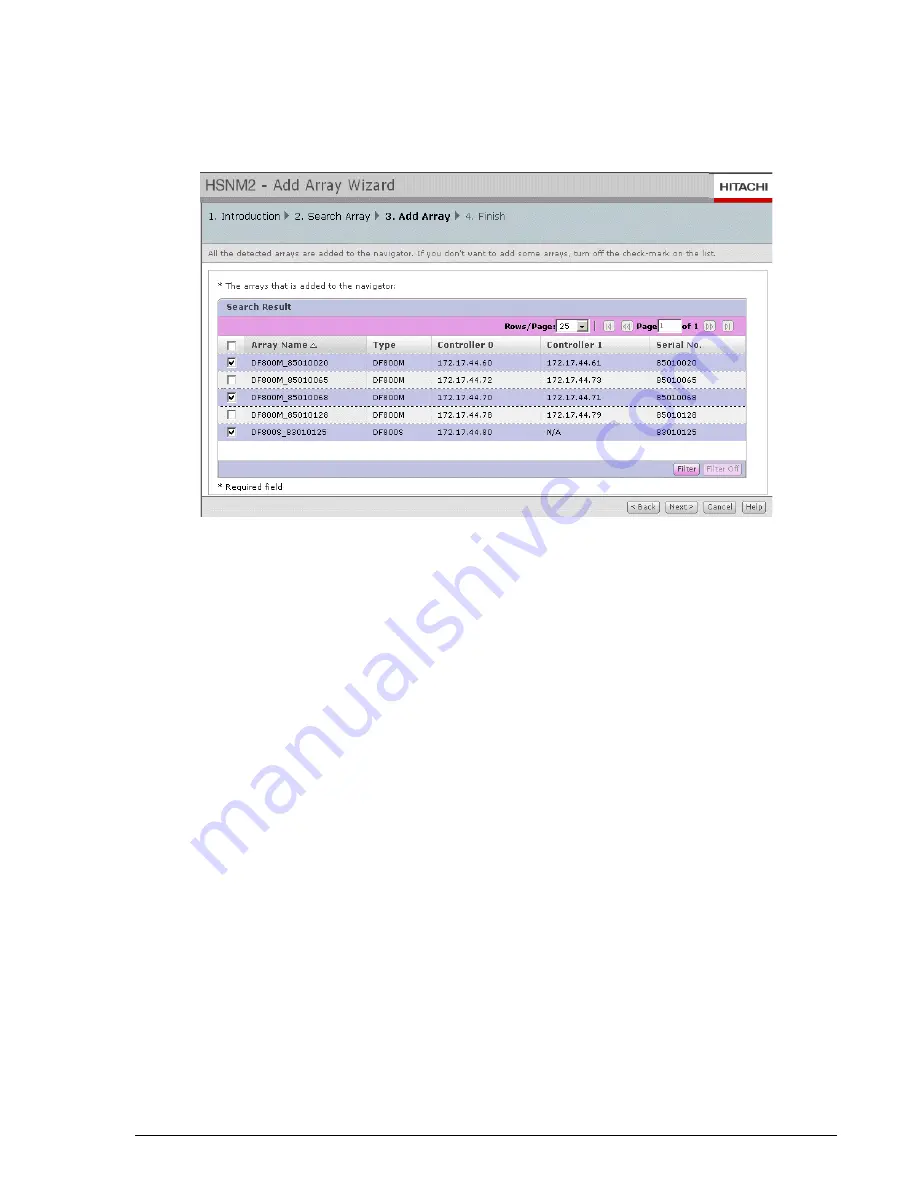
Add array screen
This screen displays the results of the search that was specified in the
Search Array screen. Use this screen to select the arrays you want to add
to Navigator 2.
1. If you entered a specific IP address in the Search Array screen, that
array is automatically registered in Navigator. Click Next to continue to
the Finish screen. A message box confirming that the array has been
added is displayed.
2. If you entered a range of IP addresses in the Search Array screen, all of
the arrays within that range are displayed in this screen, as shown in the
next illustration.
3. When the list of arrays is displayed, all the arrays in the list are
automatically selected. Click the checkbox to the left of the array name
to deselect the array.
4. Click Next to add the selected arrays to the Navigator 2 database and
continue to the Finish screen.
Finish screen
This screen displays a message confirming that the arrays have been added
to Navigator 2. Click Finish to acknowledge the message and close the Add
Array wizard.
Navigator 2 refreshes the Array List window and displays the arrays that you
added.
Summary of Contents for AMS 2100
Page 20: ...xx Preface Hitachi AMS 2100 2300 Storage System Hardware Guide ...
Page 28: ...1 8 Introduction Hitachi AMS 2100 2300 Storage System Hardware Guide ...
Page 50: ...1 30 Introduction Hitachi AMS 2100 2300 Storage System Hardware Guide ...
Page 176: ...5 58 Installation Hitachi AMS 2100 2300 Storage System Hardware Guide ...
Page 240: ...7 58 Configuration Hitachi AMS 2100 2300 Storage System Hardware Guide ...
Page 278: ...10 6 Upgrading the firmware Hitachi AMS 2100 2300 Storage System Hardware Guide ...
Page 292: ...B 6 Regulatory information Hitachi AMS 2100 2300 Storage System Hardware Guide ...
Page 304: ...Index 4 Hitachi AMS 2100 2300 Storage System Hardware Guide ...
Page 305: ...Hitachi AMS 2100 2300 Storage System Hardware Guide ...


