background image

6.   Non usare la batteria per uno scopo diverso da quelli 

speci

fi

 cati.

7.  Se la ricarica della batteria non si completa anche 

quando è passato un tempo di ricarica speci

fi

 cato, 

interrompere immediatamente la ricarica.

8.  Non mettere o sottoporre la batteria a temperature 

elevate o ad alta pressione come in un forno 

microonde, essicatore o contenitore ad alta pressione.

9.   Tenere immediatamente lontano dal fuoco quando si 

rilevano perdite o maleodore.

10.  Non usare in un luogo dove viene generata forte 

elettricità statica.

11. Se si veri

fi

 ca la perdita delle batterie, maleodore, 

generazione di calore, scolorimento o deformazione, 

o se appaiono anormalità di qualsiasi natura durante 

l’uso, la ricarica o la conservazione, rimuoverla 

immediatamente dall’apparecchio o carica batteria, e 

interrompere l’uso.

ATTENZIONE

1.  Se il liquido che fuoriesce dalla batteria entra negli 

occhi, non sfregare gli occhi e lavarli bene con acqua 

fresca e pulita come acqua di rubinetto e contattare 

immediatamente un medico.

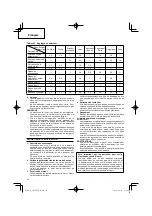
CARATTERISTICHE

UTENSILE


ELETTRICO

Velocità a vuoto

5000-35000 min

–1

Capacità del collare del mandrino

3,2 mm

Batterie rechargeable

BCL1015: Li-ion 10,8 V / Picco 12 V (1,5 Ah 3 celle)

Peso

0,48 kg

CARICATORE

Modello

UC10SFL

Votaggio di carica

10,8 V

Peso

0,35 kg

ACCESSORI


STANDARD

GP10DL 

(2LCSK)

Accessori × 40 pezzi ....................... 1

Batteria (BCL1015) .......................... 2

Caricatore (UC10SFL) ..................... 1

Custodia in plastica ......................... 1

Coperchio per la batteria ................. 1

GP10DL 

(LCSK)

Accessori × 40 pezzi ....................... 1

Batteria (BCL1015) .......................... 1

Caricatore (UC10SFL) ..................... 1

Custodia in plastica ......................... 1

GP10DL 

(NN)

Accessori × 40 pezzi ....................... 1

Per dettagli sugli accessori, si rimanda alla sezione 

“Accessori in dotazione”.

Gli accessori standard possono essere cambiati senza 

preavviso.

  Se non viene trattato, il liquido può causare problemi 

agli occhi.

2.  Se il liquido fuoriesce sulla pelle o gli abiti, lavare 

bene con acqua pulita come l’acqua del rubinetto 

immediatamente.

  C’è una possibilità che possa causare irritazione alla 

pelle.

3.  Se trovate ruggine, maleodore, surriscaldamento, 

scolorimento, deformazione, e/o altre irregolarità 

quando si utilizza la batteria per prima volta, non usarla 

e restituirla al fornitore o venditore.

AVVERTENZA

Se un oggetto estraneo conduttivo di elettricità entra nei 

terminali della batteria agli ioni di litio, potrebbe veri

fi

 carsi 

un  corto  circuito  causando  il  rischio  di  un  incendio. 

Osservate le seguenti precauzioni quando ritirate la 

batteria.


Non


posizionate


trucioli,


chiodi,


cavi


in


acciaio,


rame


o


altri


cavi


conduttivi


di


elettricità


nella


custodia.


Installate


la


batteria


nell’utensile


elettrico


o


conservatela


premendola


contro


il


coperchio


per


la


batteria

  fi 

nché


i


fori


di


ventilazione


vengono


coperti


per


impedire


corto

-

circuiti.


(Vedere


Fig.


3)

Italiano

40

000Book̲GP10DL̲WE.indb   40

000Book̲GP10DL̲WE.indb   40

2010/04/23   16:12:09

2010/04/23   16:12:09

Summary of Contents for GP 10DL

Page 1: ...eusement et bien assimiler ces instructions avant usage Prima dell uso leggere attentamente e comprendere queste instruzioni Deze gebruiksaanwijzing s v p voor gebruik zorgvuldig doorlezen Leer cuidadosamente y comprender estas instrucciones antes del uso Antes de usar leia com cuidado para assimilar estas instruções Handling instructions Bedienungsanleitung Mode d emploi Istruzioni per l uso Gebr...

Page 2: ...2 6 7 8 9 6 7 0 6 3 1 2 4 5 q w r e t y r u i a b c 1 2 3 4 5 6 7 8 000Book GP10DL WE indb 2 000Book GP10DL WE indb 2 2010 04 23 16 12 06 2010 04 23 16 12 06 ...

Page 3: ...t Einsetzen Insérer Inserire Pilot lamp Kontrollampe Lampe témoin Spia Hole for connecting the rechargeable battery Anschluss für aufladbare Batterie Orifice de raccordemente de la batterie rechargeable Foro di collegamento della batteria ricaricabile Screw type mandrel Schraubstift Mandrin de type vis Mandrino del tipo ad avvitamento Flange Flansch Collet Flangia Wheel mandrel Radstift Mandrin à ...

Page 4: ...ça Drukken Presionar Empurrar Insteken Insertar Inserir Controlelampje Lámpara piloto Lâmpada piloto Aansluiting voor oplaadbare batterij Agujero para conectar la batería recargable Orifício para conectar a bateria recarregável Schroeftype as Mandril tipo tornillo Mandril tipo parafuso Flens Brida Flange Schijfas Mandril de tren de ruedas Mandril do disco Inschroef eind Extremo atornillable Parafu...

Page 5: ...Solo per Paesi UE Non gettare le apparecchiature elettriche tra i rifiuti domestici Secondo la Direttiva Europea 2002 96 CE sui rifiuti di apparecchiature elettriche ed elettroniche e la sua attuazione in conformità alle norme nazionali le apparecchiature elettriche esauste devono essere raccolte separatamente al fine di essere reimpiegate in modo eco compatibile Symbolen WAARSCHUWING Hieronder st...

Page 6: ...attery pack picking up or carrying the tool Carrying power tools with your finger on the switch or energising power tools that have the switch on invites accidents d Remove any adjusting key or wrench before turning the power tool on A wrench or a key left attached to a rotating part of the power tool may result in personal injury e Do not overreach Keep proper footing and balance at all times Thi...

Page 7: ...damaged accessory After inspecting and installing an accessory position yourself and bystanders away from the plane of the rotating accessory and run the power tool at maximum no load speed for one minute Damaged accessories will normally break apart during this test time h Wear personal protective equipment Depending on application use face shield safety goggles or safety glasses As appropriate w...

Page 8: ...ctly at you c When wheel is binding or when interrupting a cut for any reason switch off the power tool and hold the power tool motionless until the wheel comes to a complete stop Never attempt to remove the cut off wheel from the cut while the wheel is in motion otherwise kickback may occur Investigate and take corrective action to eliminate the cause of wheel binding d Do not restart the cutting o...

Page 9: ...ttery remove any swarf and dust that may adhere to it and do not store it together with metal parts screws nails etc 2 Do not pierce battery with a sharp object such as a nail strike with a hammer step on throw or subject the battery to severe physical shock 3 Do not use an apparently damaged or deformed battery 4 Do not use the battery in reverse polarity 5 Do not connect directly to an electrica...

Page 10: ...e point φ4 8 mm 1 4 8 mm High speed cutter φ3 2 mm 1 3 2 mm Drill φ3 2 mm 1 3 2 mm Felt polishing wheel φ12 7 mm 4 12 7 mm Felt polishing wheel φ25 4 mm 2 25 4 mm Sanding band φ12 7 mm 60 grit 6 12 7 mm 60 grit Sanding band φ12 7 mm 120 grit 2 12 7 mm 120 grit Cutting wheel φ23 8 t0 6 6 23 8 mm 0 6 mm Cutting wheel φ23 8 t1 0 2 23 8 mm 1 0 mm Aluminium oxide grinding wheel φ22 2 1 22 2 mm Sanding ...

Page 11: ...charger Position the battery so that the nameplate faces toward the nameplate of the charger and press in the battery until it comes into contact with the bottom plate See Fig 5 Inserting the battery will turn on the charger the pilot lamp lights up CAUTION If the pilot lamp does not light up pull out the power cord from the receptacle and check the battery mounting condition The pilot lamp goes o...

Page 12: ...If this happens with the collet nut loosened press the end of the tool lightly against a hard object Fig 10 5 Balance adjustment of the tip tool After attaching the tip tool operate the grinder at low speed If the balance is not right follow the procedure below to adjust the balance Loosen the collet nut while pressing the lock button Next rotate the tip tool by 1 4 and tighten the collet nut Oper...

Page 13: ... winding is the very heart of the power tool Exercise due care to ensure the winding does not become damaged and or wet with oil or water 4 Cleaning of the outside When the grinder is stained wipe with a soft dry cloth or a cloth moistened with soapy water Do not use chloric solvents gasoline or paint thinner for they melt plastics 5 Storage Store the grinder in a place in which the temperature is...

Page 14: ...en measured in accordance with a standard test method and may be used for comparing one tool with another It may also be used in a preliminary assessment of exposure WARNING The vibration emission during actual use of the power tool can differ from the declared total value depending on the ways in which the tool is used To identify safety measures to protect the operator that are based on an estima...

Page 15: ...rieb des Elektrowerkzeuges in feuchter Umgebung nicht vermeiden lässt verwenden Sie eine Stromversorgung mit Fehlerstromschutzeinrichtung Residual Current Device RCD Durch den Einsatz einer Fehlerstromschutzeinrichtung wird das Risiko eines elektrischen Schlages reduziert 3 Persönliche Sicherheit a Bleiben Sie wachsam achten Sie auf das was Sie tun und setzen Sie Ihren Verstand ein wenn Sie mit El...

Page 16: ... Batterieflüssigkeiten können zu Reizungen oder Verbrennungen führen 6 Service a Lassen Sie Elektrowerkzeuge durch qualifizierte Fachkräfte und unter Einsatz passender zugelassener Originalteile warten Dies sorgt dafür dass die Sicherheit des Elektrowerkzeugs nicht beeinträchtigt wird VORSICHT Von Kindern und gebrechlichen Personen fernhalten Werkzeuge sollten bei Nichtgebrauch außerhalb der Reich...

Page 17: ...flüssige Kühlmittel erfordern Die Verwendung von Wasser oder anderen flüssigen Kühlmitteln kann zu einem elektrischen Schlag oder Schock führen RÜCKSCHLAG UND DAZU GEHÖRIGE SICHERHEITSHINWEISE Rückschlag ist die plötzliche Reaktion infolge eines Verklemmens oder Verhakens eines drehenden Schleifkörpers eines Schleiftellers oder einer Drahtbürste etc Dieses Verklemmen oder Verhaken führt zu einem p...

Page 18: ...er Sollgeschwindigkeit des Schleifers übereinstimmt oder diese übertrifft Achten Sie darauf dass die Abmessungen der Scheibe mit dem Schleifer kompatibel sind Schleifscheiben müssen sorgfältig und in Übereinstimmung mit den Anweisungen des Herstellers gelagert und verwendet werden Überprüfen Sie die Schleifscheibe vor dem Einsatz verwenden Sie keine angeschlagenen gebrochenen oder sonstwie defekte ...

Page 19: ...gen Lagern Sie ungebrauchte Batterien nicht an Plätzen an denen Staub oder Späne anfallen Vor dem Einlagern einer Batterie sind sämtlicher Staub und Späne zu entfernen Weiterhin ist zu berücksichtigen dass die Batterie nicht gemeinsam mit Metallteilen Schrauben Nägel usw zu lagern ist 2 Achten Sie darauf dass die Batterie nicht durch einen spitzen Gegenstand beispielsweise einen Nagel beschädigt w...

Page 20: ...L 2LCSK 1 Zubehöre 40 Stk 1 2 Batterie BCL1015 2 3 Ladegerät UC10SFL 1 4 Plastikgehäus 1 5 Batterieabdeckung 1 GP10DL LCSK 1 Zubehöre 40 Stk 1 2 Batterie BCL1015 1 3 Ladegerät UC10SFL 1 4 Plastikgehäus 1 GP10DL NN 1 Zubehöre 40 Stk 1 Details zu den Aufsätzen finden Sie in Mitgelieferte Aufsätze Das Standardzubehör kann ohne vorherige Bekanntmachung jederzeit geändert werden Deutsch 20 000Book GP10...

Page 21: ...chmuck und Metallen Wählen Sie für das Werkstück die passende Größe aus Geeignet für Aufgaben wie das Formen von Holz und die Endbearbeitung von Modellen Schleifen Sie in zwei Arbeitsgängen mit verschiedenen Körnungen um eine gute Oberflächenbearbeitung zu erreichen Spitzenaufsatz aus Aluminiumoxyd φ15 9 mm 1 15 9 mm Spitzenaufsatz aus Silikonkarbid φ 4 8 mm 1 4 8 mm Hochgeschwindigkeitsschneider ...

Page 22: ...MEN EINSETZEN DER BATTERIE 1 Herausnehmen der Batterie Den Handgriff festhalten und die Batterieverriegelungen drücken um die Batterie herauszunehmen siehe Abb 3 und 4 ACHTUNG Die Kontakte des Batterie niemals kurzschließen 2 Einsetzen des Batterie Den Batterie unter Beachtung der richtigen Richtung in das Gerät einsetzen siehe Abb 4 LADEN Vor Gebrauch des Akku Werkzeugs den Akkumulator wie folgt l...

Page 23: ...e Spannfuttermutter fest sitzt benutzen Sie den mitgelieferten Spannfutterspanner um sie zu lockern Eisenstaub auf der Spannfuttermutter am Spannfutter oder auf der Wellenschraube kann verursachen dass sich die Spannfuttermutter schwer drehen lässt Abb 8 Achten Sie darauf vor dem Anbringen bzw Abnehmen des Spitzenaufsatzes den Staub zu entfernen HINWEIS Gelegentlich lässt sich der Werkzeugaufsatz ...

Page 24: ...PEKTION 1 Inspizieren der Zubehöre Die Benutzung eines Spitzenaufsatzes bzw einer Spindel mit einem abgenutzten oder beschädigten Ende bringt nicht nur eine schlechte Endbearbeitung sondern belastet auch den Motor unnötig wodurch die Effizienz verringert wird und ein Schaden oder Verletzungen verursacht werden können Tauschen Sie den Spitzenaufsatz oder die Spindel aus wenn diese abgenutzt oder besc...

Page 25: ... Entwicklung sprogramms von HITACHI sind änderungen der hierin gemachten technischen Angaben vorbehalten Information über Betriebslärm und Vibration Die gemessenen Werte wurden entsprechend EN60745 bestimmt und in Übereinstimmung mit ISO 4871 ausgewiesen Gemessener A gewichteter Schallpegel 73 dB A Gemessener A gewichteter Schalldruck 62 dB A Messunsicherheit KpA 3 dB A Bei der Arbeit immer einen ...

Page 26: ...uence de drogues d alcool ou de médicaments Pendant l utilisation d outils électrique un instant d inattention peut entraîner des blessures graves b Utiliser un équipement de protection individuelle Toujours porter des verres de protection L utilisation d équipements de protection tels que les masques anti poussière les chaussures de sécurité anti dérapantes les casques ou les protections auditive...

Page 27: ...ilisation de cet appareil à une fin autre que celles prévues est dangereuse et peut provoquer une blessure corporelle c N utilisez pas d accessoires autres que ceux spécifiquement désignés et recommandés par le fabricant Le fait de pouvoir fixer un accessoire sur l appareil ne signifie pas que son utilisation est sécurisée d La vitesse nominale de l appareil doit être au moins égale à la vitesse m...

Page 28: ... l outil dans la direction opposée au mouvement de la meule au point de pincement d Faites particulièrement attention lorsque vous travaillez sur des coins ou des rebords tranchants etc Evitez de faire rebondir l accessoire et de le coincer Les coins rebords tranchants ou les rebonds ont tendance à coincer l accessoire en rotation provoquant une perte de contrôle ou un recul e Ne fixez pas de scie...

Page 29: ...ctuée laissez le chargeur au repos pendant environ 15 minutes avant de commencer la prochaine charge de batterie Ne pas charger la batterie pendant plus de 2 heures Ne laissez pas de corps étrangers pénétrer par le trou de raccord de la batterie rechargeable Ne désassemblez jamais la batterie rechargeable et le chargeur Ne court circuitez jamais la batterie rechargeable Le fait de cour circuiter l...

Page 30: ...BCL1015 2 3 Chargeur UC10SFL 1 4 Boîtier en plastique 1 5 Couvercle de batterie 1 GP10DL LCSK 1 Accessoires 40 pièces 1 2 Batterie BCL1015 1 3 Chargeur UC10SFL 1 4 Boîtier en plastique 1 GP10DL NN 1 Accessoires 40 pièces 1 Pour plus d informations sur les accessoires reportez vous à la section Accessoires fournis Les accessoires standard sont sujets à changement sans préavis PRECAUTION 1 En cas de...

Page 31: ...des surfaces métalliques Utiliser pour le brillantage des bijoux et métaux Choisir la taille adaptée à la pièce à usiner Adapté aux tâches telles que le façonnage du bois et la finition de maquettes Meuler en deux étapes avec différents grains afin d obtenir une bonne finition Pointe en oxyde d aluminium φ15 9 mm 1 15 9 mm Pointe en carbure de silicium φ4 8 mm 1 4 8 mm Outil de coupe à haute vitess...

Page 32: ...e Maintenir fermement la poignée et pousser le taquet de la batterie pour l enlever Voir Fig 3 et 4 ATTENTION Ne jamais court circuiter la batterie 2 Mise en place de la batterie Insérer la batterie tout en respectant la polarité voir Fig 4 CHARGE Avant d utiliser la perceuse épectrique chargez la batterie comme suit 1 Brancher le cordon d alimentation du chargeur à la prise secteur 2 Insérer la b...

Page 33: ...t la vis à collet ou la vis sans tête peut gêner les rotations de l écrou à collet Fig 8 Veiller à bien ôter la poudre avant de fixer l outil à pointe ou de le démonter REMARQUE La pointe de l outil peut parfois être difficile à détacher du collet Dans une telle situation desserrez l écrou à collet et appuyez légèrement l extrémité de l outil contre un objet dur Fig 10 5 Equilibrage de l outil à poi...

Page 34: ...tes les vis de fixation Vérifiez régulièrement toutes les vis de fixation et assurez vous qu elles sont bien serrées S il advient qu une vis se desserre la resserrer immédiatement Le fait de négliger ce point pourrait entrainer de sérieux dangers 3 Entretien du moteur Le bobinage de l ensemble moteur est le cœur même de l outil électro portatif Tableau 2 Réglages du sélecteur Veiller soigneusement...

Page 35: ...ustique pondérée A 62 dB A Incertitude KpA 3 dB A Porter une protection de l ouïe Valeurs totales des vibration somme vectorielle triaxiale déterminée conformément à EN60745 Meulage de finition Valeur d émission de vibration ah SG 2 2 m s2 Incertitude K 1 5 m s2 La valeur totale des vibrations déclarées a été mesurée conformément à une méthode d essai standard qui peut être utilisée pour la compar...

Page 36: ...one personale Indossate sempre le protezioni oculari L attrezzatura protettiva quali maschera facciale calzature antiscivolo caschi o protezioni oculari ridurrà il rischio di lesioni personali c Impedite le accensioni involontarie Prima del collegamento a una sorgente di alimentazione e o pacco batteria e prima di raccogliere o trasportare l utensile verificate che l interruttore sia posizionato s...

Page 37: ... non siano specificatamente progettati e raccomandati dal produttore dell utensile Il solo fatto che l accessorio possa essere fissato all utensile elettrico non significa che ne garantisca un funzionamento sicuro d La velocità nominale dell accessorio deve essere almeno uguale alla velocità massima contrassegnata sull utensile elettrico Gli accessori utilizzati ad una velocità superiore a quella ...

Page 38: ...ostra mano c Non posizionate il vostro corpo nella zona dove si sposterà l utensile se si verifica il rinculo Il rinculo spingerà l utensile nella direzione opposta al movimento della mola al punto di impigliamento d Fate particolare attenzione quando lavorate angoli estremità appuntite ecc Evitate di far saltare e impigliare l accessorio Gli angoli le estremità appuntite o gli sballottamenti hann...

Page 39: ...o della batteria ricaricabile Non smontare mai la batteria ricaricabile e il caricatore Non provocare assolutamente mai dei cortocircuiti alla batteria ricaricabile Il fenomeno provoca surriscaldamento e grande corrente electrica Può quindi causare bruciature o danni alla batteria Non gettare la batteria nel fuoco Può esplodere Quando si esegue la trapanatura in una parete pavimento o soffitto verif...

Page 40: ...ssori 40 pezzi 1 2 Batteria BCL1015 2 3 Caricatore UC10SFL 1 4 Custodia in plastica 1 5 Coperchio per la batteria 1 GP10DL LCSK 1 Accessori 40 pezzi 1 2 Batteria BCL1015 1 3 Caricatore UC10SFL 1 4 Custodia in plastica 1 GP10DL NN 1 Accessori 40 pezzi 1 Per dettagli sugli accessori si rimanda alla sezione Accessori in dotazione Gli accessori standard possono essere cambiati senza preavviso Se non v...

Page 41: ...talliche Utilizzare per la lucidatura a specchio di gioielli e metalli Selezionare le dimensioni adatte al pezzo da lavorare Adatto per operazioni come la sagomatura del legno e la finitura dei modelli Eseguire la smerigliatura in due fasi con numeri di grana diversi per ottenere una buona finitura della superficie Punto in ossido di alluminio φ15 9 mm 1 15 9 mm Punto in carburo di silicone φ4 8 m...

Page 42: ...ito 2 Montaggio della batteria Inserire la batteria facendo attenzione alla corretta collocazione delle polarità ved Fig 4 RICARICA Prima di usare il trapano elettrico caricare la batteria come indicato di seguito 1 Collegare il cavo del caricatore alla presa AC 2 Inserire la batteria nel caricatore Sistemare la batteria in modo che abbia l etichetta rivolta verso l etichetta del caricatore e prem...

Page 43: ...a dal collare Se dovesse succedere con il dado del collare allentato premere delicatamente l estremità dell utensile contro un oggetto duro Fig 10 5 Regolazione del bilanciamento dell utensile a punta Dopo aver fissato l utensile a punta adoperare la smerigliatrice a bassa velocità Se il bilanciamento non è corretto seguire la procedura di seguito per regolarlo Allentare il dado del collare tenend...

Page 44: ... a punta o il madrino è usurato o danneggiato sostituirlo 2 Inspezione delle viti di montaggio Ispezionare regolarmente le viti di montaggio e assicurarsi che siano ben fissate Se una di queste dovesse essere alentata riserrarla immediatamente Si rischia in caso contrario di provocare incidenti pericolosi 3 Manutenzione del motore L avvolgimento del motore il vero e proprio cuore degli attezzi ele...

Page 45: ...ato A 62 dB A KpA incertezza 3 dB A Indossare protezioni per l udito Valori totali di vibrazione somma vettori triass determinati secondo la norma EN60745 Smerigliatura di superficie Valore di emissione vibrazioni ah SG 2 2 m s2 Incertezza K 1 5 m s2 Il valore totale delle vibrazioni dichiarato è stato misurato in conformità a un metodo di test standard e può essere utilizzato per confrontare un u...

Page 46: ...geving gebruikt moet worden dient een voeding met RCD reststroom apparaat beveiliging te worden gebruikt Gebruik van een RCD vermindert de kans op een elektrische schok 3 Persoonlijke veiligheid a Blijf waakzaam let voortdurend op uw werk en gebruik uw gezond verstand wanneer u elektrisch gereedschap gebruikt Gebruik geen elektrisch gereedschap wanneer u moe bent of onder invloed van drugs alcohol...

Page 47: ...gebruikt Hierdoor kunt u erop aan dat de veiligheid van het elektrisch gereedschap behouden blijft VOORZORGMAATREGELEN Houd kinderen en kwetsbare personen op een afstand Het gereedschap moet na gebruik buiten het bereik van kinderen en andere kwetsbare personen worden opgeborgen ALGEMENE VEILIGHEIDSINSTRUCTIES VOOR SLIJPEN AFSCHUREN POLIJSTEN OF DOORSLIJPEN a Dit elektrisch gereedschap is bedoeld ...

Page 48: ...an de rand van de schijf die in het klempunt zit zich gaan vastzetten in het materiaaloppervlak waardoor de schijf omhoog kan springen of terugslaan De schijf kan in de richting van de operator of van deze vandaan springen afhankelijk van de draairichting van de schijf op het punt van klemraken Slijpschijven kunnen onder deze omstandigheden ook breken Terugslag is het resultaat van verkeerd gebrui...

Page 49: ... adapters of hulsen om slijpschijven met te grote gaten te kunnen plaatsen Controleer bij het gebruik van een van binnen bedrade schijf of het draad lang genoeg is voor de spillengte Zorg dat het werkstuk goed wordt ondersteund Gebruik geen afgezaagde schijven voor zijslijpen Zorg dat eventuele vonken niet voor schade kunnen zorgen bijvoorbeeld door tegen mensen op te spatten of door ontvlambare s...

Page 50: ...ijd verstreken is stopt u onmiddellijk met het opladen 8 Breng de accu niet op hoge temperaturen of drukken of stel ze er niet aan bloot zoals in een microgolfoven droger of een hogedrukcontainer 9 Blijf uit de buurt van vuur onmiddellijk nadat een lek of vieze geur werd vastgesteld 10 Gebruik hem niet in een plaats waar een grote statische elektriciteit wordt opgewekt 11 In geval van een acculek ...

Page 51: ...t geven van een gladde afwerking aan metalen oppervlakken Gebruik voor spiegelpolijsten van juwelen en metalen Kies de maat die geschikt is voor het werkstuk Geschikt voor taken zoals het vormen van hout en diverse afwerkingen Schuur in twee etappen met verschillende korrelnummers voor een goede afwerking van het oppervlak Aluminiumoxide punt φ15 9 mm 1 15 9 mm Siliconen hardmetalen punt φ4 8 mm 1...

Page 52: ...ik van de boor schroefamachine e d dient de batterij als volgt opgeladen te worden 1 Sluit het snoer van de oplader aan op een stopkontakt 2 Steek de accu in de oplader Plaats de accu zo dat het naamplaatje tegenover het naamplaatje van de oplader komt te liggen Druk de batterij in tot u voelt dat deze kontakt maakt met de bodemplaat Zie Afb 5 Door een batterij te plaatsen zet u de oplader aan het...

Page 53: ... verwijderen zijn Als dat het geval is en de ringmoer zit los duw dan het uiteinde van het opzetstuk voorzichtig tegen een hard voorwerp Afb 10 5 Het puntgereedschap uitbalanceren Nadat het puntgereedschap is bevestigd laat u de slijper met laag toerental draaien Als de balans niet juist is volgt u de onderstaande aanwijzingen om het puntgereedschap uit te balanceren Draai de klembusmoer los terwi...

Page 54: ... regelmatig om te verzekeren dat ze goed aangedraaid zijn Draai loszittende schroeven onmiddellijk vast Dit om ongelukken te voorkomen 3 Onderhoud van de motor De motorwikkeling is het hert van het electrishce gereedschap Er moet daarom bijzonder zorgvuldig op gelet worden dat de wikkeling niet beschadigd en or met olie or water bevochtigd wordt Tabel 2 Instellingen van de schakelaarknop 4 Reining...

Page 55: ...u 62 dB A Onzekerheid KpA 3 dB A Draag gehoorbescherming Totale trillingswaarden triax vector som bepaald overeenkomstig EN60745 Oppervlak slijpen Trillingsemissiewaarde ah SG 2 2 m s2 Onzekerheid K 1 5 m s2 De opgegeven totale trillingswaarde is gemeten overeenkomstig een standaard testmethode en kan gebruikt worden om het ene gereedschap met het andere te vergelijken De waarde kan ook gebruikt w...

Page 56: ...eléctrica No utilice una herramienta eléctrica cuando esté cansado o esté bajo la influencia de drogas alcohol o medicación La distracción momentánea cuando utiliza herramientas eléctricas puede dar lugar a importantes daños personales b Utilice un equipo de protección Utilice siempre una protección ocular El equipo de protección como máscara para el polvo zapatos de seguridad antideslizantes casc...

Page 57: ...uridad instrucciones ilustraciones y especificaciones proporcionadas con esta herramienta Si no se siguen todas las instrucciones indicadas a continuación podría producirse una descarga eléctrica un incendio y o daños graves b No se recomienda realizar operaciones como cepillado metálico con esta herramienta Las operaciones para las que no se diseñó la herramienta eléctrica podrían producir un rie...

Page 58: ...dicadas a continuación a Agarre la herramienta eléctrica firmemente y coloque el cuerpo y el brazo para que pueda resistirse a las fuerzas de retroceso Utilice siempre una agarradera auxiliar si se proporciona para un control máximo sobre el rebote o reacción del par durante la puesta en marcha El operario puede controlar las reacciones del par o las fuerzas de rebote si se toman las precauciones ...

Page 59: ...de polvo guantes casco y mono Preste atención a la rueda que sigue girando tras apagar la herramienta Siempre cargar la batería a una temperatura de 0 40 C Una temperatura inferior a 0 C causa una sobrecarga lo que es peligroso No puede cargarse la batería a una temperatura mayor de 40 C La temperatura más apropiada para cargar es la de 20 25 C No usar el cargador continuamente Cuando se completa ...

Page 60: ...emas de visión 2 Si el líquido de fuga entra en contacto con la piel o la ropa lávela bien con agua limpia como por ejemplo agua del grifo inmediatamente Podría producir irritación de la piel 3 Si observa óxido mal olor recalentamiento decoloración deformación y u otras irregularidades al utilizar la batería por primera vez no la utilice y devuélvasela a su proveedor o distribuidor ADVERTENCIA Si ...

Page 61: ...como metales Seleccionar el tamaño adecuado para la pieza de trabajo Adecuado para tareas como modelado de madera y terminar modelos Amolar en dos fases con diferentes números de granalla para obtener un buen acabado de la superficie Punto de óxido de aluminio φ15 9 mm 1 15 9 mm Punto de carburo de silicio φ4 8 mm 1 4 8 mm Cortador de gran velocidad φ3 2 mm 1 3 2 mm Broca φ3 2 mm 1 3 2 mm Rueda de...

Page 62: ...s ver la Fig 4 CARGA Antes de usar la herramienta eléctrica cargar la batería del modo siguiente 1 Conectar el cable de alimentación del cargador a la toma de CA 2 Insertar la batería en el cargador Colocar la batería de forma que la placa de características quede encarada hacia la placa de características del cargador y empujar la batería hasta que entre en contacto con la placa inferior Consulte...

Page 63: ...amienta de punta NOTA De vez en cuando tal vez sea difícil desacoplar la herramienta de punta de la pinza Si ocurre esto con la tuerca de la pinza aflojada presione el extremo de la herramienta ligeramente contra un objeto duro Fig 10 5 Ajuste del equilibrio de la herramienta de punta Una vez colocada la herramienta de punta opere la amoladora a baja velocidad Si no está bien equilibrada siga el p...

Page 64: ... mandril están desgastados o dañados sustitúyalo 2 Inspección de los tornillos de montaje Inspeccionar regularmente los tornillos de montaje y asegurarse que están bien apretados Si se afloja algún tornillo hay que apretarlos inmediatamente De lo contrario en ésto puede ser muy peligroso 3 Mantenimiento de motor La unidad de bobinado del motor es el verdadero corazón de las herramientas eléctrias ...

Page 65: ...es para los oídos Valores totales de la vibración suma de vectores triax determinados de acuerdo con EN60745 Pulido de superficies Valor de emisión de la vibración ah SG 2 2 m s2 Incertidumbre K 1 5 m s2 El valor total de vibración declarado se ha medido de acuerdo con un método de prueba estándar y puede utilizarse para comparar una herramienta con otra También puede utilizarse en una evaluación ...

Page 66: ...abalha com ferramentas eléctricas pode resultar em ferimentos pessoais graves b Utilize equipamento de protecção pessoal Utilize sempre protecção para os olhos O equipamento de protecção tal como uma máscara de pó sapatos de segurança anti derrapantes chapéu rígido ou protecção auricular utilizados para condições adequadas reduzirá os ferimentos pessoais c Evite ligar por acidente Certifique se de...

Page 67: ...ebida podem criar perigo e causar ferimentos c Não utilize acessórios que não sejam especificamente concebidos e recomendados pelo fabricante da ferramenta O facto de um acessório se adaptar à ferramenta eléctrica não é garantia de uma operação segura d A velocidade nominal do acessório deve ser pelo menos igual à velocidade máxima marcada na ferramenta eléctrica A utilização dos acessórios a velo...

Page 68: ...l ao operador controlar as reacções de torção ou as forças energéticas b Nunca colocar a mão perto do acessório rotativo O acessório pode ter uma reacção energética para a sua mão c Não posicione o corpo na área onde a ferramenta eléctrica se irá movimentar na eventualidade de reacção energética A reacção energética irá propelir a ferramenta na direcção oposta ao movimento do disco no ponto de ape...

Page 69: ...e continua a rodar após a ferramenta ter sido desligada Recarregue sempre a bateria numa temperatura entre 0 e 40 C Uma temperatura de menos de 0 C provocará uma recarga excessiva o que é perigoso Enquanto que numa temperatura acima de 40 C a bateria não pode ser recarregada A temperatura mais apropriada para a recarga é entre 20 e 25 C O recarregador não deve ser usado continuamente Quando termin...

Page 70: ...so 0 48 kg RECARREGADOR Modelo UC10SFL Voltagem para recarga 10 8 V Peso 0 35 kg CUIDADO 1 Se o líquido vertido pela bateria entrar nos seus olhos não os esfregue e lave os bem com água fresca e limpa como água da torneira e contacte imediatamente um médico Se não for tratado o líquido pode provocar problemas nos olhos 2 Se o líquido verter para a sua pele ou roupa lave as imediatamente com água l...

Page 71: ...lha um tamanho que se adeqúe à peça de trabalho Adequada para tarefas que envolvam trabalhar a madeira e para modelos de acabamento Rectifique em duas fases com números de orifícios diferentes para obter um bom acabamento de superfície Ponto de óxido de alumínio φ15 9 mm 1 15 9 mm Ponto de carboneto de silício φ4 8 mm 1 4 8 mm Cortador de alta velocidade φ3 2 mm 1 3 2 mm Berbequim φ3 2 mm 1 3 2 mm...

Page 72: ...sira a bateria observando a direção correta veja Fig 4 RECARGA Antes de usar a ferramenta elétrica recarregue a bateria da seguinte forma 1 Ligue o cabo de alimentação do carregador ao receptáculo 2 Introduza a bateria no carregador Posicione a bateria de forma a que a chapa com o nome fique virada para a chapa com o nome do carregador e prima a até que a bateria entre em contacto com a chapa do f...

Page 73: ...ig 8 Certifique se de que retira qualquer pó antes de instalar ou retirar a ponta NOTA Muito ocasionalmente pode ser difícil retirar a ponta da ferramenta do anel Se isto acontecer com a porca do anel solta prima ligeiramente a ponta contra um objecto duro Fig 10 5 Ajuste de equilíbrio da ponta Após instalar a ponta utilize a rectificadora a baixa velocidade Se o equilíbrio estiver incorrecto siga...

Page 74: ...ua a 2 Inspeção dos parafusos de fixação Inspecione regularmente todos os parafusos de fixação e se certifique de que estão corretamente apertados Caso algum parafuso se afrouxe reaperte o imediatamente do contrário existe risco de graves problemas 3 Manutenção do motor O enrolamento do motor do aparelho é o coração da ferramenta elétrica Tome o devido cuidado para assegurar que o enrolamento não ...

Page 75: ...Imprecisão KpA 3 dB A Use protetores de ouvido Os valores totais da vibração soma do vector triax são determinados de acordo com a norma EN60745 Rectificação de superfícies Valor de emissão de vibrações ah SG 2 2 m s2 Incerteza de K 1 5 m s2 O valor total de vibração declarado foi medido de acordo com um método de teste padrão e pode ser utilizado para comparar uma ferramenta com outra Também pode...

Page 76: ...NG 1 8 MOTOR DC 10 8 V 1 9 TAPPING SCREW W FLANGE D3 16 5 10 HOOK 1 11 NAME PLATE 1 12 HITACHI LABEL 1 13 CONTROLLER 1 14 BATTERY BCL1015 1 501 CHARGER UC10SFL 1 502 CASE 1 503 ACCESSORIES SET A 1 504 ACCESSORIES SET B 1 000Book GP10DL WE indb 76 000Book GP10DL WE indb 76 2010 04 23 16 12 13 2010 04 23 16 12 13 ...

Page 77: ...de adquisición 4 Nombre y dirección del cliente 5 Nombre y dirección del distribudor Se ruega poner el sello del distribudor con su nombre y dirección Français Português CERTIFICAT DE GARANTIE 1 No de modèle 2 No de série 3 Date d achat 4 Nom et adresse du client 5 Nom et adresse du revendeur Cachet portant le nom et l adresse du revendeur CERTIFICADO DE GARANTIA 1 Número do modelo 2 Número do sér...

Page 78: ...78 1 2 3 4 5 000Book GP10DL WE indb 78 000Book GP10DL WE indb 78 2010 04 23 16 12 14 2010 04 23 16 12 14 ...

Page 79: ...ce Tel 33 1 69474949 Fax 33 1 60861416 URL http www hitachi powertools fr Hitachi Power Tools Belgium N V S A Koningin Astridlaan 51 1780 Wemmel Belgium Tel 32 2 460 1720 Fax 32 2 460 2542 URL http www hitachi powertools be Hitachi Fercad Power Tools Italia S p A Via Retrone 49 36077 Altavilla Vicentina VI Italy Tel 39 0444 548111 Fax 39 0444 548110 URL http www hitachi powertools it Hitachi Power...

Page 80: ...oki Europe Ltd está autorizado para recopilar archivos técnicos Esta declaración se aplica a los productos con marcas de la CE Français Português DECLARATION DE CONFORMITE CE Nous déclarons sous notre seule et entière responsabilité que ce produit est conforme aux normes ou documents normalisés EN60745 EN60335 EN55014 et EN61000 en accord avec les Directives 2004 108 CE 2006 95 CE et 2006 42 CE du...

Reviews: