12
English
PRIOR
TO
OPERATION
1.
Setting
up
and
checking
the
work
environment
Check if the work environment is suitable by the above
precautions.
HOW
TO
ATTACH
THE
TIP
TOOL
WARNING
To prevent accidents, be sure to switch the power o
ff
and remove the battery from the grinder.
CAUTION
Make sure the mandrel is screwed in tightly.
After attaching the tip tool, check that the tool is
securely
fi
xed.
If the tool is loose, it may come o
ff
, causing damage or
injury.
1.
How
to
use
the
screw
-
type
mandrel
(Fig.
6
(a))
Use the screw-type mandrel when using the felt
polishing wheel.
Keeping the wheel straight, screw it onto the thread of
the screw-type mandrel as far as the
fl
ange.
2.
How
to
use
the
wheel
mandrel
(Fig.
6
(b))
Remove the screw in the end of the mandrel with a
fl
athead screwdriver and attach the cutting wheel or
sanding disc.
3.
How
to
use
the
drum
mandrel
(Fig.
6
(c))
A 60-grit sanding band is
fi
tted to the drum mandrel
when it leaves the factory.
Loosen the screw in the end of the mandrel with a
screwdriver to remove/attach the sanding band.
After attaching the sanding band, tighten the screw
securely.
4.
Attach
the
tip
tool
to
the
grinder
Rotate the collet nut by hand while pressing the lock
button to further depress the lock button.
In this state, the shaft is locked and the collet nut can
be loosened or tightened. (
Fig.
7
)
To attach the tip tool, insert the tip tool as far as it will
go and tighten the collet nut securely.
To detach the tip tool, the collet nut can usually be
rotated by hand, though occasionally it may be tight.
If the collet nut is tight, use the provided collet spanner
to loosen it.
Iron powder on the collet nut, collet or shaft screw may
cause the collet nut to be di
ffi
cult to rotate. (
Fig.
8
)
Be sure to remove any powder before attaching or
detaching the tip tool.
NOTE
Very occasionally, the tip tool may be di
ffi
cult to detach
from the collet.
If this happens, with the collet nut loosened, press the
end of the tool lightly against a hard object. (
Fig.
10
)
5.
Balance
adjustment
of
the
tip
tool
After attaching the tip tool, operate the grinder at low
speed. If the balance is not right, follow the procedure
below to adjust the balance.
Loosen the collet nut while pressing the lock button.
Next, rotate the tip tool by 1/4 and tighten the collet nut.
Operate the grinder at low speed and check the
balance. If the balance is right, adjustment is
completed.
If the balance still is not right, detach the tip tool, the
collet nut and collet and re-attach them. If the tip tool
is still not balanced after several such attempts, check
for deformation or wear of the tip tool or deformation of
the collet. If worn or deformed, replace the tip tool or
collet.
OPERATING
THE
GRINDER
WARNING
○
Keep your face away from the tip tool during use.
○
Wear goggles and a dust mask when using the grinder.
Breakage of the tip tool may lead to injury.
○
Do not operate the grinder at extremely slow speed. A
smooth
fi
nished surface will not be achieved and doing
so may lead to damage of the tip tool, breakdown of the
grinder or injury.
CAUTION
Do not touch the tip tool, collet nut or collet immediately
after machining as they will be very hot and touching
them may result in burns.
1.
Remove
the
battery
and
attach
the
tip
tool
2.
Fix
the
workpiece
so
that
it
does
not
move
The smaller the workpiece, the more unstable it is to
machine. Fix small workpieces in a vise.
Holding the workpiece by hand may result in injury.
3.
Insert
the
battery
in
the
grinder
4.
Check
the
balance
of
the
tip
tool
Check the tip tool visually at low speed (around [1] on
the switch dial).
Also check for abnormal noise during operation.
5.
Select
the
machining
speed
○
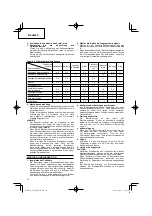
Select the optimal speed for the material while
performing trial grinding with reference to
Table
2
.
○
If plastic is machined at high speed, it may melt due to
heating. Test it gradually starting from a low speed.
000Book̲GP10DL̲WE.indb 12
000Book̲GP10DL̲WE.indb 12
2010/04/23 16:12:07
2010/04/23 16:12:07


