Maintenance & Service Procedures 11
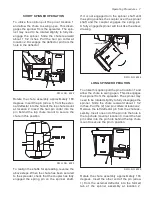
Tighten the engine drive chain by loosening the
four nuts (arrow 1)holding the engine plate, then
slide the entire engine assembly. Retighten nuts
to secure the engine plate
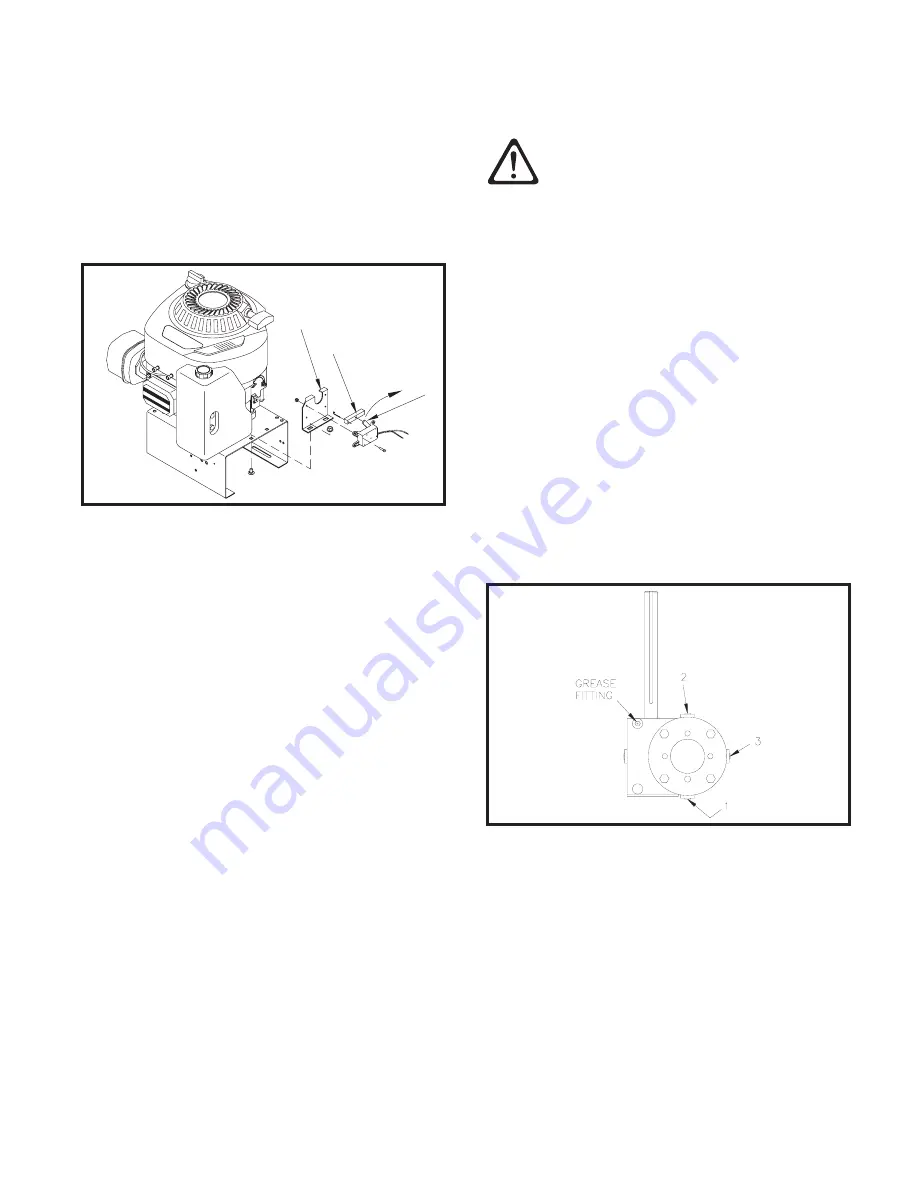
THROTTLE CONTROL ACTUATOR
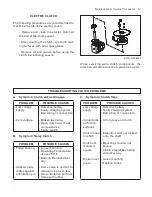
Reassemble the throttle actuator as follows:
FORWARD
1
2
3
DWG. NO. 6040
1. Assemble the actuator on the bracket.
2. Advance the actuator arm (arrow 1) forward
with a 9V battery until the arm is stopped
by the bracket.
3. Place the plastic block (arrow 2) on the ac-
tuator arm and loosely bolt the bracket (ar-
row 3) on the engine plate.
4. Slide the governor control rack on the en-
gine fully ahead, then pin to the plastic
block.
5. Fully tighten the bracket to the engine
plate.
6. Cycle the actuator to verify that the arm is
stopped by the bracket, not by the engine
mechanism.
LUBRICATION
CAUTION: Do not lubricate, adjust or
clean the machine while it is running.
Death or serious injury can result.
Prior to operation of a new machine, or one that
has been stored, grease all bearing points with
a high quality SAE multi-purpose grease and oil
the roller chains.
Throughout the season, grease bearings at
about 10 hour intervals and oil roller chains of-
ten.
NOTE: Over-greasing may cause seal damage
to bearings. Use only one pump of grease per
fitting.
Replace gear box oil annually with SAE 90 gear
lubricant. Prevent debris from entering the gear
box by cleaning dirt from plug area and wiping
plugs prior to reinstallation.
DWG. NO. 6031
Remove the drain plug at location 1 to drain old
oil into a quart or larger container and discard.
Reinstall the drain plug and remove the breath-
er at location 2 and the oil level plug at location
3. Fill the gearbox through the breather port un-
til oil appears at the level port. Reinstall the oil
level plug, add another 1/4 quart then reinstall
the breather. Capacity is about 5/8 quart (0.6
liters).


