


Storage System User Manual
73
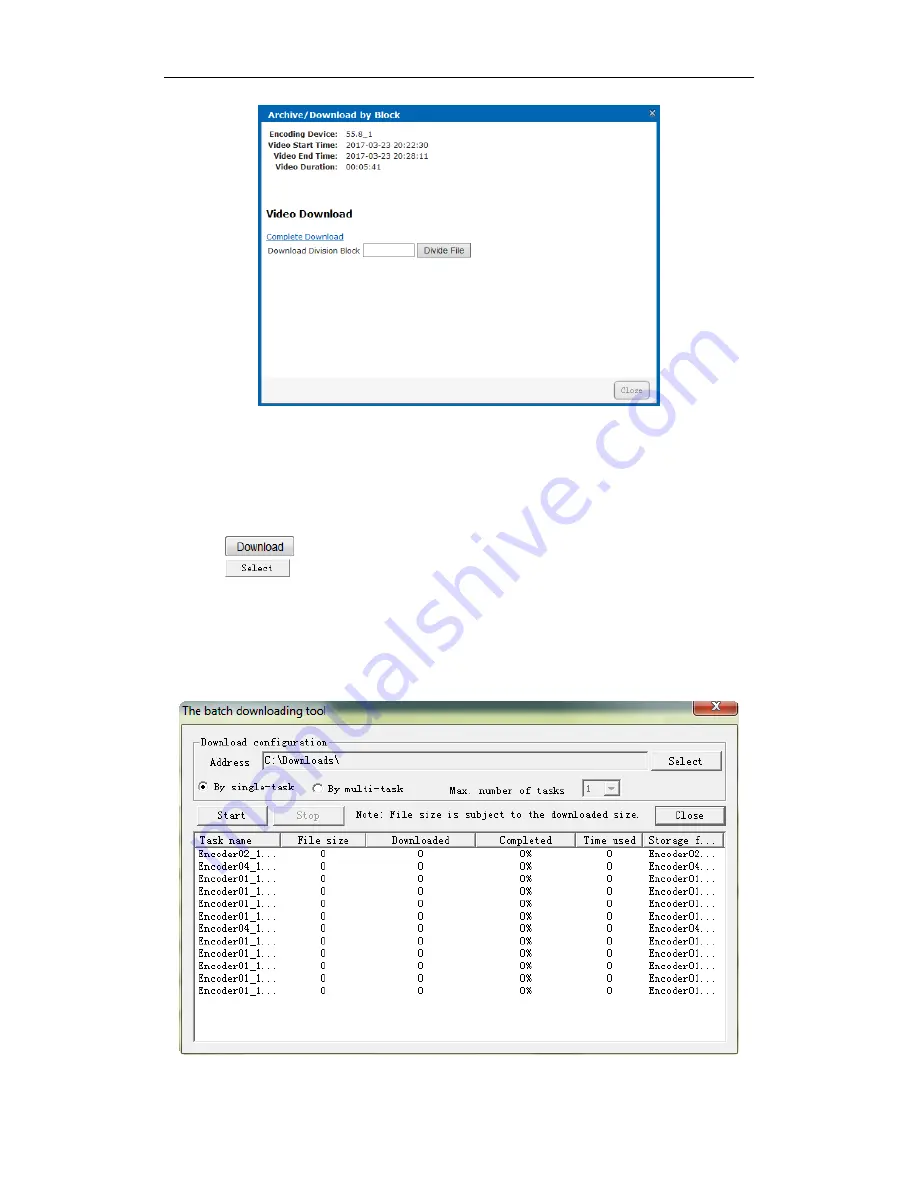
Figure 7. 31
Segment Downloading
7.6.4.3
Batch Dowloading
Steps:
1.
Check the checkboxes of videos you want to download.
2.
Click
button to pop up batch downloading interface.
3.
Click
button to select saving path.
4.
Select downloading mode as
By signle-task
or
By multi-task
.
By single-task
: Download one video at a time.
By multi-task
: Download several videos simultaneously. The maximum downloading video
amount is
Max. number of tasks
whose valid range is from 1 to 5.
5.
Click
Start
to start downloading. You can click
Stop
to stop downloading.
Figure 7. 32
Batch Downloading