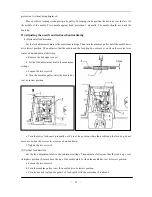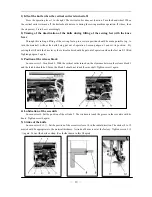
(4) Loosen the bolt 4.
(5) Set the plunger 2 to the position where it projects as
far as possible to the left.
(6) Turn the machine pulley to move the roller 6 of the
driving knife arm to the outermost side (right side) of the
thread trimmer cam 5.
(7) Move the roller 6 so that the clearance between the
outermost side (right side) of the thread trimmer cam 5 and
the roller 6 is 0.1mm, and then tighten the bolt 4.
32)
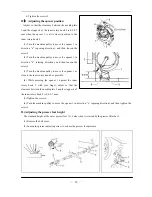
Adjusting the thread trimming timing
The center of the pin 1, the center of the reference hole
3 an
point on the pulley and
ey until the white point on the
e belt cover are in a straight line.
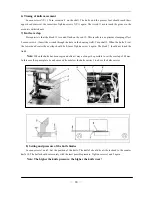
(4) Turn the thread trimmer cam 2 to adjust the position of
e thread trimmer cam 2 so that the center of the pin 1, the
enter of the reference hole 3 and the center of the roller 4 of
e driving knife arm are in a straight line.
(5) Tighten the bolts 5.
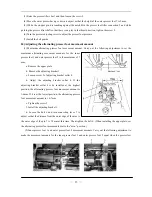
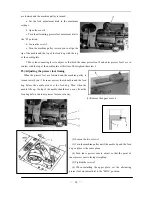
33)Safety clutch
The standard safety clutch 2 in the lower toothed belt wh
amaged in case of thread jamming in the hook path. When the
out.
d the center of the roller 4 of the driving knife arm
should be in a straight line when the thread take-up lever is at
the highest position. (The white
the
point on the belt cover are in a straight line.)
(1) Turn the machine pull
pulley and the point on th
(2) Overturn the arm.
(3) Loosen the three bolts 5
th
c
th
eel protects the hook from being displaced or
hook is blocked, the safety clutch 2 must come
d
—
17
—
Summary of Contents for GC20688-BDC
Page 24: ...A ARM BED MECHANISM 21...
Page 28: ...B THREAD TENSION REGULATOR MECHANISM 25...
Page 31: ...C NEEDLE BAR AND THREAD TAKE UP MECHANISM 28...
Page 34: ...D PRESSER FOOT MECHANISM 31...
Page 37: ...E UPPER FEED LIFTING ROCK SHAFT MECHANISM 34...
Page 40: ...F STITCH REGULATOR MECHANISM 37...
Page 43: ...G FEEDING AND FEED LIFTING HOOK SHAFT MECHANISM 40...
Page 46: ...H HOOK SADDLE MECHANISM 43...
Page 50: ...I OIL LUBRICATION MECHANISM 47...
Page 53: ...J ACCESSORIES 50...
Page 55: ...K PNEUMATIC CONTROL MECHANISM 52...
Page 57: ...L KNIFFE MECHANISM 54...


