• (optional) The Current Configuration Address may be altered from this section to change to
a DHCP or Static network configuration.
Figure 27: Dedicated Link
6.
To save the changes, press F4 and select Yes.
Note: The enclosure will reboot to apply the new
selections.
7.
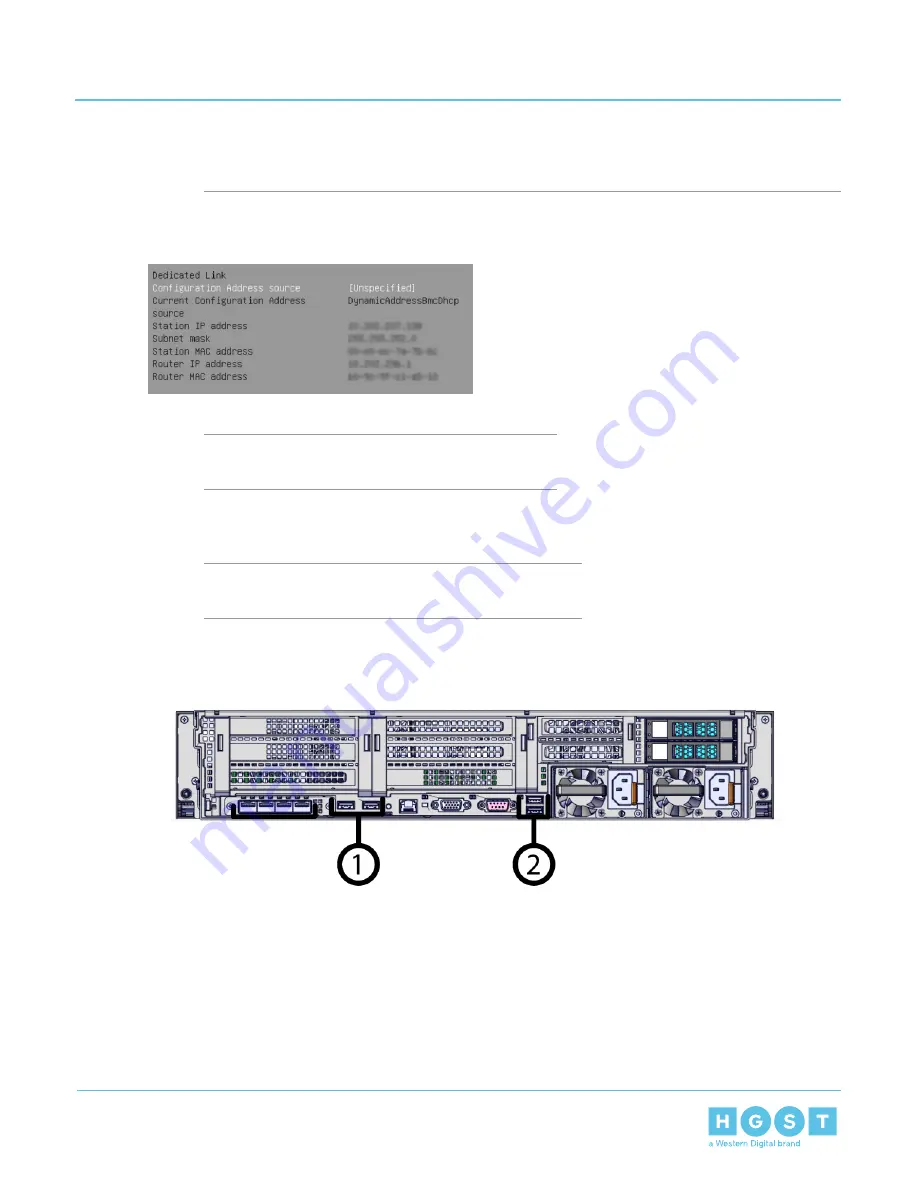
While the enclosure is rebooting, move to the rear of the enclosure and connect USB drive containing
the Operating System into the any of the four open USB ports.
Note: Callouts 1 and 2 each contain a set of two USB 3.0
ports.
Figure 28: Rear I/O—USB Ports
8.
Once the enclosure loads the BIOS, it will provide prompts on how to load the specific OS. Complete the
installation of the OS according to these prompts.
9.
After a few minutes, the console or laptop will display a prompt to load the preferred operating system.
Complete the necessary steps to install the OS.
10. From a laptop, open a web browser and navigate to the IP Address that was collected from the initial
BIOS session.
11. Log-in as the Administrator.
a) Open a browser window navigate to the enclosure BMC IP address.
33
5
Initial Bringup
Installation Guide
5.1
Bringing Up the Enclosure


