Chapter
5.
Usage
remote
host
system.
If
you
use
a
German
administration
system
and
your
host
sys-
tem
uses
a
US
English
keyboard
layout,
for
instance,
special
keys
on
the
German
keyboard
will
not
work
as
expected.
Instead,
the
keys
will
result
in
their
US
English
counterpart.
You
can
circumvent
such
problems
by
adjusting
the
keyboard
of
your
remote
system
to
the
same
mapping
as
your
local
one.
The
Remote
Console
window
always
tries
to
show
the
remote
screen
with
its
optimal
size.
That
means
it
will
adapt
its
size
to
the
size
of
the
remote
screen
initially
and
after
the
screen
resolution
of
the
remote
screen
has
been
changed.
However,
you
can
always
resize
the
Remote
Console
window
in
your
local
window
system
as
usual.
Warning
In difference to the remote host system, the Remote Console window
on your local window system is just one window among others. In order
to make keyboard and mouse work, your Remote Console window must
have the local input focus.
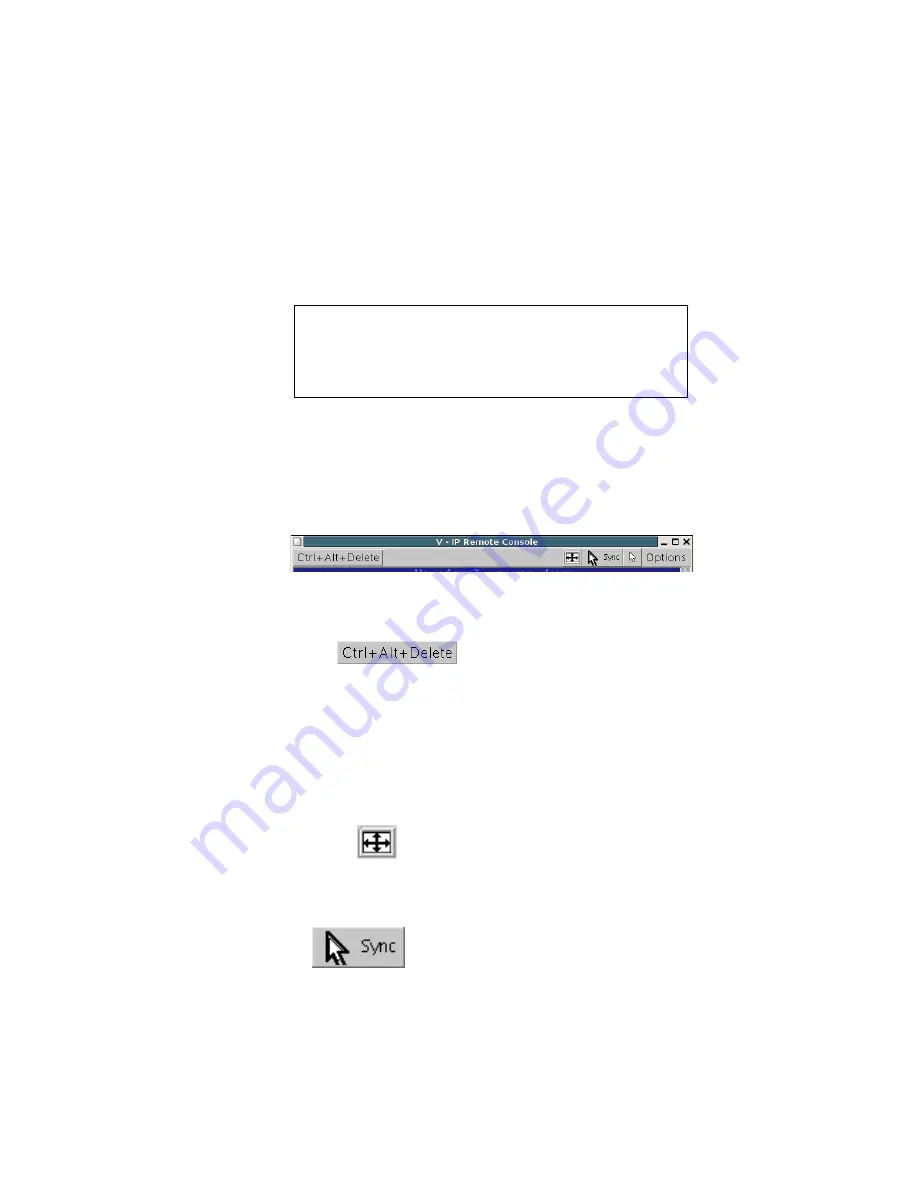
Remote Console Control Bar
The
upper
part
of
the
Remote
Console
window
contains
a
control
bar.
Using
its
ele-
ments
you
can
see
the
status
of
the
Remote
Console
and
influence
the
local
Remote
Console
settings.
A
description
for
each
control
follows.
Figure
5-5.
Remote
Console
Control
Bar
Ctrl+Alt+Delete
Special
button
key
to
send
the
“
Control
Alt
Delete
”
key
combination
to
the
remote
system
(see
also
the
Section
called
KVM
Settings
in
Chapter
6
for
defining
new
button
keys).
Note:
For the user “ admin ” this button exists on default. Other users have to define
this button on their own.
Auto
Adjust
button
If
the
video
displayed
is
of
bad
quality
or
distorted
in
some
way,
press
this
button
and
wait
a
few
seconds
while
the
V-IP
tries
to
adjust
itself
for
the
best
possible
video
quality.
Sync
Mouse
Choose
this
option
in
order
to
synchronize
the
local
with
the
remote
mouse
cur-
sor.
This
is
especially
necessary
when
using
accelerated
mouse
settings
on
the
host
system.
In
general,
there
is
no
need
to
change
mouse
settings
on
that.
28
Summary of Contents for V-IP
Page 1: ...V IP Installation and User Guide...
Page 6: ...vi...
Page 18: ...Chapter 2 Introduction 10...
Page 22: ...Chapter 3 Installation 14...
Page 30: ...Chapter 4 Configuration 22...
Page 82: ...Chapter 6 Menu Options 74...
Page 88: ...Appendix C V IP Video Modes 80...
Page 90: ...Appendix D Users and Roles 82...
Page 94: ...Appendix E Key Codes 86...
Page 96: ...Appendix F Pin Assignment 88...
Page 98: ...Appendix G Specifications 90...


