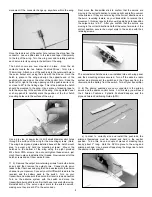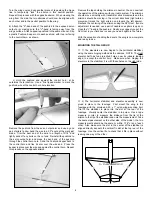
place on the model. The liquid cleaner allows the decal to slide
easily into the desired position – do not press down on the decal.
Once in position, hold the decal lightly in place with your finger and
use a paper towel to gently dab the excess liquid away. Use a
small squeegee to now set the decal in place, removing all excess
liquid and any air bubbles.
The SIG 4" Epoxy Spreader -
#SIGSH678 - is perfect for this job. Mop up any excess cleaner
with a dry cloth and allow the decals to set overnight. They will be
solidly adhered to the model without any air bubbles.
SETTING THE CONTROL SURFACE MOVEMENTS:
The following control movement information is provided for initial
set-up and test-flying purposes. After you have test-flown your
Little Extra and get a feel for how effective these movements are,
you can increase or decrease the movements as desired.
Ailerons:
1/2" Up - 1/2" Down
Elevators:
3/4" Up - 3/4" Down
Rudder:
1-1/8" Right - 1/1/8" Left
CENTER OF BALANCE:
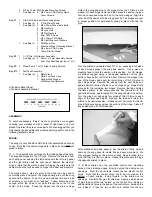
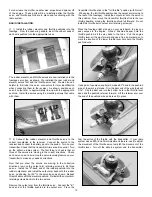
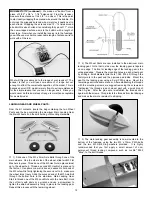
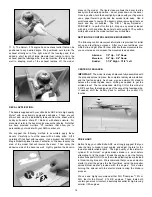
IMPORTANT: The model is always balanced fully assembled with
the prop and spinner in place, the complete radio system installed,
and the fuel tank empty. As shown, we use a simple CG stand to
balance the model upside down, shifting as needed to get the
airplane level. The recommended starting CG for this model is
2-5/8" back from the leading edge of the wing at the fuselage side.
If needed, shift the battery pack to achieve the correct CG
location.
PRE-FLIGHT:
Before flying your Little Extra ARF, we strongly suggest that you
take the time to break-in your engine and adjust the idle for the
lowest possible reliable rpm's. The high quality of the piston-to-
cylinder fit on Norvel
™
engines makes break-in a must before
attempting to fly the model. Break the engine in per the factory
instructions and DO NOT use the molded plastic spinner provided
in this kit during break-in. We recommend that you use an electric
starter to start the engine the first few times, using the propeller
spinner/thrust washer provided with the engine.
This avoids
burning the spinner with the electric starter during the break-in
process.
We use and highly recommend either SIG "Champion" 15% or
25% fuel for the Norvel
™
.074 R/C engines. These fuels both
contain generous oil content, absolutely essential for high-revving
smaller 1/2A engines.
❑
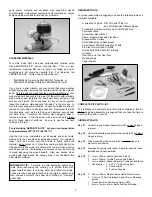
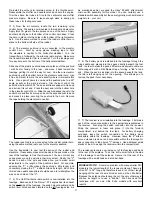
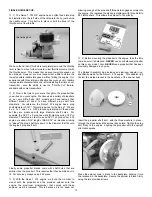
5) The Norvel
™
.074 engine has an exhaust outlet that can be
positioned to any desired angle. We positioned ours to aim the
exhaust directly out of the right side of the fuselage and then
added a short length of large diameter fuel tubing to carry the
exhaust past the fuselage side. In actual practice, this works quite
well in keeping much of the exhaust residue off the model.
DECAL APPLICATION:
The decals supplied with your Little Extra ARF kit are high quality
Mylar
®
with an extremely aggressive adhesive. These are not
die-cut and must be individually removed from the sheet with a
hobby knife and a sharp #11 blade or with sharp scissors. For
placement, refer to the box art and various other photos. Note that
we have provided multiple "N" numbers that allow you to
personalize your model with your AMA number, etc.
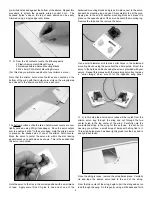
We suggest the following method to accurately apply these
decals. Carefully cut out the decal with a hobby knife. Lift it
carefully off its sheet with tweezers. Use a product like SIG Pure
Magic Model Airplane Cleaner, Fantastic
®
, or Windex
®
to spray the
area of the model that will receive the decal. Then spray the
adhesive side of the decal as well. Lightly position the decal in
14


