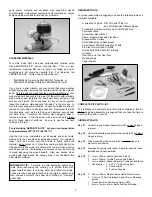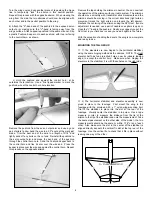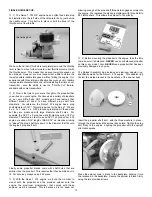
With a hobby knife and a sharp #11 blade, carefully cut a "V" notch
in the leading edge of the rudder, from the hole just drilled, down
to the bottom of the rudder. This notch has to be deep enough to
fully accept the .046 dia. tail wheel wire. Test fit the tail wheel wire
in place into the hole and notch in the rudder. Adjust the notch as
needed to fully "nest" the wire into the rudders leading edge.
Mix a small amount of 5-minute epoxy.
Slide the tail wheel
mounting plate out of the way, down to the tail wheel itself. Use a
pin or thin object to apply glue into the drilled hole and into the "V"
notch. Press the tail wheel wire into the rudder. Wipe of any
excess glue with alcohol and allow the glue to set.
❑
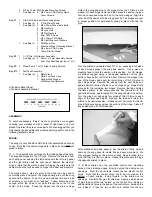
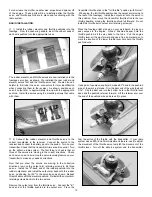
5) The rudder is now hinged to the vertical fin. Slip the three
rudder hinges into the two hinge slots in the trailing edge of the
vertical fin and the hinge slot at the rear of the fuselage. Center
the hinges and slip the card stock wedges into their center slots.
Press the rudder in place to the exposed ends of the three hinges,
all the up to the fin and fuselage. Make sure the top of the rudder
is aligned with the top of the fin. Use a piece of masking tape to
hold the rudder hard over to elevators. Turn the fuselage over,
remove one of the card wedges and use thin CA glue to apply 3
or 4 drops of glue to each edge of the exposed hinge at the hinge
line. Move to the next hinge and repeat this process to glue the
remaining hinges in place. Remove the tape, and hold the rudder
7
Remove the stabilizer from the fuselage and mix a small amount
of 5-minute epoxy. Apply a thin layer of glue to the top and bottom
of the stabilizer slot - very little is actually needed.
Slide the
stabilizer/elevator assembly carefully back in place into the
fuselage. Once again, align the stabilizer squarely to the fuselage
per the above instructions. With everything aligned, set the model
on a flat surface and stand back a few feet to view it directly from
the front. The stabilizer should be parallel with the wing in front
view. If it is tilting one way or the other, use tape or small weights
to pull it back into alignment. Clean any excess glue with a fresh
paper towel and alcohol and allow the glue to set.
❑
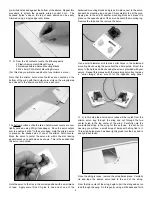
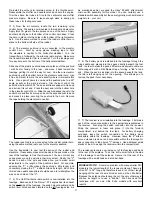
3) The vertical fin is now glued in place into the slot at the top
rear of the fuselage. Mix a small amount of 5-minute epoxy and
apply a thin layer of glue to the inside of the fuselage slot and to
the exposed wood on both sides of the bottom of the vertical fin.
Press the fin carefully in place all the way. Wipe off any excess
glue with alcohol and a fresh paper towel. Again place the model
on a flat surface and view it head on in front view from a few feet
away.
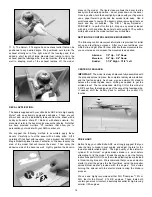
The fin must be at 90
O
to the fuselage and horizontal
stabilizer. This can be easily checked with a small 90
O
square, as
shown. Use a piece of tape from the top of the fin to the tip of the
stabilizer to hold the fin in this position and allow the glue to set.
When the epoxy has cured, remove the wing from the fuselage.
❑
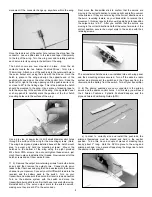
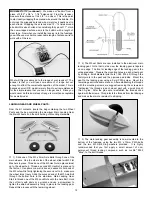
4) Before hinging the rudder to the vertical fin and fuselage,
the wire tailwheel assembly is installed. From the kit contents,
locate the Tail Wheel Assembly bag. Use a ruler to measure a
point 7/16" from the very bottom of the rudder, at its leading edge
- mark this point with a fine tip marker.
At the mark, use a pointed "punch" to poke a small guide hole in
the center of the rudder hinge line, at 90
O
to the leading edge. This
small hole is now drilled to a depth of about 3/8" into the leading
edge of the rudder, again, at 90
O
to the leading edge, using a .046"
dia. drill bit and a pin vise.


