background image


Hemisphere GNSS Inc. 

8515 East Anderson Drive, Suite A 
Scottsdale, Arizona, US 85255 
 
Phone: 480‐348‐6380 
Fax: 480‐270‐5070 

[email protected] 


www.hgnss.com

Summary of Contents for S321 Non-UHF

Page 1: ...875 0357 D User Guide S321 Smart Antenna Revision A8 February 16 2018 ...

Page 2: ...rks are the properties of their respective owners Patents Hemisphere GNSS products may be covered by one or more of the following patents U S Patents Australia Patents 6111549 6876920 7400956 8000381 8214111 2002244539 6397147 7142956 7429952 8018376 8217833 2002325645 6469663 7162348 7437230 8085196 8265826 2004320401 6501346 7277792 7460942 8102325 8271194 6539303 7292185 7689354 8138970 8307535...

Page 3: ... Installation 6 Chapter 2 Installation 7 Ports and Connections 7 Installing Connecting S321 8 Installing Batteries 8 Installing UHF and GSM Antennas 9 Installing S321 on a Tribrach 10 Installing the S321 on a Range Pole 10 Connecting to a Power Source 11 Connecting to an External Device 12 Using the Device FN and I Keys 12 Powering the S321 On Off 13 Inserting and Removing the MicroSD Card SIM Car...

Page 4: ...e WebUI 23 Initial Setup 23 WebUI Start up 24 Install New Firmware 26 GNSS Registration 26 Security 26 View Log 26 Formatting Self Test Reset 26 WebUI Settings 27 Working Mode UHF 27 System Modes 29 Data Links 30 Internal UHF 31 External 32 Network 33 NTRIP 33 TCP IP 34 Rover Bluetooth 36 Static 36 Device Configuration 37 NMEA Message 38 Satellites 38 Firmware Update 39 Updating Firmware via WebUI...

Page 5: ...iv Appendix A Radio Mode A1 Appendix B Troubleshooting B1 Appendix C Technical Specifications C3 ...

Page 6: ...se to nearby RTK rovers via UHF radio or the internet BeiDou BeiDou is a Chinese satellite based navigation system Datalink Datalink is the device used to send RTK or DGNSS corrections from a base station to one of more rovers Common datalinks are UHF radio or Ntrip see Ntrip DGPS DGNSS Differential GPS GNSS refers to a receiver using Differential Corrections Differential Corrections A method of i...

Page 7: ... United States GPS system GNSS Global Navigation Satellite System GNSS is a system that provides autonomous 3D position latitude longitude and altitude along with very accurate timing globally by using satellites Current GNSS providers are GPS GLONASS and Galileo BeiDou is expected to have global coverage by 2020 GPS Global Positioning System GPS is a global navigation satellite system implemented...

Page 8: ...lopment in Japan ROX ROX is a Hemisphere GNSS propriety RTK message format that can be used as an alternative to RTCM3 when both the base and rover are Hemisphere branded RTCM Radio Technical Commission for Maritime Services RTCM is a standard used to define RTK message formats so that receivers from any manufacturer can be used together RTK Real Time Kinematic RTK is a real time differential GPS ...

Page 9: ...S321 User Guide Chapter 1 Introduction Page 1 of 65 Chapter 1 Introduction Product Overview Key Features What s Included in your Kit Firmware Upgrades ...

Page 10: ...rmware and activations S321 is Athena enabled and Atlas capable Athena RTK Athena RTK Real Time Kinematic technology is available on Eclipse based GNSS receivers Athena RTK requires the use of two separate receivers a stationary base station primary receiver that broadcasts corrections over a wireless link to the rover secondary receiver The localized corrections are processed on the rover to achi...

Page 11: ...spheregnss com Technology For more information about Atlas L band see https hemispheregnss com atlas aRTK Position Aiding aRTK is an innovative feature available in Hemisphere s S321 smart antenna that greatly mitigates the impact of land based communication instability Powered by Hemisphere s Atlas L band system service aRTK provides an additional layer of communication redundancy to RTK users as...

Page 12: ... indicators The SureFix indicators are then combined with the RTK solution before being provided to the user At the end of the process the user has access to high fidelity information about the quality of the RTK solution What s Included in your Kit As per Table 1 1 below the S321 is available in a variety of kits with supplementary products sold as controller option kits accessory kits or simply ...

Page 13: ...se 699 0015 0 1 1 1 1 Carry Case 750 0183 1 1 1 1 1 8 GB MicroSD Card 750 1169 0 1 1 1 1 Accessory Kits Part Number 940 2155 0 Base Acc 940 2156 0 Rover Acc Accessor y Only S321 Power Cable Alligator Clips 054 0171 0 1 S321 5 Pin Power Cable PacCrest Rcvr 054 0172 0 1 S321 5 Pin Power Cable Satel Rcvr 054 0173 0 1 S321 5 Pin Power Cable Receiver 054 0178 0 1 S321 5 Pin Power cable Serial Rcvr 054 ...

Page 14: ...d Connections Installing Connecting S321 Installing UHF and GSM Antennas Installing S321 on a Tribrach Installing S321 on a Range Pole Connecting to a Power Source Connecting to an External Device Powering the S321 On Off Inserting and Removing the MicroSD SIM Card Resetting the S321 ...

Page 15: ...vides additional information about each port connection Figure 2 1 S321 ports and connectors Table 2 1 S321 ports and connections Port What to connect 7 pin Diagnostic Port LEMO Diagnostic cable for serial or USB 5 pin Power Data Port LEMO External power data and radio devices GSM Antenna Connector External GSM antenna UHF Antenna Connector External UHF antenna Mounting hole Pole or tripod mount ...

Page 16: ...ling the battery ensure the contact points are facing up towards the Hemisphere logo Slide the battery into the designated spot until the battery tension bar clicks into place The projected run time of the battery is 6 hours in the UHF receive mode The S321 kit provides two batteries as noted in the What s Included in your Kit portion of this User Guide Figure 2 2 Battery installation ...

Page 17: ...Insert the connector end of the UHF antenna and rotate clockwise to secure the antenna to the S321 To install the GSM portion of the S321 antenna locate the GSM antenna 150 1023 0 from the kit list under Insert the connector end of the GPRS antenna and rotate clockwise to secure the antenna to the S321 Figure 2 3 Installing UHF and GSM antennas Note Only one antenna UHF or GSM can be connected to ...

Page 18: ...ure the S321 onto the mount in a clockwise rotation Figure 2 4 Installing S321 on a tribrach Installing the S321 on a Range Pole Using the standard 5 8 11 mount on the bottom of the S321 you can secure the unit to a field standard 5 8 11 range pole the S321 should be placed carefully on the range pole to ensure cross threading does not occur while rotating the unit in a clockwise direction Hand ti...

Page 19: ...s two main power sources The first being an internal removable battery which is described in the earlier portion of this chapter The second source of power is the external power cable 054 0171 0 The 5 pin LEMO connector allows 9 to 24V of power into the S321 Figure 2 7 External power connector ...

Page 20: ...ce connector Using the Device FN and I Keys The on device menu can be navigated by using the on device keys The FN key allows you to scroll through each item on the device menu display The I key acts as an enter key for selecting to required menu option The I key also acts as a power key when the menu option of power is selected See Powering the S321 On Off below Figure 2 9 S321 on device menu ...

Page 21: ...ting and Removing the MicroSD Card SIM Card Caution Use electrostatic discharge ESD protection such as by wearing an ESD strap that is attached to an earth ground before inserting or removing the SIM card on the S321 If an ESD strap is not available then touch a metal object prior to accessing the SIM card holder The MicroSD card and the SIM card are only accessible by first opening the battery do...

Page 22: ...ntly push the card in until it clicks 3 Close and secure the battery door Figure 2 10 SIM MicroSD card slot Resetting the S321 To reset the S321 lift the battery door and locate the Reset button between the SIM card and MicroSD card slots The reset button will turn the unit off and automatically restart the unit Figure 2 11 S321 Reset button ...

Page 23: ...15 of 65 Chapter 3 Setup and Configuration Control Panel Overview Setting up the S321 Installing the Base Installing the Rover Bluetooth Communication Hemisphere WebUI WebUI Settings Firmware Update Downloading Static Data Calibrating S321 Internal Sensors ...

Page 24: ...el shown below Figure 3 1 Control panel and display Satellite LED Green The LED illuminates and stays a solid green color to indicate a signal satellite lock has been achieved Figure 3 2 Satellite LED static LED green It switches on if the static mode is selected and it starts to blink when the receiver is recording data with the same frequency of the sample rate ...

Page 25: ...er Guide Chapter 3 Setup and Configuration Page 17 of 65 Figure 3 3 Static LED Bluetooth LED Blue Once you have connected the receiver with the data controller this LED will illuminate Figure 3 4 Bluetooth LED ...

Page 26: ...ce network you can control the S321 via WebUI For more information on the WebUI please see section WebUI Figure 3 5 Wi Fi LED External Data Link or Internal UHF Radio LED Green The LED is green when the device is selected as an RTK data link via an external data link or an internal UHF radio link It begins blinking when the S321 is either transmitting data as a base or receiving data as a rover Fi...

Page 27: ...the LEDs will flash according to sample interval default is 1 second and you hear three beeps every 60 seconds Table 3 1 Definition of icons on the S321 menu Type Icon Explanation Operating mode Rover mode Base mode Static mode Power status Full battery power or external power supply Battery power remaining Battery power remaining 2 4 Battery power remaining The battery needs to be replaced Date s...

Page 28: ... Setup and Configuration Page 20 of 65 S321 Menu Structure and Information Home Page Coordinate Information Current Data Link Status File Information Device Status Operating Mode Settings Switch Operating Modes Switch Data Link ...

Page 29: ...S321 User Guide Chapter 3 Setup and Configuration Page 21 of 65 General Settings Wi Fi Backlight Language ...

Page 30: ...wn coordinates or unknown coordinates attach the receiver to the tribrach 2 Attach the transmitting radio antenna into the port UHF using the 40cm supporting pole is better since increases the height of the antenna 3 Switch on the receiver and select the base working mode Installing the Rover 1 Fix the bracket on the pole fix the hand held to the bracket put the rover on the pole and attach the re...

Page 31: ...ta collector the following S321 Bluetooth information appears on the device S321 XXXXXX where XXXXXX is the serial number Hemisphere WebUI The WebUI can work on any PC Tablet or Phone that has Wi Fi network capabilities Initial Setup Using the Windows Wi Fi network locate the Wireless Network Connection labeled S321XXXXXXXXX If you want this network to automatically connect select the Connect auto...

Page 32: ...168 10 1 The WebUI will prompt you for a user name and password The default user name and password are User Name admin Password s321 WebUI Start up The Status tab provides general GNSS information including System mode Latitude Longitude and Height The Information tab contains device and module information in addition to current software and firmware versions ...

Page 33: ...oad tab allows you to log and review multiple data files from the on board memory of the device The Management tab provides access to the firmware update tools a terminal to register authorization codes and password customization to properly secure your device moving forward ...

Page 34: ... which have been subscribed to the S321 The Atlas expiration date will be displayed under this field In addition the ability to update the S321 with new subscriptions is available under the AuthCode field Type the new Atlas code and the device will automatically update Security The Security field allows the user to enable or disable login requirements The user can reset or customize a new password...

Page 35: ...aler Important The Advanced UHF Settings can only be accessed by Hemisphere GNSS or a certified Hemisphere GNSS dealer Cutoff Angle satellites at a lower angle to the horizon than 5 are not used in the GNSS solution GLONASS Enable or Disable the use of GLONASS satellites BeiDou Enable or Disable the use of BeiDou satellites Galileo Enable or Disable the use of Galileo satellites SBAS Enable or Dis...

Page 36: ...n in the image Please refer to the unit listed to the right hand side of the field Pdop Threshold data will not be logged if the Pdop of the receiver exceeds the user defined value 3 5 is the default value but this can be changed Interval log data at intervals of 30s 15s 5s 1Hz 2Hz 5Hz or 10Hz While the receiver is logging data the WebUI will display Recording next to System Mode under the Status ...

Page 37: ...igured as a Survey Rover Base Station or run a Static Observation The Base Position must be configured Select Base under System Mode the following dialogue appears Automatically Start Base Set to Yes if the S321 should automatically begin broadcasting RTK upon startup If set to No you must manually start the base every time the unit is powered on Data Type Broadcast RTK via RTCM 2 3 DGNSS RTCM 3 0...

Page 38: ...osition BaseLink Upcoming feature this feature requires an Atlas H10 10 centimeter subscription Input a Target Accuracy Once the accuracy of the GNSS position of the receiver has reached the Target Accuracy the receiver will begin to output RTK based on its calculated position The accuracy of the GNSS position may continue to improve If it does improve a new target accuracy may be entered and the ...

Page 39: ...ile to upload a channel table A channel table can be created through the WebUI by a certified Hemisphere GNSS dealer by clicking on Advanced UHF Settings and typing a password You can also upload by clicking Import next to Radio Configuration File and uploading a channel table file ucf provided by your dealer Note The radio frequency should match the transmitting base The following dialogue appear...

Page 40: ...ls with descriptions FEC Scrambling over the air link rate and modulation please refer to Appendix C FEC Forward Error Corrections Radio Power Transmit RTK corrections at 100mW 200mW 500mW or 1W dependent upon the radio settings and restrictions provided by your dealer This feature is only displayed when running as a base External If you wish to send RTK corrections out of the serial port such as ...

Page 41: ...Please see a certified Hemisphere GNSS dealer to ensure that the pinout of these connectors matches the pinout of your radio Most radios may require a null modem adapter Network The S321 supports TCP IP connections for direct connection between base and rovers via cellular as well as NTRIP NTRIP NTRIP requires a specific IP address username and password When used as a base the S321 is an NTRIP ser...

Page 42: ...re the APN settings while using TCP IP so that an internet connection is established After establishing an internet connection change Connect Mode back to NTRIP and proceed with the configuration TCP IP If running as a base station select TCP Server and type in a Port The TCP Server requires that the SIM card provide a public IP address The public IP address can be found in the Information tab on ...

Page 43: ... and Configuration Page 35 of 65 If the S321 is running as a rover select TCP Client and type in the IP address and Port of the base Note The IP address and Port of the base can be found under the Information tab of the base station ...

Page 44: ...work corrections to the data collector internet and then sending them to the S321 via the Bluetooth communication port Static Use Static mode to take a static observation of a point and stop logging for both base and rover if the position moves Select Static next to System Mode and configure the log file to configure a file refer to Working Mode for instructions ...

Page 45: ...fically the S321 will audibly indicate when the receiver is in Base or Rover mode Voice indication covers logging data and declaring when the S321 has achieved RTK float and RTK fix This is important when working in a low visibility environment Direct Link Mode enables certain troubleshooting features for Hemisphere GNSS and certified Hemisphere GNSS dealers In addition the easy to use radio butto...

Page 46: ...the Don t track checkbox next to that satellite in the list Note This function is only available if you have hardware version S321 v1 1 see Information tab or higher these messages will come out of the 5 pin serial port at the same baud rate as the External Serial Port Baud Rate as shown above This function cannot be used if you are using an external device for RTK ...

Page 47: ...ersions lower than v4 16 OS v4 03 Bootloader and v1 38 171114 WebUI Updating Firmware via WebUI Using the Management tab under the WebUI select the Choose File button to find the appropriate firmware of application software for the S321 device After selecting the correct firmware software file click the green Upload File button ...

Page 48: ...he current firmware version versus the new firmware version When you have ensured the correct files are in place click OK button A status bar will indicate the level of progress for the updating firmware software When the status bar reaches 100 the upgrade is complete The WebUI will indicate Update successful ...

Page 49: ..._YYMMDD bin YY Year MM Month DD Day e g S321_update_160202 bin Radio firmware SATEL_update_XXXXX bin XXXXX version e g SATEL_update_V07 27 2 0 8 6 bin 3G module firmware PHS_update_XXXXX bin XXXXX version e g PHS_update_03 001 bin How to Download Static Data Static data can be logged to the S321 internal memory or to a MicroSD card If First Storage is set to Internal Storage see Device Configurati...

Page 50: ...vel tolerance checking or auto store by leveling then you need only perform Step 1 calibration The Electronic Bubble Calibration can also be performed from a SurvCE PC configured with the S321 driver and using the Equip GPS Utilities Sensor Calibration Zero Calibration function The setup and preparation for Electronic Bubble Calibration from SurvCE PC is the same as described below for the Calibra...

Page 51: ...lid pole not less than two meters long with calibrated vial X A connection to a base station using either the S321 s internal radio internal GSM cell modem For best performance the effective distance is less than 1 kilometer 0 6 miles X Assembly that is included with the S321 kit The four Mini Rotary Bracket components are shown in Figure 3 9 X Fully charged S321 battery Not battery dependen t X I...

Page 52: ...older to your data collector Make a note of the location of this folder on your data collector Figure 3 9 Mini rotary bracket Using your handheld device open the SurvCE application by tapping on the SurvCE icon In the SurvCE application tap the File tab in the top left portion of the screen Then tap the 1Job button ...

Page 53: ...Equip tab at the top of the screen On the Equip tab tap the 3GPS Rover button The GPS Rover menu contains four main tabs The Current tab indicates the current rover attached to SurvCE To calibrate your S321 select Hemisphere GNSS from the Manufacturer drop down list Select S321 from the Model drop down list ...

Page 54: ... the Comms tab select Bluetooth from the Type drop down list Select the Windows Mobile BT Type Tap the wrench and hammer icon Note Click the wrench and hammer icon to find your S321 device Tap the Find Device button and wait for a complete list of devices to generate ...

Page 55: ...you see your device on the list tap the device name to highlight it Then press the Bluetooth Connect icon at the top right of the screen Once Bluetooth has bonded with your device tap the Receiver tab Under Antenna Type ensure HEMS321 is selected from the drop down list ...

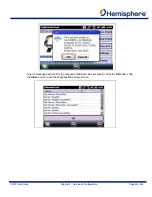
Page 56: ...elect Internal UHF from the drop down list Tap the wrench and hammer icon The Configure Internal UHF Radio menu allows you to set your rover to your desired protocol required to connect to a local base When your desired protocol has been selected tap the green checkmark at the top of the screen ...

Page 57: ...S321 User Guide Chapter 3 Setup and Configuration Page 49 of 65 When your UHF radio configuration is complete tap the Equip tab if not already selected and tap 7 Monitor Skyplot ...

Page 58: ...the lower right portion of the screen When prompted with a pop up asking if you are sure you want to exit tap the Yes button Connect your handheld device to your PC via the USB communication cable included with the handheld After connecting ensure your Mobile Device Center is open and running on your PC This allows you to export software to the handheld device Select the CalibrationTool file to ex...

Page 59: ...rate calibrations in Steps 2 and 3 The calibration Step 1 can be performed either indoors or outdoors as it is NOT affected by magnetic noise and it does not require either RTK corrections or the presence of GNSS signals The S321 should be mounted on either a tribrach or pole that has been leveled as accurately as possible A high quality calibrated tribrach with an accurate line level in a rotatin...

Page 60: ...ionTool to open the program When the CalibrationTool launches you will be required to tap the Connect button located at the bottom of the screen Select Connect from the drop down list Set the Connect Mode to Bluetooth Next tap the Search for Bluetooth device button When you locate your S321 press Connect and the calibration will be ready to start ...

Page 61: ...S321 User Guide Chapter 3 Setup and Configuration Page 53 of 65 The first portion of the calibration is the Electric Bubble Adjust Tap the 1 Electric Bubble Adjust button to open the calibration screen ...

Page 62: ...ation Tap the Close button to exit out of the first calibration Calibration Step 2 Magnetic Step by Step Calibration The second portion of the calibration process is the Magnetic Step by Step calibration For this step a pole or a tripod and tribrach with a small pole extender can be used If a pole is used you will need to keep the pole as vertical as possible while rotating the pole A good way to ...

Page 63: ...rst magnetic calibration will be the Vertical Remove the S321 from the survey pole and place it on the Mini Rotary Tool Connect the Mini Rotary Tool back to the survey pole see picture in step below for example Click the 1 Vertical button and slowly rotate the device clockwise 360 or more depending on the progress bar ...

Page 64: ...ks the points The progress bar indicates when the vertical calibration is complete The second magnetic calibration is the Horizontal Place the S321 back onto the survey pole in the normal orientation Click the 2 Horizontal button and slowly rotate the device clockwise 360 or more depending on the progress bar Slowly rotate the S321 so that it takes at least 30 seconds to make one complete rotation...

Page 65: ...S321 User Guide Chapter 3 Setup and Configuration Page 57 of 65 The progress bar moves as the calibration marks the points The progress bar indicates when the horizontal calibration is complete ...

Page 66: ...3 Magnetic Bias Angle Calibration The third and final portion of the calibration process is the Magnetic Bias Angle calibration Before continuing make sure the unit is receiving an RTK FIX and is mounted on a pole This RTK link must be independent of the data collector This means you will need to use one of the next two RTK methods Radio UHF or Internal GSM in receiver Note NEVER use any DCI metho...

Page 67: ...r use of the CalibrationTool If you are sure the S321 is FIXED tap the 3 Magnetic Bias Angle button Even though the S321 is in Fixed mode and receiving corrections the receiver status is not displayed in this version of the tool The first part of the Magnetic Bias Angle calibration is recording a center point Hold the device as stable and upright as possible Tap the Center Point button The center ...

Page 68: ...d and a warning message will display If points are not being captured make the necessary adjustments as prompted on the display Important The S321 display should be facing the user at all times The second part of the Magnetic Bias Angle calibration is Inclined Point If you re using a bipod remove the bipod leaving the pole on the same point ...

Page 69: ... at approximately 25 to 35 angle Below you will see Tilt is the angle of the unit and the Prj is the direction in which the device is facing Note Each direction East South West and North will log 10 points Keep the device in place until all 10 points are logged Note The tilt should be between 25 and 35 to collect points and the device tilted in the correct direction to within 10 e g between 80 100...

Page 70: ...e S321 and survey pole to the WEST at approximately 25 to 35 angle Below you will see Tilt is the angle of the unit and the Prj is the direction in which the device is facing Tilt the S321 and survey pole to the NORTH at approximately 25 to 35 angle Below you will see Tilt is the angle of the unit and the Prj is the direction in which the device is facing When the Incline Point calibration is comp...

Page 71: ...age 63 of 65 Enter the height of the survey pole in meters used for calibration in the Measure Height field below Then tap OK The Magnetic Bias Angle is now complete and a pop up will show you the corrections made to the tilt sensor Click the OK button ...

Page 72: ...er Guide Chapter 3 Setup and Configuration Page 64 of 65 A list of messages will confirm the magnetic calibration was successful Click the OK button Tap the Close button to exit the Magnetic Bias Angle screen ...

Page 73: ...S321 User Guide Chapter 3 Setup and Configuration Page 65 of 65 You can now Exit the CalibrationTool program and your S321 is 100 calibrated ...

Page 74: ...S321 User Guide Appendix A Frequently Asked Questions Page A1 Appendix A Radio Mode ...

Page 75: ...S321 User Guide Appendix A Frequently Asked Questions Page A2 Appendix A Radio Mode Table A 1 Radio Mode ...

Page 76: ...S321 User Guide Appendix B Troubleshooting Page B1 Appendix B Troubleshooting ...

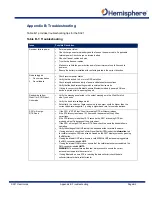
Page 77: ...rify the baud rate settings match Potentially the volume of data requested to be output could be higher than the current baud rate supports Try using a higherbaud rate for communications S321 will not go RTK Fixed If the S321 is RTK Float then it is receiving RTK or Atlas corrections If the RTK latency is between 10 15 seconds these are most likely Atlas corrections If the RTK latency is less than...

Page 78: ...S321 User Guide Appendix B Troubleshooting Page B3 Appendix C Technical Specifications ...

Page 79: ...ate recording interval Selectable from 1 2 4 5 10 20 Hz Table C 2 Performance Mode Specification Horizontal Vertical RTK Performance 8mm 1 ppm 15mm 1 ppm Static Performance long occupation 3mm 0 1 ppm 3 5mm 0 4 ppm Static Performance rapid occupation 3mm 0 5 ppm 5mm 0 5 ppm L band Performance3 0 08 m 0 16m SBAS Performance 1 0 3 m 0 6 m Autonomous no SA 2 1 2 m 2 4 m Table C 3 Satellite tracking S...

Page 80: ...her electronic device TTS Smart voice broadcast system Speaking receiver Reference Outputs RTCM3 0 RTCM3 2 CMR CMR and ROX Hemisphere proprietary messaging format Table C 5 Radio Item Specification Frequency Range 410 470 MHz Channel Spacing 12 5 KHz 25 KHz Emitting Power 0 5 1w Table C 6 Wireless Item Specification Wi Fi Integrated module with internal Wi Fi antenna 802 11 bgn Bluetooth Bluetooth...

Page 81: ...able C 10 Environmental Item Specification Operating Temperature 30 C to 60 C 22 F to 140 F Storage Temperature 40 C to 80 C 22 F to 176 F Water Dust Proof IP67 Shock Resistance MIL STD 810G method 516 6 Vibration MIL STD 810G method 514 6E I Humidity Up to 100 Table C 11 Mechanical Item Specification Size 14 1 D x 14 0 H cm 5 5 D x 5 5 H in Weight 1 38 kg 3 05 lbs Mounting 5 8 x11 55 thread angle...

Page 82: ... warrants for 90 days from performanceordelivery orforthebalanceof the original Warranty Period whichever is greater that the Update under normal use and maintenance will conform in all material respects to the documentation provided with the Update and any media will be free of defects in materials and workmanship Notwithstanding the foregoing Hemisphere does not warrant that the Software will me...

Page 83: ...ime without cause Hemisphere may terminate this Agreement on 30 days notice to Licensee if Licensee fails to materially comply with each provision of this Agreement unless such default is cured within the 30 days Any such termination by a party shall be in addition to and without prejudice to such rights and remedies as may be available including injunction and other equitable remedies Upon receip...

Page 84: ...rmance or accuracy of any Product HEMISPHERE IS NOT RESPONSIBLE FOR PURCHASER S NEGLIGENCE OR UNAUTHORIZED USES OF THE PRODUCT IN NO EVENT SHALL Hemisphere GNSS BE IN ANY WAY RESPONSIBLE FOR ANY DAMAGES RESULTING FROM PURCHASER S OWN NEGLIGENCE OR FROM OPERATION OF THE PRODUCT IN ANY WAY OTHER THAN AS SPECIFIED IN Hemisphere GNSS s RELEVANT USER S MANUAL AND SPECIFICATIONS Hemisphere GNSS is NOT R...

Page 85: ...Hemisphere GNSS Inc 8515 East Anderson Drive Suite A Scottsdale Arizona US 85255 Phone 480 348 6380 Fax 480 270 5070 precision hgnss com www hgnss com ...

Page 86: ... 0 ...

Reviews: