3
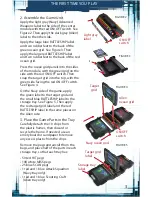
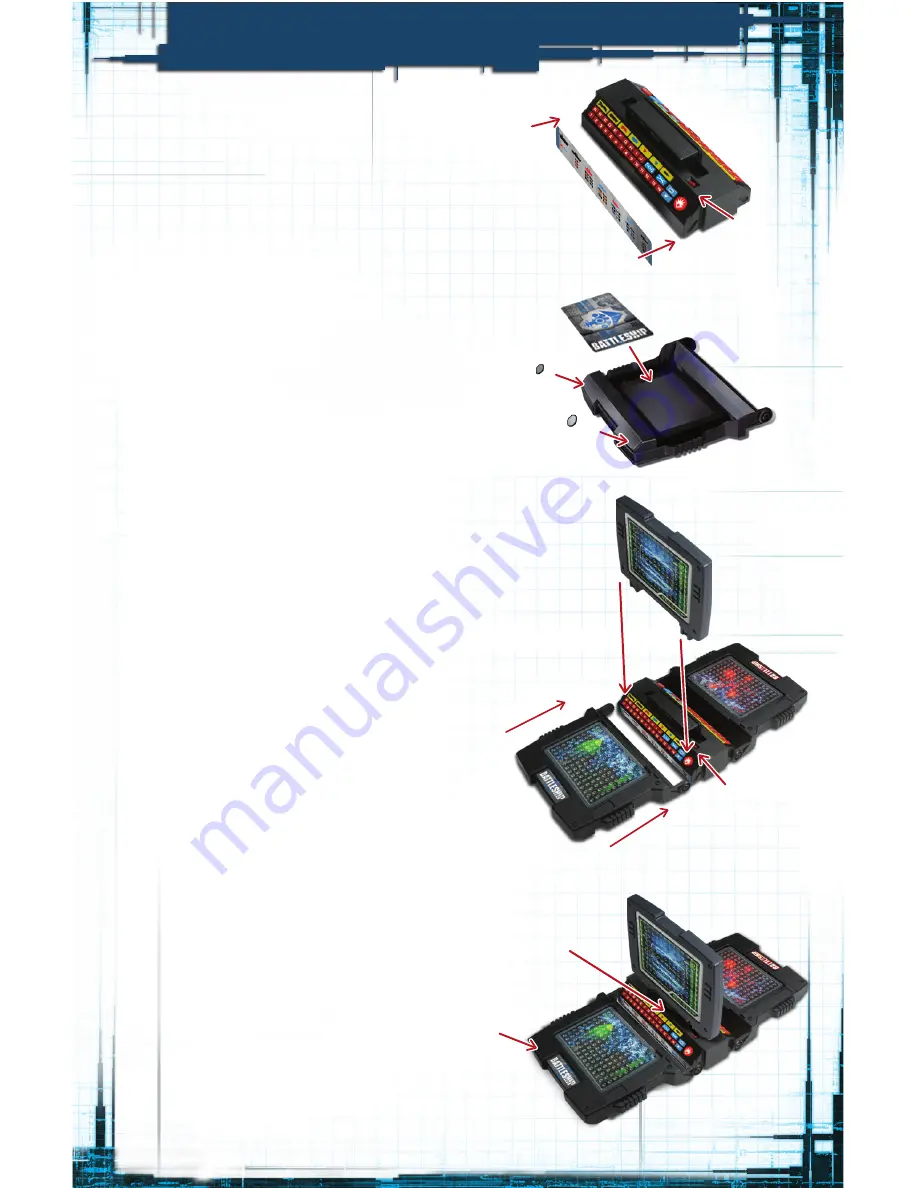
2. Assemble the Game Unit
Apply the light gray (Navy) Advanced
Weapons label to the side of the center
module with the red ON/OFF switch. See
Figure 2. Then apply the dark gray (Alien)
label to the other side.
Apply the large blue BATTLESHIP label
and two rubber feet to the back of the
green ocean grid. See Figure 3. Then
apply the large red BATTLESHIP label
and two rubber feet to the back of the red
ocean grid.
Press the ocean grid panels into the sides
of the module, with the green grid on the
side with the red ON/OFF switch. Then
snap the target grid into the top, with the
green side facing the red ON/OFF switch.
See Figure 4.
On the Navy side of the game, apply
the green label to the target grid and
the small blue BATTLESHIP label to the
storage tray. See Figure 5. Then apply
the red target grid label and the red
BATTLESHIP label in the same places on
the Alien side.
3. Place the Game Parts in the Tray
Carefully detach the 10 ships from
the plastic frames, then discard or
recycle the frame. If needed, use an
emery board or sandpaper to remove
any excess plastic from the ships.
Remove the pegs and aircraft from the
bags, and place half of the parts in each
storage tray, so that each tray has:
• 50 red HIT pegs
• 100 white MISS pegs
• 25 blue SCAN pegs
• 1 red and 1 blue Attack Squadron
(Navy tray only)
• 1 red and 1 blue Scouting Craft
(Alien tray only)
FIGURE 3
FIGURE 2
Navy ocean grid
Storage tray
label
Target grid
label
Alien
ocean grid
Target
grid
FIGURE 4
FIGURE 5
Light gray
label
ON/OFF
switch
ON/OFF
switch
THE FIRST TIME YOU PLAY
Summary of Contents for Battleship Deluxe Movie Edition
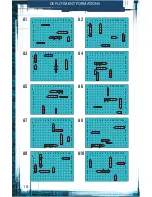
Page 19: ...19 B1 B3 B5 B7 B9 B2 B4 B6 B8 B10 1 2...
Page 20: ...20 C1 C3 C5 C7 C9 C2 C4 C6 C8 C10...
Page 21: ...21 D1 D3 D5 D7 D9 D2 D4 D6 D8 D10 1 2...
Page 22: ...22 E1 E3 E5 E7 E9 E2 E4 E6 E8 E10...
Page 23: ...23 F1 F3 F5 F7 F9 F2 F4 F6 F8 F10 1 2...
Page 24: ...24 G1 G3 G5 G7 G9 G2 G4 G6 G8 G10...
Page 25: ...25 H1 H3 H5 H7 H9 H2 H4 H6 H8 H10 1 2...
Page 26: ...26 I1 I3 I5 I7 I9 I2 I4 I6 I8 I10...


