24
Martin® ELP WW IP User Manual
Effects
This section describes the effects provided by the ELP WW IP fixture
. See ‘DMX protocol’ on page
28 for a full list of the DMX channels and values required to control the different effects.
Dimming
Overall intensity can be precisely adjusted from 0 to 100% using 16-bit coarse and fine control. In
1Ch or 2Ch mode the control is 8-bit. In 1Ch mode this is the only control.
Strobe effects
An electronic shutter provides instant open and blackout, random and variable speed flash from 1
to 12 flashes per second, and pulse effects.
Manual focus
The ELP WW IP
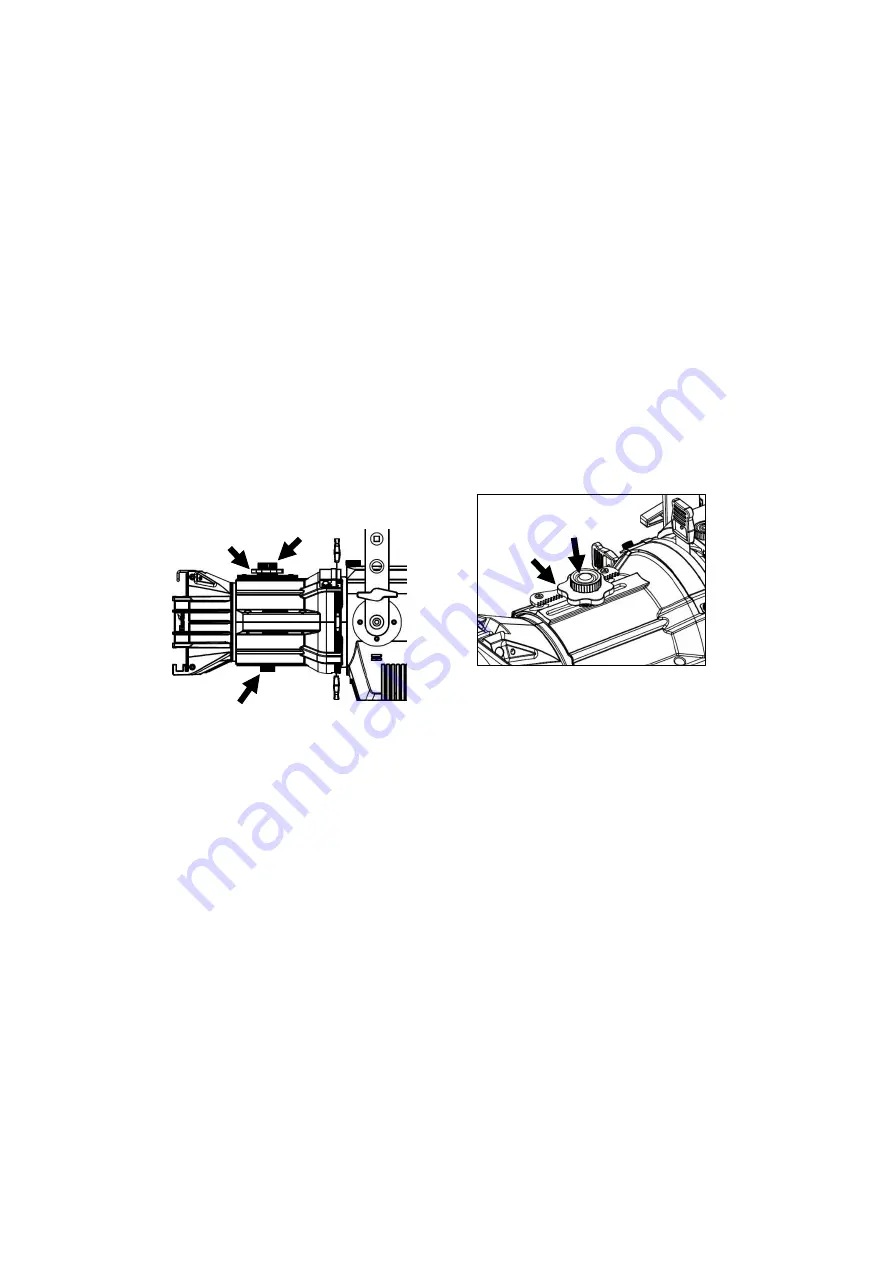
has a unique “Fine Focus” system which allows you to easily make small focus
adjustments using a gear-based wheel on top of the lens tube. To focus the fixture, see drawings
below. Loosen the thumbscrews
A
and
B
on the top and bottom of the lens tube slightly, then turn
the focus wheel
C
to slide the lens in or out of the tube. Tighten the thumbscrews
A
and
B
again to
hold the focus setting.
Manual beam shaping shutters
The fixture has 4 manually operated beam shaping shutters.
To change the shape of the beam, power the fixture on and aim the beam at the target. Use the
four shutter blade handles (see
6
in ‘Fixture overview’ on page 10) to adjust the position of the
shutter blades and obtain the desired beam shape.
Use of gobos and irises
The fixture will accept a standard A-size or B-size goboholder or an iris (items not included) in the
gobo/accessory gate. There is a sliding cover over the gate to prevent light spill and retain the
gobo holder in the fixture. To open the cover, loosen the two thumbscrews at the sides of the cover
and slide it towards the lens. When the gobo holder or accessory is installed, slide the cover back
so it holds the gobo in place and tighten the thumbscrews.
Use of filters
The filter frame that is supplied with the lens tube lets you add color or diffusion filters to the front
of the fixture. Push the filter retaining clip (see
1
in ‘Fixture overview’ on page 10) to one side to
insert and remove filters. Click the retaining clip back into place after inserting a filter and check
that the clip is secure to prevent the color filter frame from falling out.
B
C
A
C
A
Summary of Contents for Martin ELP WW IP
Page 1: ...ELP WW IP LED Profile User Manual...
Page 37: ......
Page 38: ......
Page 39: ...www martin com...


