


3
EN
PLACEMENT
STAGE A190/A180/A170 – LEFT AND RIGHT CHANNELS
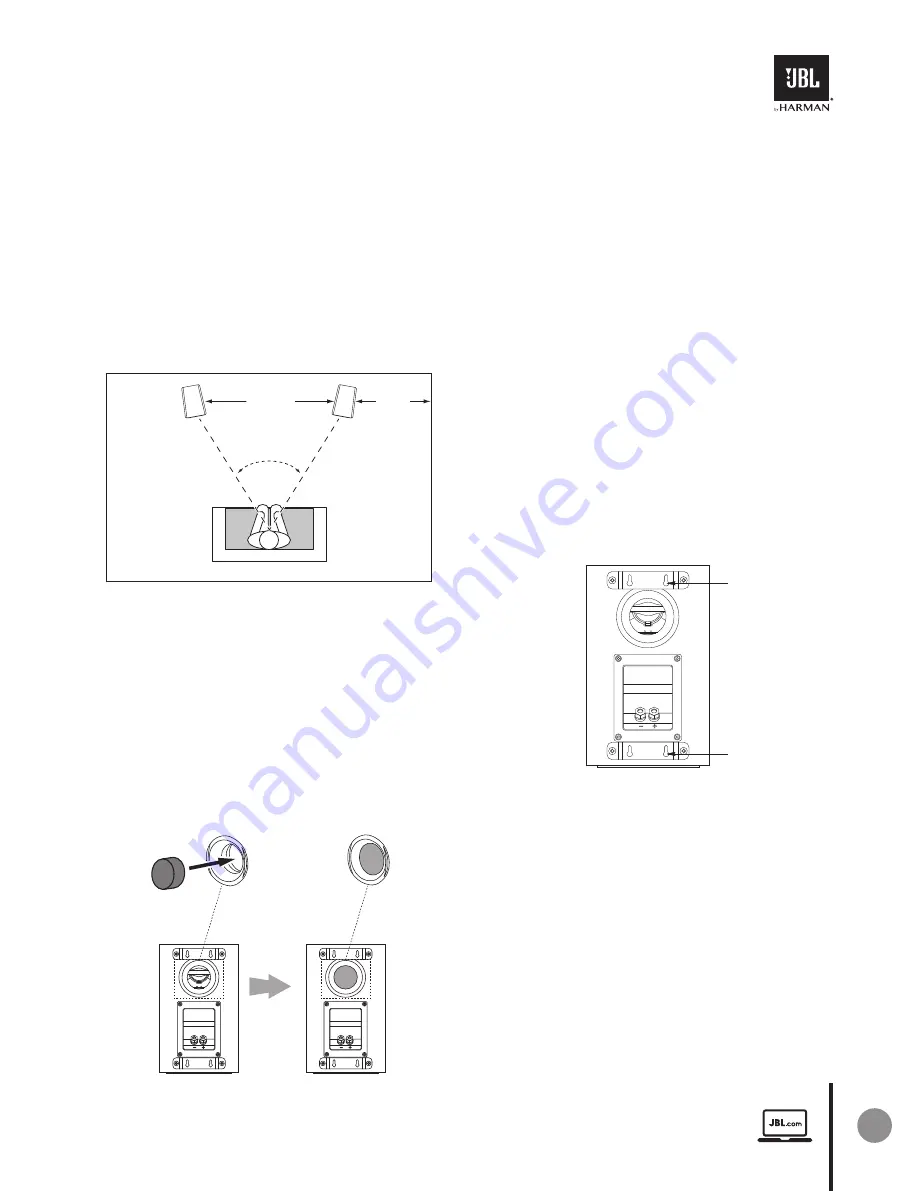
For best results, place the speakers 6 – 10 feet (1.8m – 3m) apart. Angling the speakers toward the listening
position can improve the stereo imaging. The speakers will produce the most accurate stereo soundstage when
the angle between the listener and the speakers is between 40 and 60 degrees.
Use the included carpet spikes for stability and improved performance if you are placing your Stage A190/A180/
A170 speakers on a thick rug or plush carpeting. The carpet spikes can be manually screwed into outrigger feet
provided.
CAUTION: Floorstanding (tower) loudspeakers have a high center of gravity and may become unstable and
tip over during earthquakes or if they are rocked, tipped or improperly positioned. Consider anchoring
these speakers to the wall behind them, using the procedures and hardware customary for anchoring
bookcases and wall units. You are responsible for proper installation and proper selection of hardware.
Generally, bass output will increase as the speaker
is moved closer to a wall or corner.
For best performance, we recommend that you
place the speakers at least 20 inches (51cm) away
from the side and rear walls.
FOAM PLUG
There are two operation modes for A120,
Bookshelfl oudspeaker & On-wall loudspeaker. In
the Bookshelf mode, A120 is the ported system
(port in rear), and in the On-wall mode, A120 is
semi-sealed system which requires a foam plug
inside the port.
WALL-MOUNTING THE STAGE A120
We have designed the Stage A120 speakers to mount
directly onto a wall. Each speaker has four keyholes on
the back and will require four 4.0x38mm wood screws
fastened to a wall stud. If a wall stud is unavailable,
install an anchor appropriate for a 4.0x38mm screw.
NOTE: You are responsible for the correct selection
and use of mounting hardware (available through
hardware stores) that will ensure the proper and safe
wall-mounting of the speakers. 4.0x38mm wood screws
not provided.
1) Using the included wall brackets, mark the positions
on the wall where you would like to place the
mounting screws.
2) Fasten four 4.0x38mm wood screws to the wall
using the markings from Step 1 as your guide.
Leave an 1/16" (1.59mm) space between the wall
and screwhead. If a wall stud is not available, use an
appropriate anchor.
3) Place the speaker on the wall by aligning the keyholes
on the back of the speaker to the screwheads on the
wall. Once positioned properly, the speaker should
slide down slightly and become secure.
6 – 10 ft
(1.8m – 3m)
40° – 60°
>20 in
(>51cm)
Keyholes
Keyholes
Summary of Contents for JBL STAGE Series
Page 1: ...JBL STAGE SERIES LOUDSPEAKERS ENGLISH...
Page 11: ...JBL...
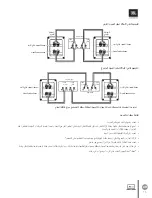
Page 14: ...14 AR STAGE A125C 135C A125C A135C A125C A135C 2 0 61 0...
Page 16: ...16 AR 1 2 3 1 2 3...
Page 17: ...17 AR 1 2 3 4...
Page 18: ...18 AR JBL 1...
Page 21: ...JBL STAGE...
Page 24: ...24 CN TV STAGE A125C 135C A125C A135C 0 2 0 61 TV A125C A135C...
Page 26: ...26 CN Stage Stage 1 2 1 2 3 3...
Page 27: ...27 CN Stage 1 2 3 4...
Page 28: ...28 CN low JBL 1...
Page 31: ...JBL STAGE H JTTALERE I STAGE SERIEN DANSK...
Page 41: ...JBL STAGE SERIE LAUTSPRECHER DEUTSCH...
Page 51: ...SERIE STAGE JBL ALTAVOCES ESPA OL...
Page 61: ...JBL STAGE SARJAN KAIUTTIMET SUOMI...
Page 71: ...JBL S RIE STAGE ENCEINTES FRAN AIS...
Page 81: ...JBL STAGE SERIES LOUDSPEAKER BAHASA INDONESIA...
Page 91: ...JBL STAGE SERIES DIFFUSORI ITALIANO...
Page 101: ...JBL Stage...
Page 104: ...104 JP STAGE A125C 135C TV A125C A135C 0 2 0 61cm TV TV A125C A135C...
Page 106: ...106 JP AC Stage Stage Y Y 1 2 1 2 3 3...
Page 107: ...107 JP 1 2 3 4 2 1 Stage 2...
Page 108: ...108 JP JBL Ch Ch Ch Ch Ch Ch 1...
Page 111: ...JBL STAGE...
Page 114: ...114 KO STAGE A125C 135C TV A125C A135C 0 2 0 61cm TV A125C A135C TV...
Page 116: ...116 KO AC Stage Stage 1 2 1 2 3 3...
Page 117: ...117 KO 1 2 3 4 Stage 2...
Page 118: ...118 KO JBL 1...
Page 121: ...JBL STAGE SERIES LUIDSPREKERS NEDERLANDS...
Page 131: ...JBL STAGE SERIE H YTTALER Norsk...
Page 141: ...SERIA JBL STAGE G O NIKI POLSKI...
Page 151: ...S RIE STAGE DA JBL CAIXAS AC STICAS PORTUGU S DO BRASIL...
Page 161: ...JBL STAGE SERIES...
Page 164: ...164 RU TV STAGE A125C 135C A125C A135C 0 2 0 61 A125C A135C...
Page 166: ...166 RU Stage Stage 1 2 1 2 3 3...
Page 167: ...167 RU Stage 1 2 3 4...
Page 168: ...168 RU JBL 1...
Page 171: ...JBL STAGE SERIEN H GTALARE SVENSKA...
Page 181: ...JBL STAGE...
Page 184: ...184 TW TV STAGE A125C 135C A125C A135C 0 2 0 61 TV A125C A135C...
Page 186: ...186 TW AC Stage Y Stage Y 1 2 1 2 3 3...
Page 187: ...187 TW Stage 1 2 3 4...
Page 188: ...188 TW JBL 1...