


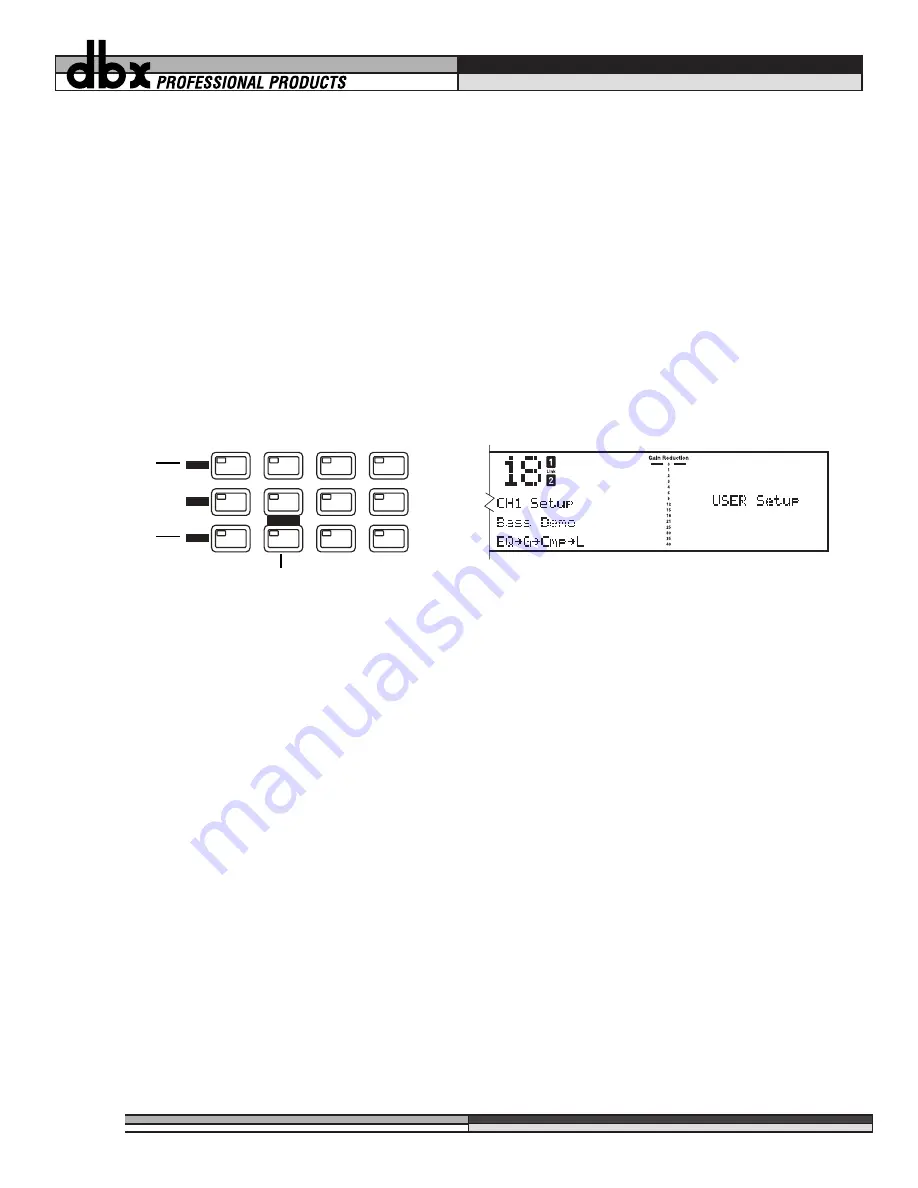
2. Press the “
CH 1
” or “
CH 2
” button, (depending on which setup you want to look at) while the “
pro-
gram
” button’s light is on. This method only lets you see the setup for one channel at a time. The con-
tents of the setup, or the setup’s chain, will be displayed in the third line of text. As you do this, the
program LED will go off, and the LED on the button you pressed will light, indicating that you are now
looking at channel one’s (or two’s) setup. In addition to this telemetry, there will be text which says
“
USER setup
” or “
FACTORY Setup
” in the curve window on the far right side of the display. By turn-
ing the
Data Wheel
, you can scroll through them. You will notice the various factory setups as well as
all your user setups. You can store up to 100 linked setups, and 100 mono setups. As you do more
projects with your DDP, you will begin to gather all types of setups that you have designed and saved
for yourself. You are now in “setup” mode. Using the
Data Wheel
, scroll through the available setups
for the program you have chosen. You will see the 3 linked chain types if you are in a linked program
number, or you will see the 6 chains for mono setups if you are in a dual mono program number.
To get out of setup mode and back to program mode, simply touch the program button. The LED associated with
the
Channel
button will turn off and the
Program
button LED will turn on.
While in program mode, you may scroll through the different factory designed programs by simply turning the
Data Wheel
. By default, the DDP is shipped with the AutoLoad feature activated. This means that the program
number displayed on the screen is the one which is active, scrolling though the programs cancels any changes
you made to the program you last edited. (See Section 4 for details on editing and storing programs and chains,
and Section 5 for more information on AutoLoad and other utility features) In AutoLoad mode, it’s best to scroll
through programs while in “
Bypass
” mode. Enter
Bypass
mode by pressing the Bypass button. Its LED will light
indicating that the DDP is in
Bypass
mode.
The Bypass Button
The
Bypass
button on the DDP works like an analog processor, in order to give you more visual feedback. When
you engage the bypass mode, the DDP’s meters continue to operate, giving you the ability to change and adjust
parameters while bypassed. Refer to figure 1 for more information on where the DDP’s metering points are locat-
ed. It may take a little practice to adjust parameters without being able to hear the effects of the adjustments.
However, this feature is very useful in that it allows you to change programs, setups or parameters in a live situa-
tion without subjecting your audio system or an audience to the sudden change. Simply bypass the DDP, make
your changes, make sure the meters are showing the desired effect, then take the DDP out of Bypass mode.
Setup Mode
Setup mode is the method by which you will manipulate parameters to make them fit your application exactly.
While every effort was made to produce factory presets that work for most applications, it should be noted that
no two systems, situations or applications are exactly alike. Therefore you will have to change and fine tune the
parameters in the chains that have been provided for you. As you become familiar with this process, you will
become more adventurous and creative in setting up your DDP for various applications. In dual mono mode,
each chain is manipulated separately. In linked mode, the stereo pair shows up on the screen as one chain, and
therefore only needs to be edited once.
{{{{
||||
®
,,,,
yyyy
zzzz
10
Section 3: Setup / Basic Operation
DE-ESSER
SIDECHAIN / EQ
UTILITY
SELECT
STORE
BYPASS
COMPRESSOR
LIMITER
EXP / GATE
LOAD
CH 1
CH 2
PROGRAM
PREV PAGE
NEXT PAGE
“CH 1”
Button
“CH 2”
Button
“PROGRAM” Button
Figure 10: Function buttons and LCD display in chain mode.


