32
INITIAL SETUP
HDMI Video:
This setting may be used to manually adjust the resolution
of the HDMI Output signal. The default Auto setting detects the best
resolution the video display is capable of displaying and selects it. If your
video display can handle a higher setting, you may select it here. If the
display does not support the selected setting, the DVD 48 will automati-
cally select an appropriate setting. For some programs, such as DVDs
of older television programs, you may prefer a lower resolution to avoid
distortion due to how they were recorded.
When the 480p/576p setting is selected, the DVD 48 will always output
at 480p for compatibility with NTSC displays. Each setting’s number
indicates the number of horizontal lines per frame. Resolutions ending
in “p” are progressive scan, meaning that all lines making up one frame
are displayed in one pass. When the resolution ends in “i”, it is inter-
laced, meaning that each frame is displayed in two passes, one for all
odd-numbered lines and one for all even-numbered lines. Progressive
scan images tend to be brighter, clearer and freer of distortion.
Wide Screen Format:
This setting may be used to adjust how a 4:3
aspect ratio image is displayed on a wide-screen video display using
the progressive scan Component Video Outputs or the HDMI Output.
•
NL Stretch:
The image is stretched in a non-linear way so that it fills the
screen, leaving no black or gray bars at the top or sides. The image is
stretched more towards the sides than in the center to avoid distortion.
•
Pillar Box:
The image is displayed in its original aspect ratio with bars
on the left and right sides of the screen. This may result in burn-in on
some plasma displays.
•
Off:
No aspect ratio adjustment is made.
DVI Output Range:
This setting adjusts the image when the HDMI
Output is used with an HDMI-to-DVI adapter to connect it to the video
display. Select the Enhanced setting if the black and white in the picture
are not distinct. Leave the setting at the default Standard setting if you
cannot see the correct image when Enhanced is selected.
HDMI Audio:
This setting determines whether and in what format the
audio signal is output through the HDMI Output.
•
Auto:
At this setting the DVD 48 outputs the native digital audio
format, such as Dolby Digital, DTS or MPEG, or PCM as recorded
on the disc. DVD-Audio MLP Lossless
™
audio is always decoded by
the DVD 48 and output as up to 5.1 discrete PCM channels when
either the Auto or PCM setting is selected.
•
PCM:
At this setting the DVD 48 outputs decoded multichannel or
two-channel PCM signals.
•
Off:
This setting mutes the audio output. If the DVD 48 is connected
to a receiver or processor that is not capable of accessing the audio
portion of the HDMI signal, select this setting.
NOTES:
• If the receiver or television is not capable of processing the
data in its native format via HDMI, it is automatically decoded
and output as multichannel PCM.
• If the receiver or television does not support multichannel
signals, it is automatically downmixed to 2-channel PCM at
48kHz/16 bits or less.
• If the receiver or television prohibits downmixing, only the left
and right channel information is output, and you may wish to
use the 6-Channel Analog Audio Outputs instead.
• SACD signals are never available at the HDMI Output, and the
analog audio outputs should always be used.
• When Auto or PCM is selected, the Coaxial and Optical Digital
Audio Outputs are muted.
When you have finished making any adjustments to the HDMI Setup
menu, press the Return Button to return to the SYSTEM SETUP menu
screen (Figure 20).
Step Five – Disc Settings
The Disc Setup menu contains some settings that affect playback of
various discs. If the SYSTEM SETUP menu screen (Figure 20) is not
already in view, press the Setup Button. Use the
⁄
/
¤
Buttons to
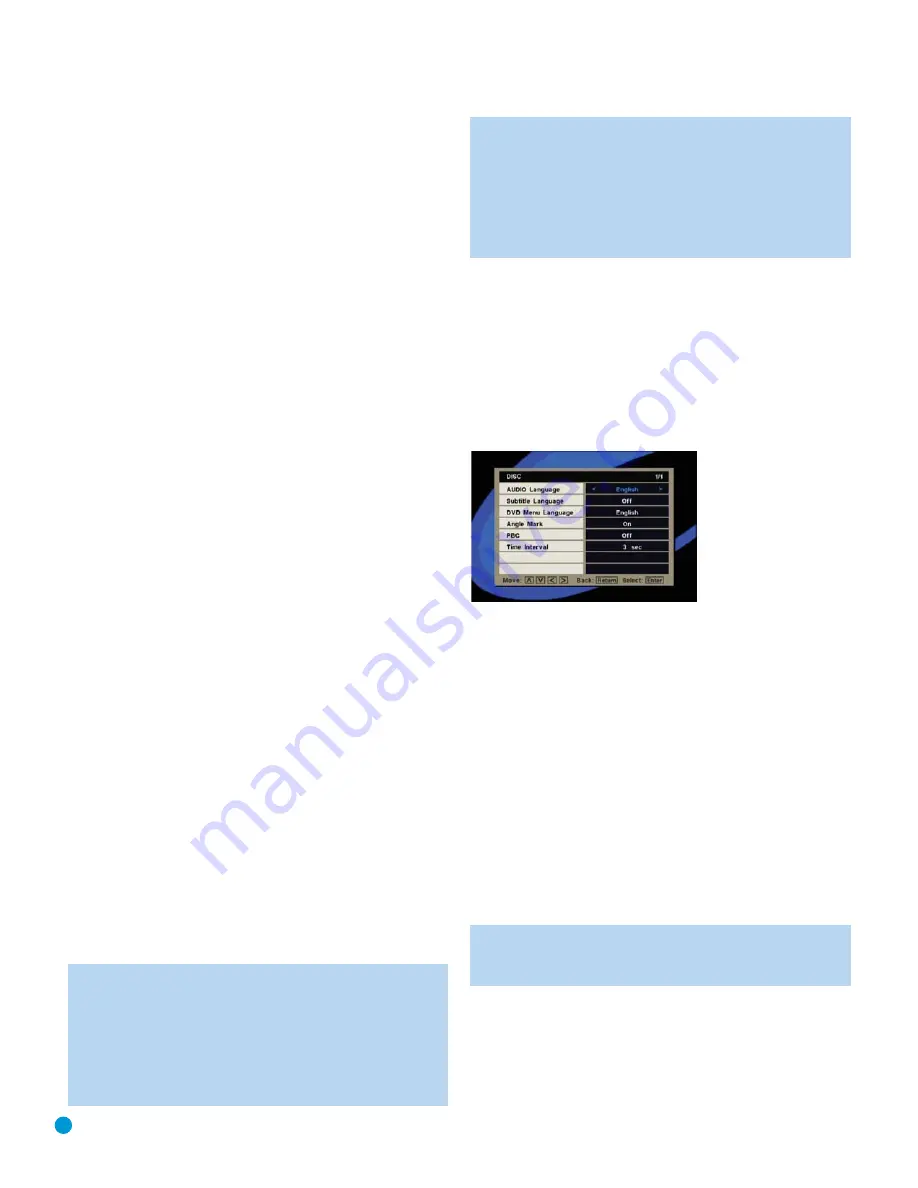
select the Disc tab, and press the Enter Button to view the DISC SETUP
menu. See Figure 32.
Figure 32 – Disc Setup Menu Screen
Audio Language:
This setting is used to select the default language
that will be used for program playback. The factory default setting is
English, but you may choose French, Spanish, Japanese, German,
Italian or Russian. To select a language other than those shown, select
Others from the menu and press the Enter Button. A dialog box will
appear, prompting you to enter a four-digit language code. Look up
the desired language code in Table A11 in the appendix and use the
Numeric Keys to enter it. This setting will display “Others” rather than
the selected language name.
This procedure selects a preferred audio program language, but it will
only be available when the disc being played contains that language.
The list of languages available on any given disc is always shown on the
disc jacket, usually at the bottom of the back cover. The audio playback
language may also be changed during playback using the Audio Select
Button, but any changes made will only be effective during playback of
that disc.
NOTE:
The Audio Select Button is also used to change the
disc’s audio output format, e.g., Dolby Digital 5.1 versus Dolby
Digital 2.0.
Subtitle Language:
This setting selects the language used for the dis-
play of subtitles. The default setting is OFF, to play discs without subtitles.
To set the player so that subtitles will always play in a specific language
when they are available, select from the choices shown.


