background image

5 - Operation

58

Liquid system

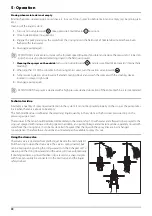
Filling/washing location requirements

When filling the sprayer with chemicals and water it is important to avoid spot contamination by spray chemicals in order 
to protect the subsoil water resources.

A.

If the sprayer is always filled at the same place, a special filling/washing location should be established. This should 
have a hard, liquid-impenetrable surface (e.g. concrete) securing against seepage and edges securing against run-off 
to the surrounding areas. The place should be drained to an adequate receptacle (e.g. slurry tank or similar).

Any spillage or washings should be retained and diluted in order to be distributed on a larger area to ensure minimal 
environmental impact and avoid build-up of larger chemical concentrations at one spot.

If no other requirements of distances exist, the following general recommendation of distance could be used. Not 
closer than:

1) 50 metres from public water supplies for drinking purposes,

2) 25 metres from non-public water supplies for drinking purposes and from treatment sumps and cesspools of 
drainage systems, and

3) 50 metres from surface water (watercourses, lakes and coastal waters) and from nature reserves.

B.

Alternatively the sprayer can be filled in the field where the spraying is to take place. If so, choose a different location 
for each refilling.

If no other requirements of distances exist, the filling should not take place closer than:

1) 300 metres from public or non-public water supplies for drinking purposes and

2) 50 metres from surface water (watercourses, lakes and coastal waters), treatment sumps, cesspools of drainage 
systems, and nature reserves.

μ

ATTENTION! Legislation and requirements vary from country to country. Always follow local legislation in force at any 
time.

÷

NOTE! It is the responsibility of the sprayer owner/operator to comply with all relevant legislation. HARDI cannot 
undertake any responsibilities for incorrect operation and use.

Filling of water

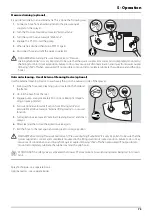
The tank should normally be filled 1/3 with water before adding 
chemicals. Always follow the instructions given on the chemical 
container!

±

WARNING! If the sprayer is put aside with liquid in the main tank, 
all MANIFOLD valves must be closed.

Summary of Contents for NAVIGATOR DELTA

Page 1: ...NAVIGATOR DELTA Original Instruction book 67012000 104 Version 1 04 GB 05 2012 www hardi international com ...

Page 2: ...k are to the best of our belief correct at the time of printing As it is HARDI INTERNATIONAL A S policy permanently to improve our products we reserve the right to make changes in design features accessories specifications and maintenance instructions at any time and without notice HARDI INTERNATIONAL A S is without any obligation in relation to implements purchased before or after such changes HA...

Page 3: ...arding the Machinery Directive CE marking 2009 127 EC and later amendments regarding machinery for pesticide application 2014 30 EU regarding electromagnetic compatibility EMC Electronic components on the machine are tested and installed according to the requirements of the EMC Directive as well as the following ISO standard ISO 14982 regarding test methods and acceptance criteria for electromagne...

Page 4: ...1 EC Declaration 4 ...

Page 5: ...Diagram Liquid system 23 Diagram Liquid system with options without Dilution 24 Diagram Liquid system with all options 25 Hydraulic systems 26 PARALIFT hydraulics 26 IntelliTrack hydraulics optional 26 Boom 27 Boom and terminology 27 Equipment 28 ManualTrack 28 IntelliTrack 28 Driving technique for IntelliTrack 28 Platform 29 Right side cover 29 Tank level indicator 29 Nozzle pressure gauge 30 Che...

Page 6: ...5 Label for Dilution kit optional 45 BoomPrime adjustment optional 46 Transport 47 Transport lock 47 Track width axles and wheels 48 Altering the track gauge optional 48 Turning rim 48 Counter weight 49 Boom 50 Pendulum setup 50 Pendulum effect adjustment 50 Parallel setting of lift and frame 51 Boom folding speed adjustment LPY only 51 Brakes 52 Emergency and parking brake optional 52 Hydraulic a...

Page 7: ...bricants 75 Boom lubrication oiling plan 76 Trailer lubrication oiling plan 77 P T O lubrication oiling plan 77 Service and Maintenance intervals 78 10 hours service EasyClean filter 78 10 hours service Cyclone Filter 78 10 hours service In Line filter optional 79 10 hours service Spraying circuit 79 10 hours service Brakes optional 79 10 hours service Brakes air tank optional 79 50 hours service ...

Page 8: ...transmission shaft cross journals 94 Change of tyre 95 IntelliTrack front potentiometer calibration 95 Safety valve activation 96 Grease the ProFlow valve optional 96 Off season storage 97 Off season storage program 97 7 Fault finding Operational problems 99 General info 99 Liquid system 100 Hydraulic system Z model 101 Hydraulic system Y model 102 IntelliTrack 102 Mechanical problems 103 Emergenc...

Page 9: ...box 112 Plug positions for LPZ hydraulics 113 Rear lights 113 ProFlow electrical connections 113 Charts 114 Boom hydraulic Y 114 Boom hydraulic Z 114 Electrical specifications for boom and work light 115 Sprayer hydraulic Z type IntelliTrack 115 Sprayer hydraulic Z type ManualTrack 116 Index Index 117 ...

Page 10: ...Table of Contents 10 ...

Page 11: ...tor is certified to use spray equipment Adhere to the law Tractor drivers seat is the intended working place during operation Wear protective clothing Clothing may differ depending on chemical being sprayed Adhere to the local law Wash and change clothes after spraying Wash tools if they have become contaminated Do not eat drink or smoke while spraying or working with contaminated equipment In cas...

Page 12: ...ces on the machine Anybody working with or being in close range of the sprayer must respect these labels The labels should always be clean and readable Worn or damaged labels must be replaced with new ones Contact your local dealer for new labels Note that not all labels shown here will apply to your sprayer Tank under pressure Beware when moving lid Grapping area Manual handling of boom etc Servi...

Page 13: ...vice Tighten with torque according to instruction book Risk of falling off Do not ride on platform or ladder Risk of injury Keep hands away Risk of sprayer tipping over Be aware when disconnecting the sprayer Risk of injury Do not open or remove safety shields while engine is running Risk of burn Stay clear of hot surfaces Risk of squeeze Keep hands away when parts is moving Risk of injury Flying ...

Page 14: ...2 Safety notes 14 ...

Page 15: ... 7 Spray pressure gauge 8 Clean water tank lid 9 SafetyLocker 10 Parking brake 11 Pump 12 Drawbar hitch 13 Support leg 14 Step to platform 15 Agitation External Cleaning Device valve 16 Pressure SmartValve 17 External Filling ON OFF valve 18 Suction valve 19 External Filling coupler 20 EasyClean filter 21 Rinsing tank coupler 22 Pressure draining coupler 23 TurboFiller valves 24 TurboFiller ...

Page 16: ...cates producer name model own weight max height max pressure of the hydraulic system if fitted and max pressure of the spray liquid system 25 Rinsing tank 26 Main tank 27 Hose reel for External Cleaning Device 28 ChemLocker with FoamMarker tank 29 CycloneFilter 30 Support leg storing position ...

Page 17: ...ose It is not allowed to use the sprayer for any other purposes If no local law demands that the operator must be certified to use spray equipment it is strongly recommended to be trained in correct plant protection and in safe handling of plant protection chemicals to avoid unnecessary risk for persons and the environment when doing your spray job Frame Very strong and compact frame which also ha...

Page 18: ...ssurized liquid from the pump will be routed to The active function is indicated by the indicator The handle is turned so the indicator points to the label for required function If handle is turned to a position without label unused function then the valve is closed Suction valve Blue symbols This valve is to select suction from main tank or from the rinsing tank The handle is turned so the label ...

Page 19: ...ed via a remote control box The unit has a built in HARDI MATIC Rinsing tank optional A rinsing tank can be mounted to the rear of the sprayer The tank are made of impact proof and chemical resistant polyethylene Nominal content appr 450 litres Filters A EasyClean suction filter is fitted in the working zone It has a built in valve that closes when the filter is opened for inspection or cleaning A...

Page 20: ... with 2 dots Normal spraying position With return flow to prevent filter is going to be clogged when spraying This position is used when rinsing the boom if the main tank is empty C This position marked with 3 dots Flushing position which is used if filter is clogged Lift and hold the lever to use this position which largely increases return flow and flushes the filter The pressure SmartValve must...

Page 21: ...ller TurboDeflector valve This TurboDeflector valve activates theVortex flushing of theTurboFiller Lift the lever to lock it in open position for continuous liquid rotation in the hopper Chemical Container Rinsing lever The upper lever is used for two purposes When the TurboFiller lid is open For rinsing empty containers Place the container over the rotating flushing nozzle in the middle of the Tu...

Page 22: ...urn any water back to the main tank through the EVC section valves dump line The BoomPrime pressure is adjusted on the handle at valve D that comprises a pressure gauge See BoomPrime adjustment optional on page 46 for adjustment Dilution kit optional The dilution kit consist of the four valves added to the liquid system enabling the rinsing water to be directed from the rinsing tank into the main ...

Page 23: ... valve 5 Pressure SmartValve 6 CycloneFilter 7 Return line for boost function 8 Return pressure drop 9 Return pressure equalisation 10 Distribution valves 11 Pressure gauge 12 Spray boom 13 Agitation valve 14 Agitation tube 15 Tank tube for return lines riser pipe 16 One way valve 17 Safety valve 18 Tank tube riser pipe ...

Page 24: ...Tank tube for return lines riser pipe 16 One way valve 17 Safety valve 18 Tank tube riser pipe 19 Tank rinsing nozzles 20 RinseTank 21 RinseTank coupler 22 Valve block TurboFiller 23 TurboFiller 24 Ejector for TurboFiller 25 Ecofill valve 26 Tank tube for Turbofiller 27 Filling coupler 28 Filling valve 29 FastFiller ejector 30 FastFiller hose to tank inlet 31 Pressure Empty 32 Pressure drop line f...

Page 25: ...ve 18 Tank tube riser pipe 19 Tank rinsing nozzles 20 RinseTank 21 RinseTank coupler 22 Valve block TurboFiller 23 TurboFiller 24 Ejector for TurboFiller 25 Ecofill valve 26 Tank tube for Turbofiller 27 Filling coupler 28 Filling valve 29 FastFiller ejector 30 FastFiller hose to tank inlet 31 Pressure Empty 32 Pressure drop line for Pressure Empty 33 External cleaning 34 BoomPrime restrictor 35 Bo...

Page 26: ...tems PARALIFT hydraulics This PARALIFT hydraulic block manages hydraulic pressure for the PARALIFT IntelliTrack hydraulics optional This IntelliTrack hydraulic block manages hydraulic pressure for the IntelliTrack steering functions ...

Page 27: ... the tractor hydraulics LPZ boom The boom is pendulum suspended and fully hydraulically operated all functions are controlled via the Direct Hydraulic System D H The boom is also equipped with individual boom tilt control and a hydraulic pendulum lock Individual folding of outer sections enable alternative boom widths The boom can also be used in half folded position Half folded lengths are the fo...

Page 28: ...ocked if fitted see Tracking drawbar transport lock optional on page 37 Refer to the HC 5500 controller instruction book for specific instructions NOTE IntelliTrack requires the HC 5500 controller More information about the controller can be found in the seperate instruction book Driving technique for IntelliTrack A trailer with IntelliTrack behaves differently than a normal trailer In tracking po...

Page 29: ...nk The clean water tank is integrated to the side cover and is filled from the platform when right side cover is closed μ ATTENTION Only open the right side cover when the clean water tank optional is empty Tank level indicator The actual tank level in the main tank can be observed on the tank level indicator The scale is displayed in litres or Imp gal US gal certain countries μ ATTENTION The leve...

Page 30: ... The locker is split in two compartments for the separation of clean clothes from gloves with risk of contamination WARNING Although this locker is meant for storing nontoxic items it must never be used for storing food beverage or other things meant for consumption Night Spraying Light optional The 2 boom flood light lamps A are mounted to the railing of the platform one at each side and are posi...

Page 31: ...ater jet at people animals electrical installations or other sensitive objects Never try to clean clothing or footwear which you or other people wear EcoFill optional As an option an EcoFill coupling can be fitted which enables the ejector to suck chemicals directly from closed transfer containers This kit contains a Parker coupling on the chemical inlet and a Micro Matic coupler to flush the fill...

Page 32: ...3 Description 32 ...

Page 33: ...r end A or a hook can be fastened into the hole in the front end of the sprayer B Before putting the sprayer into operation Although the sprayer has been supplied with a strong and protective surface treatment on steel parts bolts etc in the factory it is recommended to apply a film of anticorrosion oil e g CASTROL RUSTILO or SHELL ENSIS FLUID on all metal parts in order to avoid chemicals and fer...

Page 34: ...e only 3 Secure with the linch pin To remove the support leg 1 Lift the leg 2 Remove the linch pin and pull out the support leg Secure the leg at the storage bracket with the linch pin Jack up the sprayer When the sprayer needs wheel mounting wheel changing brake or wheel bearing changing etc then jack up the sprayer under the axle as shown DANGER Be sure to place sprayer at level and firm ground ...

Page 35: ...enance or repairs to the transmission shaft or implement DANGER ROTATING TRANSMISSION SHAFTS WITHOUT PROTECTION GUARDS ARE FATAL P T O installation Always read the manufacturer s instruction book before applying any installation of the transmission shaft First installation of the transmission shaft is done in the following way 1 Attach the sprayer to the tractor and set the sprayer height in the p...

Page 36: ... version has rods instead of cylinders All drawbars are fastened to the underside of the sprayer near the rear axle with 6 bolts secured by lock nuts Furthermore the drawbar is supported by 2 bolts secured with lock nuts located in the area below the platform Following drawbar hitches are available steering or fixed for both high and low tractor hitch points A Low D33 50 swivel B Low D50 hitch C L...

Page 37: ...ual for the two turnbuckles A to position the drawbar Turn the turnbuckles A until the measure is correct 3 Retighten the counternuts B again Tracking drawbar transport lock optional The transport lock is a safeguard that will keep the drawbar in a centred position in case of hydraulic leakage during transport on public roads The transport lock is fixed by swinging the lock plate onto the steering...

Page 38: ...O shaft etc all hoses cables and wires are held by the hose bracket fitted to the sprayer platform Check that the length of the hoses and cables are sufficient by tight turns μ ATTENTION A sprayer with IntelliTrack requires more slack in the cables Make sure cables are long enough in tight turns when fully steered ...

Page 39: ... are A single outlet to raise or lower the boom A double outlet to fold or unfold the boom A double outlet for Hydraulic Slanting Control optional equipment The hydraulic hoses are marked with arrows to indicate direction of oil flow The hydraulic system requires an oil flow bet ween 25 and 130 l min 5 5 28 6 Imp gal min and a min pressure of 170 bar 2500 p s i μ ATTENTION After having operated th...

Page 40: ...ection WARNING Before operating the hydraulics the valve should be set according to the specific tractor model If you are unsure of the type of hydraulic system in your tractor please contact your tractor dealer Combinations of settings for flow element and circuit value if tractor requires pressure relief contact your tractor dealer for further advice WARNING Always be sure to fully open or close...

Page 41: ...potentiometer reading F is 2 50 Volt i e in centre position 5 If the reading F is not correct then adjust the chain connection until F 2 50 Volt Allowable deviation is 0 05 Volt Power supply Power requirement is 12V DC Always note polarity For proper function of the electric equipment the wires must have the following recommended cross sectional areas and correct fuses to ensure a sufficient power...

Page 42: ...tubes B are supplied One two or all three may be used They can be bent and shortened A spacer C is also supplied to allow further attachment possibilities Find the best solution for your tractor or vehicle Tube B plate is staggered so that if correctly orientated all boxes will line up Road safety kit Connect the plug for rear lights to the tractor s 7 pin socket and check the function of rear lig...

Page 43: ...ptional function 10 Speed transducer for sprayer The speed transducer and speed ring are located at the inside of the sprayers right wheel The sensor is an inductive type that requires a metallic protrusion to pass by it to trigger a signal To trigger a speed ring is used It should be adjusted so transducer is placed to the centre of the holes in the speed ring vertical direction Recommended dista...

Page 44: ... 6 Press up the pressure regulation switch at the spray control unit until the required spray pressure is shown on the pressure gauge ADJUSTMENT OF PRESSURE EQUALIZATION 7 Close the first section valve on the spray control unit 8 Turn the adjusting screw for the corresponding valve until the pressure gauge shows the same pressure as when all sections were open 9 Open the section valve again 10 Adj...

Page 45: ...he air pressure should be adjusted as shown in the diagram The diagram is embossed on the damper Label for Dilution kit optional As the Dilution kit uses a function switch on the spray control box has to be labelled as shown The switch in use may differ depending on machine configuration μ ATTENTION Place of label on the picture is an example only Spray Pressure Bar Damper pressure Bar 1 5 3 0 1 3...

Page 46: ... adjuster screw A to increase the BoomPrime pressure to 4 bar or until the nozzles start to leak 5 If nozzles leak then lower the BoomPrime pressure by 1 bar on the adjuster screw A μ ATTENTION If not adjusted correctly nozzles will not close i e will leak when the spraying is stopped or it will not prime the tubes The possible priming circulation speed of BoomPrime relies on the non dripvalves to...

Page 47: ...ings so the boom is resting on the front as well as rear brackets WARNING The max transport height must never exceed 4 0 m 13 1 ft Always measure the actual total height and choose settings not exceeding 4 0 m For LPY models the wire should be adjusted simultaneously with the transport lock A combination of adjustments described in the following part form each transport position This includes adju...

Page 48: ...ilitate the operation 7 Lower down the LH wheel 8 Tighten the clamp bolts A to a torque of 250 Nm and lock the bolts with the counternuts 9 Repeat the procedure on RH wheel 10 Check if the distance from centre tyre to centre of rear frame is equal at RH and LH 11 Retighten bolts and wheel bolts to specified torque after 8 hours of work μ ATTENTION The wider the track width the better the stability...

Page 49: ...to the water and agitated until it is fully dissolved Never pour water on to CaCl2 If you get CaCl2 in the eyes flush instantly with cold water for at least 5 minutes and seek medical advice afterwards WARNING The tyres must be liquid filled to max 75 of total tyre volume Fill only the qty of liquid necessary to obtain sufficient stability of the sprayer Do not fill liquid and CaCl2 mixture in tyr...

Page 50: ...wards Counterclockwise rotation The spring arrangement becomes shorter and the steering arms are moved upwards Use a level to inspect the alignment to make sure the 4 steering arms are level When correct position is obtained 1 Refit the spring arrangement and tighten the big nut at the upper end of arrangement 2 Extra check that the spring arrangement is correctly refitted and then release support...

Page 51: ...n 175 185 mm Measure the distances to control the uniformity Boom folding speed adjustment LPY only Adjustable restrictors for the regulation of boom folding and unfolding speed are located on the hydraulic distribution block fitted at the boom centre frame It is important to adjust the valves to ensure that the boom operates smoothly 1 Adjust the 4 screws A They are screwed the whole way in clock...

Page 52: ...rking brake before the rope breaks μ ATTENTION To ensure safe engagement and to avoid damages to the parking brake use rope with an ultimate stress between 690 N 155 lb and 785 N 176 lb WARNING Relieve the parking brake before driving Hydraulic activated brakes optional This requires aspecial trailer brakevalve attached to the tractor hydraulic and brake system Connect the snap coupler to the trac...

Page 53: ...ing optimal air pressure to the trailer brakes WARNING Driving with wrong load apportioning valve setting will make the brakes under or overapply which can cause hazardous situations Single line brakes optional 1 Flip the snap coupler protection flap away 2 Connect the snap coupler to the tractor outlet black 3 Let the compressor fill the sprayer s air reservoir 4 Check brake circuit for leaks Dua...

Page 54: ...4 Sprayer setup 54 ...

Page 55: ... Unintended boom movements may cause contact with overhead power lines μ ATTENTION A label ref no 978448 follows the sprayer This label must be placed in the cabin visible from the operator s seat μ ATTENTION Only unfold and fold the boom on level ground Manoeuvring of the boom LPY 1 The boom unfolding folding can be done according to instructions below 2 Lift up the boom lift until the boom is cl...

Page 56: ...ed 2 Push switch 4 upwards to lift the boom clear of the front transport brackets 3 Push switch 8 downwards to unfold the inner sections Rear transport hooks disengage automatically 4 Push switches 3 and 5 downwards to lower the individual tilt rams 5 Push switch 7 to the left and 13 to the right to unfold outer sections 6 Push switch 6 to correct slant angle 7 Push switch 4 downwards to lower the...

Page 57: ...t is possible to spray with boom only half unfolded In case this is needed then only unfold inner sections by pressing swich 8 downwards On the spray control unit also turn off the spray sections placed on outer boom sections 2 3 boom width Alternative boom widths can be obtained by folding outer section s The pendulum must always be locked if driving with only one outer section folded in position...

Page 58: ... supplies for drinking purposes and from treatment sumps and cesspools of drainage systems and 3 50 metres from surface water watercourses lakes and coastal waters and from nature reserves B Alternatively the sprayer can be filled in the field where the spraying is to take place If so choose a different location for each refilling If no other requirements of distances exist the filling should not ...

Page 59: ...uction Manifold 2 Turn agitation valve to Agitation pressure SmartValve to Main tank 3 Engage diaphragm pump and set P T O revolutions at 540 r min 4 Turn handle on External Filling Device valve towards Filling Device 5 The tank is now filled with water Keep an eye on the liquid level indicator 6 Turn handle on Suction Manifold away from Filling Device to discontinue filling process Then disengage...

Page 60: ...d the upper right corner of the display shows the volume being filled 10 When the volume to be filled has been reached then ProFlow automatically stops the filling by closing the ProFlow valve E To avoid over filling of the tank ProFlow automatically stops the filling when main tank is full if the pre selected volume to be filled exceeds the possible volume to be filled into the main tank 11 Turn ...

Page 61: ...For use of water Turn the ball valve lever to open The ball valve is located on the valve cover The water from this tank is for hand washing cleaning of clogged nozzles etc Only fill the clean water tank with clean water from the well WARNING Although the clean water tank is only filled with clean water this water must NOT be used for drinking ...

Page 62: ...er WARNING Be careful not to slip or splash chemicals when carrying chemicals up to the tank lid μ ATTENTION Due to risk of spillage and spot contamination it is not allowed in several countries to fill chemicals directly through the tank lid Use the TurboFiller for all induction of chemicals instead 1 Make sure the spray control unit is switched off 2 Set suction valve towards Suction from main t...

Page 63: ...s recommended to use a measuring jug for best accuracy 5 Engage the hopper transfer device by opening the TurboFiller suction valve and the chemical is being transferred to the main tank μ ATTENTION The hopper rinsing device is using spray liquid for rinsing the hopper for concentrated chemical Cleaning the TurboFiller must always be done when the spray job is ended and together with the entire sp...

Page 64: ...device can flush it down DANGER Always wear face shield and other appropriate personal safety equipment when filling chemicals 6 If the chemical container is empty it can be rinsed by the Chemical Container Cleaning device Place the container over the multi hole nozzle and push the upper lever to the left of the TurboFiller DANGER In order to avoid spray liquid hitting the operator do not press le...

Page 65: ...f Lever up is OFF and down is ON 8 Optional function A OFF B If extra equipment is added it can be controlled from here Middle position is OFF In order to close the entire boom switch main ON OFF 3 to OFF position This returns the pump output to the tank through the return system The diaphragm Non drip valves ensure instantaneous closing of all nozzles In order to close one or more sections of the...

Page 66: ...orised persons EcoFill optional The optional EcoFill is an extra valve situated between the EasyClean filter and the TurboFiller A Parker coupling is fitted to the EcoFill valve and a Micro Matic coupling is situated just below the EasyClean filter Use the EcoFill valve to select whether chemical transfer is done via the TurboFiller or by suction directly from the chemical container Procedure when...

Page 67: ...the lid to inspect if the TurboFiller is empty If not close the lid again and press the TurboFiller suction valve until the TurboFiller is empty μ ATTENTION TheTurboFiller needs to be cleaned thoroughly after finishing spraying again to be sure it is clean before spraying other crops that may be sensitive to the chemicals just used See section Cleaning on page 69 for details BoomPrime optional The...

Page 68: ...lve to Off for at short while and then On This also dilutes the pressure equalization piping 7 Repeat point 1 6 twice until the rinsing tank is empty Boom dilution When a spray job is interrupted then chemical residues in the boom piping must be diluted before returning to the farm 1 Continue driving in the field with the main On Off valve open 2 Select Boom dilution C 3 Dilute boom piping by spra...

Page 69: ...the same spot every time and keep sufficient distance to the water environment You must prevent seepage or runoff of residue into streams water courses ditches wells springs etc The washings from the cleaning area must not enter sewers Alternatively the washings can be retained in an appropriate receptacle diluted and distributed over a larger cultivated area see Filling washing location requireme...

Page 70: ...e that some chemicals require the tank to be completely filled Add appropriate detergent and or deactivating agent e g washing soda or Triple ammonia Special detergents for sprayer cleaning is recommended as some also lubricate ball valves etc 7 Start the pump and operate all controls enabling the liquid to come into contact with all the components Leave the distribution valves until last Some det...

Page 71: ...f nozzles Close TurboFiller lid and squeeze the Chemical Container Cleaning grip to clean this device Open TurboFiller lid again and make sure that TurboFiller is empty When empty close the TurboFiller suction valve again Take care that the External fast filling connection and the line are not contaminated with chemicals 5 Turn the suction valve towards and the pressure SmartValve towards and spra...

Page 72: ...leaner lubrication of the entire machine is recommended Technical residue Inevitably a quantity of spray liquid will remain in the system It cannot be sprayed properly on the crop as the pump takes in air when the tank is about to be empty This Technical Residue is defined as the remaining liquid quantity in the system as the first clear pressure drop on the pressure gauge is read The residues in ...

Page 73: ...on the outwards side of the sprayer 1 Swing out the hose reel Cleaning gun is located in the holder at the frame 2 Un roll the hose from the reel 3 Engage pump at approximately 300 r p m or 560 r p m depen ding on pump model 4 Turn suction Valve towards Suction from Rinsing tank and pressure SmartValve towards External filling device or not used function 5 Turn agitation valve towards External Cle...

Page 74: ...5 Operation 74 ...

Page 75: ...ms in lubrication oiling plans designate the following 1 Lubricant to be used see Recommended lubricants 2 Recommended intervals hours μ ATTENTION If the sprayer is cleaned with a high pressure cleaner lubrication of the entire machine is recommended Recommended lubricants BALL BEARINGS Universal Lithium grease NLGI No 2 SHELL RETINAX EP2 CASTROL LMX GREASE SLIDE BEARINGS Lithium grease with Molyb...

Page 76: ...6 Maintenance 76 Boom lubrication oiling plan ...

Page 77: ...6 Maintenance 77 Trailer lubrication oiling plan P T O lubrication oiling plan Serie 100 type P T O shaft C 50 ...

Page 78: ...before opening the filter 10 hours service Cyclone Filter To service the Cyclone filter 1 Close the suction valve and close the pressure valve 2 Unscrew filter lid A 3 Lift the lid and filter B from housing 4 Seperate filter from the integrated filter guide in the lid and clean the filter To reassemble 1 Grease the two O rings on the lid filterguide Due to small space at lid for example use a brus...

Page 79: ...ve clothing and gloves before opening the filter 10 hours service Nozzle filters Check and clean 10 hours service Spraying circuit Fill with clean water operate all functions and check for leaks using higher spray pressure than normal Check nozzle spray patterns visually using clean water 10 hours service Brakes optional Apply brake pedal and check function of trailer brakes 10 hours service Brake...

Page 80: ...ER Never inflate tyres more than to the pressure specified in the table Over inflated tyres can explode and cause severe personal injuries See the part Occasional maintenance Change of tyre WARNING If renewing tyres always use tyres with min load index as specified 100 hours service Check adjust drawbar Fixed high drawbar only If too much play is found in the lateral movements of the drawbar it mu...

Page 81: ... length When the brake is relieved the cable must be tight and yet not stretched Lengthening shortening of the parking brake cable is carried out by adjusting the turnbuckle located inside the chassis Inspect the parking brake cables for possible wear or damages Replace worn or damaged parts 250 hours service Brake adjustment optional Lift the back of the sprayer from the ground It is recommended ...

Page 82: ...The O ring should be lightly lubricated with silicone grease before installation WARNING Never dismantle the filter without having the tractor disconnected and pressure relieved 250 hours service Hydraulic brakes optional Apply brakes to full pressure and inspect brake lines for damages or leaks Replace damaged parts If the hydraulic brake lines have been dismantled the circuit must be primed afte...

Page 83: ...ours service regarding torque wrench setting Tighten all bolts to half the specified torque first then to the full specified torque 15 Tighten again after 10 hours of work Check the torque every day until it is stabilised μ ATTENTION The shaft has a vertical and an horizontal cotter pin hole Use the one first aligned with the notch when loosening the castellated nut WARNING If you do not feel tota...

Page 84: ...d slide the brake shoes over the cam Twist the pair of brake shoes to remove the shoe return springs I Replace brake shoes if the linings are worn 12 Apply a small quantity of copper paste on moving parts and assemble the brake shoes and shoe return springs again 13 Fit the shoe assembly with the anchor bolt first Then pull the shoes away from each other and slide them over the cam afterwards Tigh...

Page 85: ...upper side inlets It has to be placed in the valve openings as shown All others are the type with black flap It is recommended to use new gaskets 3 when changing or checking the valves Diaphragms Remove the diaphragm cover 4 The diaphragm 5 may then be changed If fluids have reached the crankcase re grease the pump thoroughly Also check that the drain hole at the bottom of the pump is not blocked ...

Page 86: ...gm cover 4 The diaphragm 5 may then be changed If fluids have reached the crankcase re grease the pump thoroughly Also check that the drain hole at the bottom of the pump is not blocked Reassemble with the following torque setting Reassemble pump model with the following torque setting Cone check renewal for pressure regulation valve If it becomes difficult to build up sufficient pressure or if pr...

Page 87: ...e return line If there is any leakage the valve cone E must be changed 1 Remove the clip C 2 Lift the motor housing off the valve housing 3 Unscrew the screw D and replace the valve cone E 4 Reassemble in reverse order Level indicator adjustment The level indicator reading should be checked regularly When the tank is empty the float should lie on the stop pin D of the rod and the O ring on the ind...

Page 88: ...ke sure the tank is empty and clean 2 The valve must be closed and the string loose 3 Pull out the clip A and pull down connecting piece B The entire valve assembly can now be pulled out 4 Check cord and valve flap assembly C for wear replace seal D and assemble again 5 Assemble the valve assembly again using a new valve seat E Lubricate O rings F before assembly 6 Fit clip A again μ ATTENTION Che...

Page 89: ...may be replaced Adjustment of 3 way valve The MANIFOLD valve can be adjusted if it is too tight to operate or if it is too loose liquid leakage Correct setting is when the valve can be operated smoothly by one hand Use a suitable tool and adjust the toothed ring inside the valve as shown on the drawing Retighten the frame The frame are two sections bolted together Also the drawbar is bolted to the...

Page 90: ...ontal alignment of centre and inner section 1 Loosen nut A on the eye bolt B 2 Adjust the position of the rod end C If the piston rod is screwed outwards the boom will point forwards If the piston rod is screwed inwards the boom will point backwards 3 Tighten nut A against rod end C again Vertical alignment of centre and inner section LPY only 1 Remove the bolt A which holds the wire 1 2 Hold on t...

Page 91: ... rest firmly against the mounting F no space between the two parts at all Horizontal alignment of outer and breakaway section 1 Loosen the 3 nuts on both of the two horizontal bolts A 2 Loosen the nuts on the two vertical bolts B and adjust the setting of these bolts in order to align the breakaway section 3 Tighten the nuts on the bolts B again 4 Tighten the nuts on the two horizontal bolts A aga...

Page 92: ...Remove the shaft containing the yaw damper 7 Fasten the shaft in e g a jig 8 Loosen and remove jag nut D and counter nut C 9 Unscrew the yaw damper from the shaft and replace it with a new one Grease the top of the new damper 10 Place the jag nut D on the shaft again and fasten it against the new rubber damper Also fit counter nut C on the shaft again 11 Reassemble in reverse order Remember to pos...

Page 93: ...ce the measure should be close to 45 mm Slanting indicator adjustment optional If the position of the pointer on the indicator does not correspond to the actual boom position the pointer A can be adjusted 1 Loosen the small bolt B sufficiently to allow the wire C to be adjusted 2 Place the pointer A in correct position and fasten bolt B against the wire C again Wear bushing renewal on boom lift Th...

Page 94: ...Keep steering until air is no longer visible in the hose 5 Close the venting screw A again 6 Repeat the procedure for the right side cylinder 7 Steer fully from left to right 8 10 times 8 Do the venting procedure again to assure there is no air in the system 9 Mount the dust caps to the venting screws A again DANGER Be careful when operating the track Be sure there is space enough to steer the spr...

Page 95: ...e the beads before starting inflation of the tyre If the beads are seated correctly on the rim at 100 130 kPa inflate the tyre to a maximum of 250 kPa 36 p s i until they seat perfectly on the rim 10 Never exceed the maximum mounting pressure moulded on the tyre 11 After mounting tyres adjust inflation pressure to operation pressure recommended by the tyre manufacturer 12 Do not use tubes in tubel...

Page 96: ... Failure to do so may cause risk of contamination and injury from quick coupler lid being shot off when pressurized If not possible to mount lid completely lubricate the rubber seal and the grip hooks Grease the ProFlow valve optional If the ProFlow valve works tight it should be greased This is done at the two nipples on the upperside of the valve which is located behind the valve cover at the pl...

Page 97: ...main ON OFF valve and distribution valves so that the anti freeze is sprayed through the nozzles as well The anti freeze will also prevent O rings seals diaphragms etc from drying out 6 Lubricate all lubricating points according to the lubricating scheme regardless of intervals stated 7 When the sprayer is dry remove rust from scratches or damage in the paint if any and touch up the paint 8 Remove...

Page 98: ...ressure gauges again Seal with Teflon tape 5 Connect the sprayer to the tractor including hydraulics and electrics 6 Check all hydraulic and electric functions 7 Empty the tank for remaining anti freeze 8 Rinse the entire liquid circuit of the sprayer with clean water 9 Fill with clean water and check all functions 10 Check function of brakes Please note that brake power will be reduced until the ...

Page 99: ...lves from closing correctly thus reducing the pump flow 6 A bad reassembly of the pump elements especially the diaphragm covers causes air intakes or leaks and reduces the pump flow 7 Rusted or dirty hydraulic components cause bad connections and early wears 8 A badly charged or faulty battery causes failures and misbehaviour in the electrical system Therefore ALWAYS check 1 Suction and pressure f...

Page 100: ...t Check vent in tank lid is clear Sucking air towards end of tank load Lower pump r p m Pressure increasing Pressure filters beginning to clog Clean all filters Formation of foam Air is being sucked into system Check tightness gaskets O rings of all fittings on suction side Excessive liquid agitation Reduce pump r p m Check safety valve is tight Ensure returns inside tank are present Use foam damp...

Page 101: ...Clogged restrictors in bypass block Remove and clean restrictors in bypass block See hydraulic diagram Change hydraulic oil filter Wrong polarity Check polarity Red positive Black negative Boom lift raises to max position when tractor hydraulics are engaged Wrong oil inlet to bypass block Connect hydraulic snap couplers opposite in tractor outlets or engage spool valve lever in opposite direction ...

Page 102: ...or tilt will not operate Various Check for defective switch s Check continuity of cables Check for operation of applicable solenoid coil not activating or plunger stuck Check for short circuit in wiring junction box at rear of sprayer Dirt in the restrictor port of the cylinder Multiple hydraulic functions with one switch activated Various Check for correct solenoid electric hydraulic hook up Chec...

Page 103: ...cover A from valve B 2 Pivot valve B inward Emergency operation Liquid system In case of power failure it is possible to operate all functions of the operating unit manually First disconnect the multi plug from the control box Now manually turn the emergency control knobs The problem may be due to a blown fuse A fuse is placed inside the box Fuse type Thermo ...

Page 104: ...7 Fault finding 104 ...

Page 105: ...0 8x38 A Total length mm 7056 7040 7051 7067 7056 7046 B Total width mm 2965 2965 2965 2965 2965 2695 C Total height mm 3380 3390 3384 3376 3381 3387 D Draw to axle mm 4645 4635 4637 4642 4637 4635 Wheels 11 2x48 12 4x46 12 4x52 13 6x48 16 9x38 18 4x38 20 8x38 A Total length mm 7067 7050 7060 7075 7065 7055 B Total width mm 2965 2695 2965 2965 2965 2965 C Total height mm 3375 3386 3380 3422 3442 3...

Page 106: ...453 1410 7863 20 m 2961 429 3390 6471 1419 7890 21 m 2967 434 3401 6477 1424 7901 24 m 2989 446 3435 6499 1436 7935 27 m 3017 458 3475 6527 1448 7975 28 m 3020 460 3480 6530 1450 7980 Weights with empty tank Weights with full tank All weights in Kilograms kg Wheel Fixed axle Short axle Long axle Mudguards Clearance 11 2x48 1800 or 2000 mm 1500 2000 mm 1800 2250 mm 345 mm 700 mm 12 4x46 1800 or 200...

Page 107: ...8 Technical specifications 107 Specifications Pump model 1303 9 0 Pump model 363 5 5 Pump model 363 10 0 Pump model 463 5 5 Pump model 463 6 5 Pump model 463 10 0 ...

Page 108: ...n 30 mesh 0 58 mm 50 mesh 0 30 mm 80 mesh 0 18 mm 100 mesh 0 15 mm Operating temperature range 2 to 40 C 36 F to 104 F Operating pressure for safety valve 15 bar 220 psi Max pressure on the pressure manifold 20 bar 290 psi Max pressure on the suction manifold 7 bar 100 psi Max operating temperature 75º C 167ºF Tractor 210 bar 3046 psi min 160 bar 2321 psi Sprayer litres Max drum diameter Min linin...

Page 109: ...nge of tyre on page 95 10km h 25km h 40km h 50km h Tyre size Load index Max axle load kg Rec tyre pressure bar Max axle load kg Rec tyre pressure bar Max axle load kg Rec tyre pressure bar Max axle load kg Rec tyre pressure bar 11 2x38 139 A8 7290 4 4 5395 3 6 4860 3 6 N A N A 11 2x48 142 A8 7950 4 4 5883 3 6 5300 3 6 N A N A 12 4x46 147 A8 9225 4 4 6827 3 6 6150 3 6 N A N A 12 4x52 147 B 10125 4 ...

Page 110: ...ank hose and synthetic fittings can be incinerated at an authorized disposal plant The metallic parts can be scrapped Always follow local legislation regarding disposal Materials used Tanks HDPE Frame etc Steel Pump Cast iron Diaphragms PUR Hoses suction PVC Hoses pressure EPDM Valves Glass reinforced PA Filters PP Nozzles Unfilled POM Fittings Glass reinforced PA ...

Page 111: ...4b 12 34 4c 4 PWM 1TX 5a 14 S5 5b 15 S5 5c 27 GND 6a 16 S6 6b 17 S6 6c 13 Optional 5 Reg feedback 7a 18 S7 7b 19 S7 7c 33 Option 1 4 20mA 8a 37 S8 8b 36 S8 8c 32 Option 2 Frq 9a 35 S9 Air angle 0 5V 9b 34 S9 Fan speed 0 5V 9c not connected Option 3 Tank gauge 10a 21 On off 10b 22 On off 10c not connected PWM Output option 11a 23 Pressure 11b 24 Pressure 11c 28 Flow 12a 20 Foam blop 0 5V 12b 1 Opti...

Page 112: ... sensor Brown Blue Option 2 RPM sensor Brown Blue Black Speed Brown Blue Black Flow Brown Blue Black Left end nozzle Pendulum lock at HAY LPY Brown Blue Right end nozzle Pendulum lock at HAY LPY Brown Blue Regulation Yellow Brown Blue Bypass EC on off Brown Blue Section 9 x x Section 8 User defined A B x x Section 7 Brown White Section 6 Yellow Grey Section 5 Brown Blue Section 4 Brown Blue Sectio...

Page 113: ...m lock damper cylinder B Fold sensor Rear lights The wiring is in accordance with ISO 1724 ProFlow electrical connections Power supply 12 V DC Electric control valve connection 12 V DC Max 5 Ampere Position Wire colour 1 LH direction indicator Yellow 2 Free Blue 3 Frame White 4 RH direction indicator Green 5 RH rear position lamp Brown 6 Stop lamps Red 7 LH rear position lamp Black Brown wire Posi...

Page 114: ...8 Technical specifications 114 Charts Boom hydraulic Y Boom hydraulic Z 0 55 LOCK FOR PARALIFT 0 55 V13 V14 V11 V12 V9 V10 V7 V8 V5 V6 V3 V4 V2 V1 0 7 0 7 0 7 0 7 0 7 0 7 0 7 0 7 0 7 0 7 0 55 0 55 ...

Page 115: ...lectrical specifications for boom and work light Sprayer hydraulic Z type IntelliTrack T P T P RB LA RB LB RA B A K L T 1 LS P 1 0 6 0 4 0 8 4 5 Flow 782145 Track 72451400 Paralift 72286200 Boom RA LB LA V0 V62 V60 V61 V63 V40 V41 1 8 ...

Page 116: ...ical specifications 116 Sprayer hydraulic Z type ManualTrack T P T P RB LA RB LB RA B A K L T 1 LS P 1 0 6 0 4 0 8 4 5 Flow 782145 Track 72523300 Paralift 72286200 Boom RA LB LA V0 V60 V61 V40 V41 0 7 0 7 1 8 ...

Page 117: ...0 Driving technique 28 E EasyClean filter 20 EasyClean suction filter 19 EcoFill 31 66 Electrical connections 111 Electrical Valve Control 19 Emergency operation 103 Equipment 28 EVC control unit 19 EVC distribution valve 87 EVC junction box 112 EVC operating unit 112 External Cleaning Device 19 31 External Filling Device 59 F Filling chemicals through tank lid 62 Filling liquid chemicals by HARDI...

Page 118: ... number 17 Requirements tractor 39 40 Return valve 20 Right side cover 29 Rinsing tank 19 Rinsing main tank not empty 72 Roadworthiness 16 17 Rubber dampers 94 S Safety info 55 Safety precautions 62 SafetyLocker 30 Seal 88 Service and Maintenance intervals 78 Shield 94 Slanting 57 Spare parts 119 Speed ring 43 Speed transducer 43 Spray lance 31 Spray Technique 73 Spraybox 65 Sprayer hydraulic 115 ...

Page 119: ...Spare parts To see updated spare part information the website www agroparts com can be visited Here all parts information can be accessed when free registration has been made ...

Page 120: ...HARDI INTERNATIONAL A S Herthadalvej 10 DK 4840 Nørre Alslev DENMARK ...

Reviews: