background image

INSTRUCTIONS FOR USE 


Installing the Battery 

1.  Slide the battery cover lock towards the arrow indicator next to it. 
2.  Take off the battery cover and insert the lithium battery as per indicated polarity. 
3.  Replace the battery cover, securely. 


Charging the Battery 

1.  Plug the Micro USB connector of the provided USB cable into the Micro USB port of the 

camera. 

2.  Connect the other end of the cable either to a computer USB Port or a suitable USB wall 

charger. 

3.  While charging is in process, the charging LED indicator turns Blue. 
4.  When the battery is fully charged, the charging LED indicator turns off. 
 

NOTE: 

Camera can be charged even when it is powered off. Usually, it takes about 4 hours to fully 

charge the battery. 


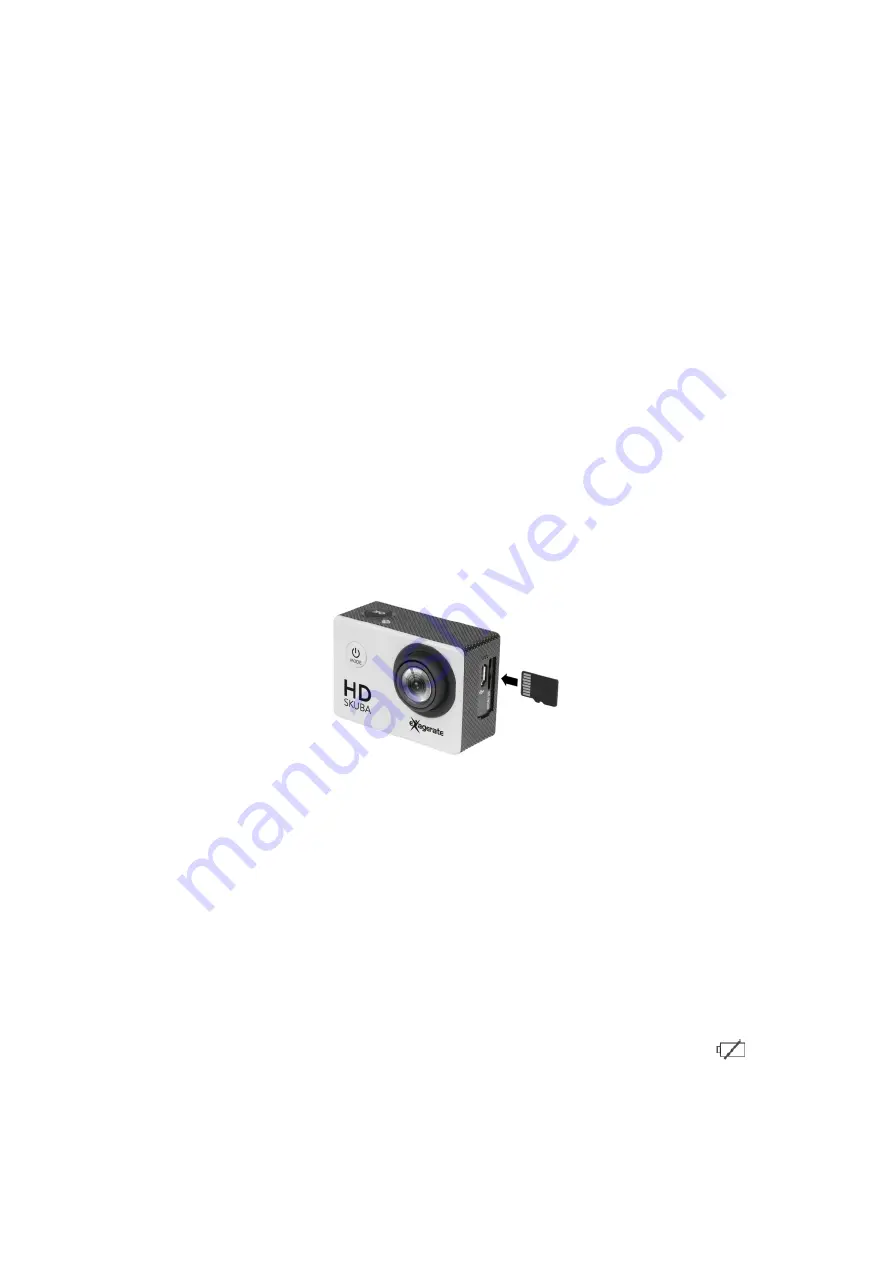
Installing the Memory Card 

1.  Insert a Micro SD Card into the card slot with the golden contacts facing the camera lens until it 

clicks into place. 

2.  To take the Micro SD card out, gently press the end of the memory card inwards and the card 

will be ejected from the card slot. 


NOTE 

The camera is not equipped with built-in memory, therefore a memory card is required all the time. 
We recommend a Micro SD card with a Class 10 speed rating for best performance. 
To avoid lose any data, only remove or insert your card while the camera is off. 


Power ON/OFF 

  Power On: Press the Power/Mode button to turn the camera on. 

The red LED indicators will light up. 

  Power Off: Press and hold the Power/Mode button for few seconds to turn the camera off. 

  Automatic power off: Camera turns off automatically, when it reaches the idle time set up by 

the user in the Auto Power Off settings of the camera. 

  Power off due to low battery: In case of extremely low battery, the low battery icon 

  may 

appear on the LCD screen. The camera will then automatically power off. Please recharge the 
battery. 


Summary of Contents for Exagerate Skuba XCAM720HD

Page 1: ...Action Camera Skuba 720P HD Action Camera User Manual XCAM720HD www hamletcom com...

Page 2: ...Directive 2014 30 EU for the following standards EN 55022 2010 AC 2011 EN 61000 3 2 2014 EN 61000 3 3 2013 EN 55024 2010 EN 60950 1 2006 A11 2009 A1 2010 A12 2011 A2 2013 The complete CE declaration...

Page 3: ...Features LCD 2 Display Camera lens 110 Wide Angle Focus 20cm Infinite Image Resolution 12M 10M 8M 5M 3M 2M 1M VGA Video Resolution 1080P 1920x1080 20fps 720P 1280x720 30fps VGA 640x480 Image file form...

Page 4: ...OK Shutter button 2 Status LED indicators Red 3 Power Mode button 4 Microphone 5 Micro SD card slot 6 Micro USB port 7 Charging LED indicator Blue 8 Up button 9 Speaker 10 Down button 11 Battery cove...

Page 5: ...the golden contacts facing the camera lens until it clicks into place 2 To take the Micro SD card out gently press the end of the memory card inwards and the card will be ejected from the card slot N...

Page 6: ...dicates current mode as Video mode Exposure Indicates the current exposure compensation setting Loop Recording Indicates the current loop recording setting Resolution Indicates the current recording r...

Page 7: ...atically record over the oldest video 15 Minutes The camera continuously records a video of 15 minutes in length When the memory card is full the camera will automatically record over the oldest video...

Page 8: ...Setup Menu To enter the Photo setup menu do the following 1 While in Photo mode press and hold OK button for few seconds to open menu settings 2 Use the Up and Down buttons to navigate through the men...

Page 9: ...BACK MODE To select Playback mode press the Power Mode button repeatedly until the Playback mode icon is displayed on the top left corner of the LCD screen In Playback mode use Up and Down buttons to...

Page 10: ...button to go back to main menu In the main menu press Power Mode button again to exit from the menu System Menu Options Main menu Sub menu Description Date Time 09 01 2016 00 01 MM DD YYYY Setup date...

Page 11: ...era will be shown as a USB removable disk on your computer You can now view the images and videos shot with your camera on your computer You can also move copy the files to your computer to free up sp...

Page 12: ...12...

Reviews: